This document covers the basics of how to navigate and use the Daml Hub console.
Services
Upon logging into Daml Hub, you can create the following services from the Workspace section:
- Scratchpad service
- Participant service
- Synchronizer service
The capabilities of the new participant and synchronizer services allow application builders to create truly distributed applications on Daml Hub. Application users can also use Daml Hub to host their participant node regardless of where the synchronizer for the application they want to connect to is hosted. This reduces the cost and complexity of users managing their own nodes.
Note that the new services do not support party tokens and services account tokens. PACs are the recommended type of credentials for use with these services.
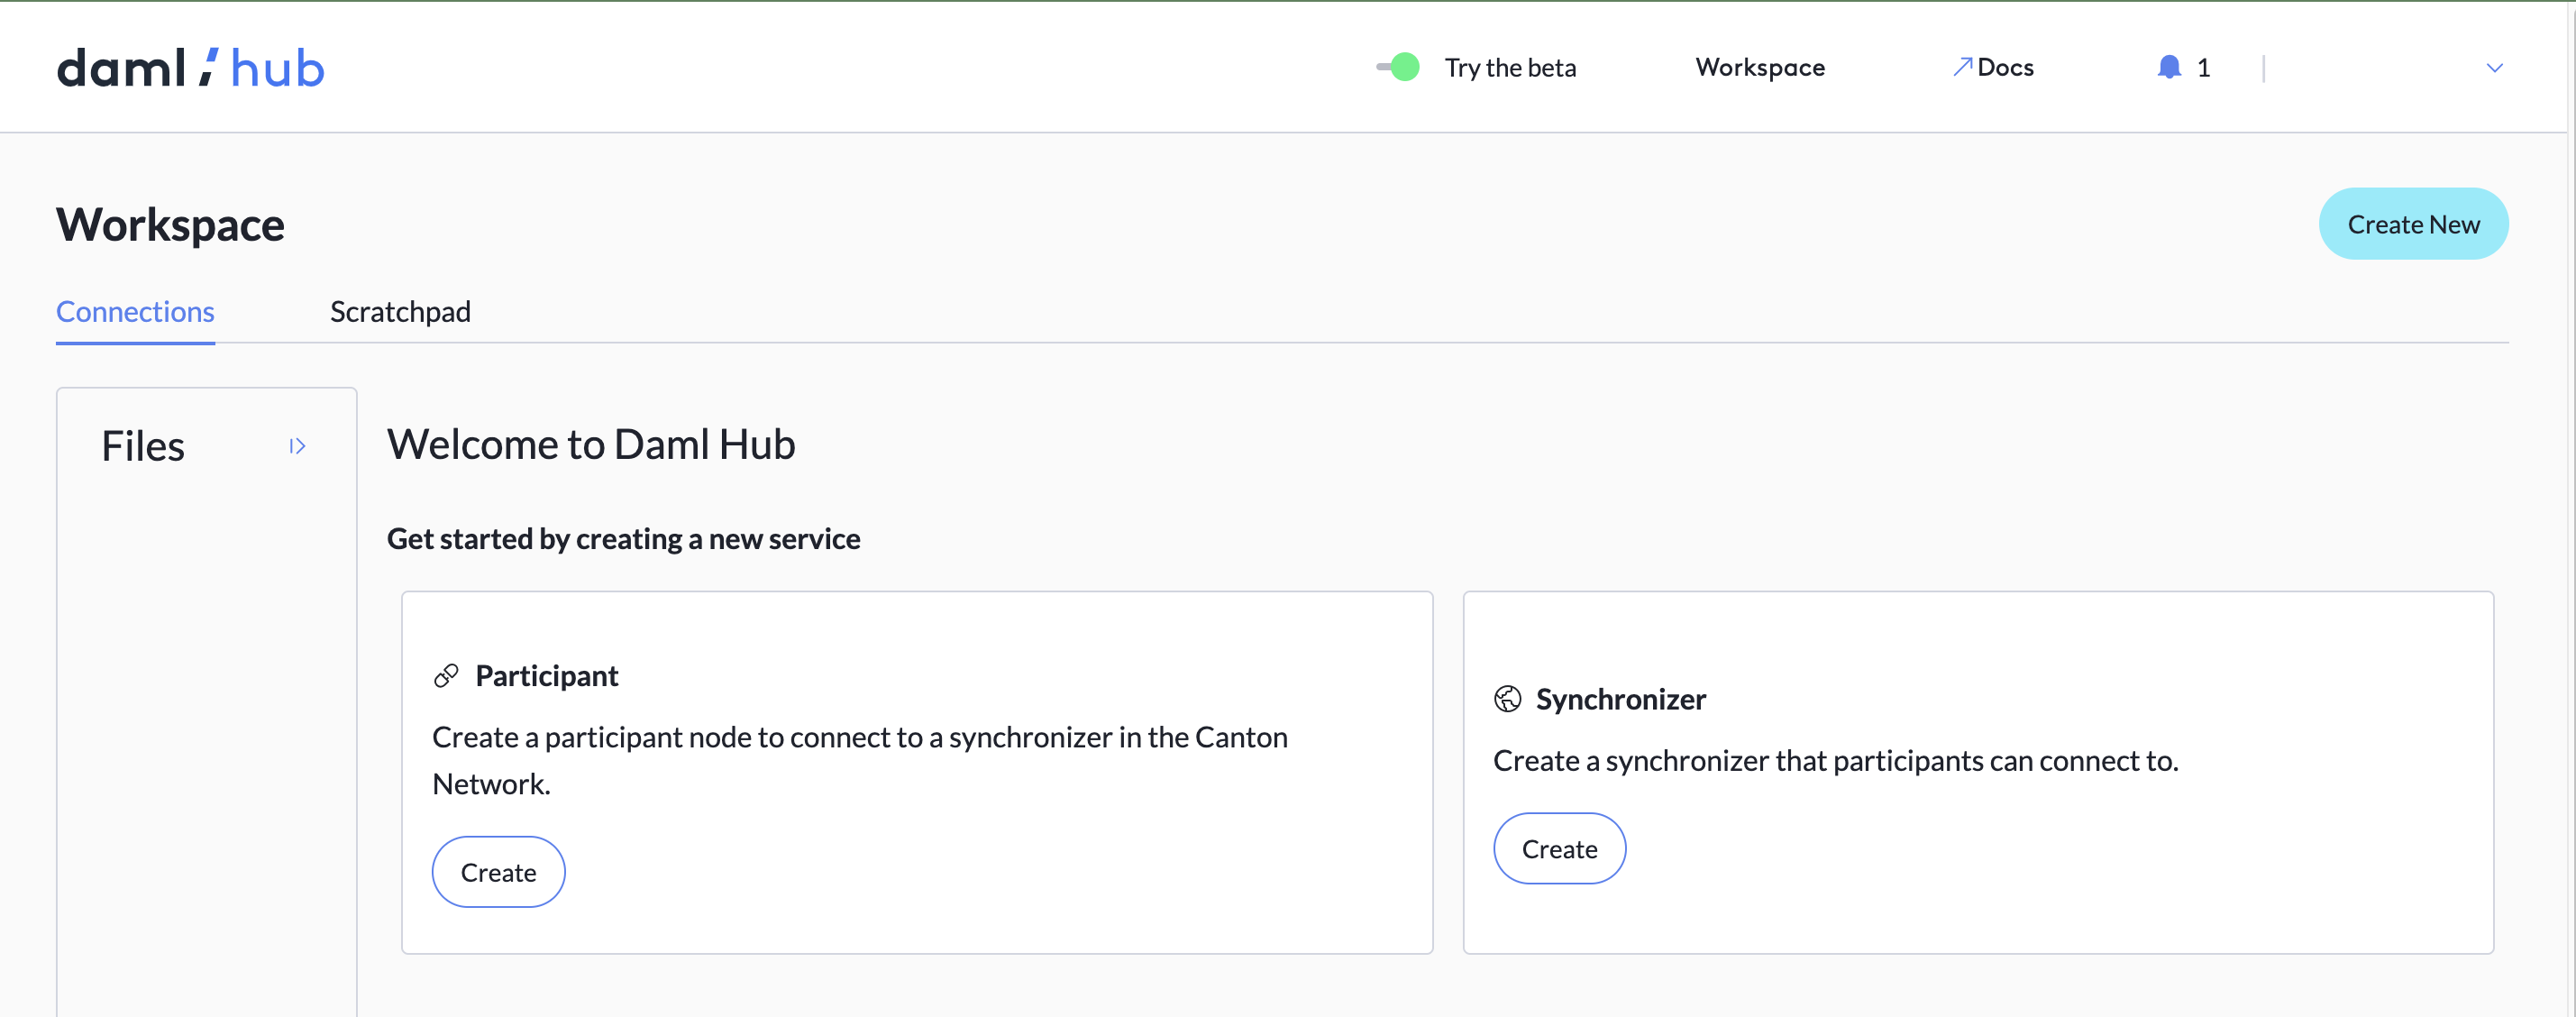
The workspace layout:
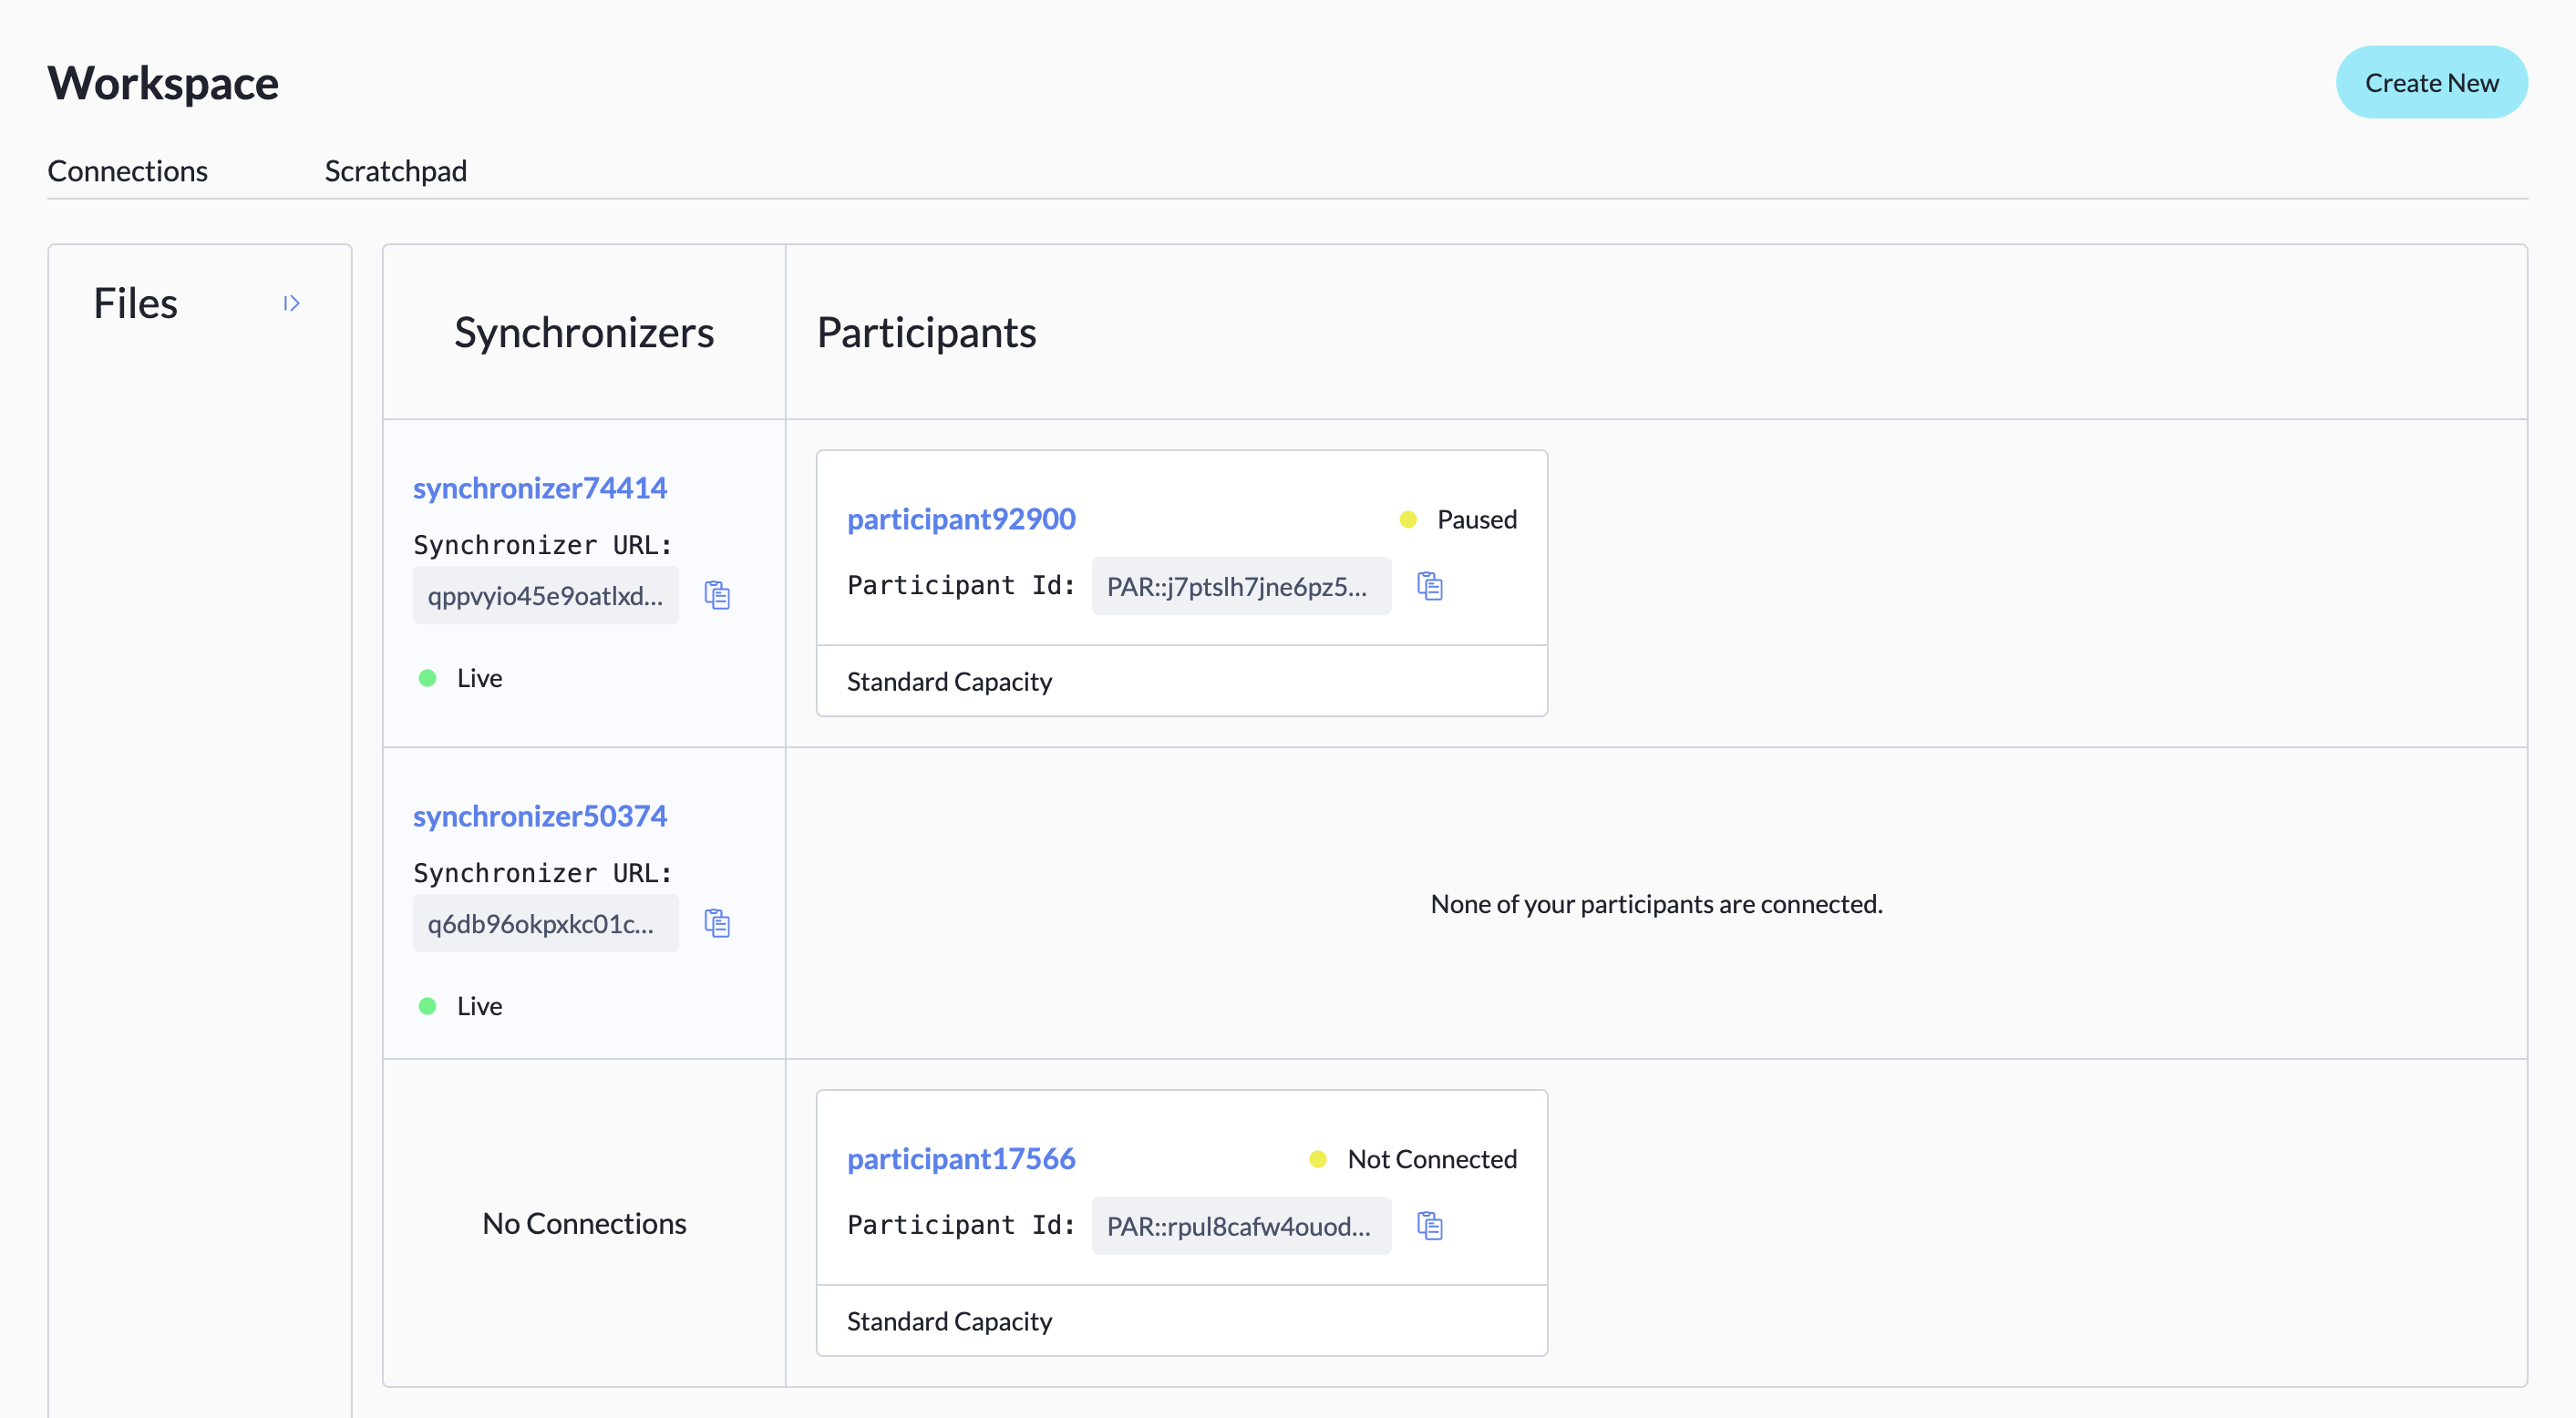
Once the workspace is populated, scratchpads appear in their own tab, while synchronizers and participants appear in a table with synchronizers on the left and participants on the right. The table shows which services are connected and which have no connections.
Scratchpad service
The scratchpad service consists of one participant node and one synchronizer that are pre-connected. As the name suggests, the scratchpad service is useful for quickly testing and developing Daml applications. The scratchpad service is self-contained; the synchronizer can’t receive connections from other participant nodes. This service is very similar to the old standard capacity ledger.
To create a scratchpad:
- Click Create New in the workspace. This opens the Create New Service screen.
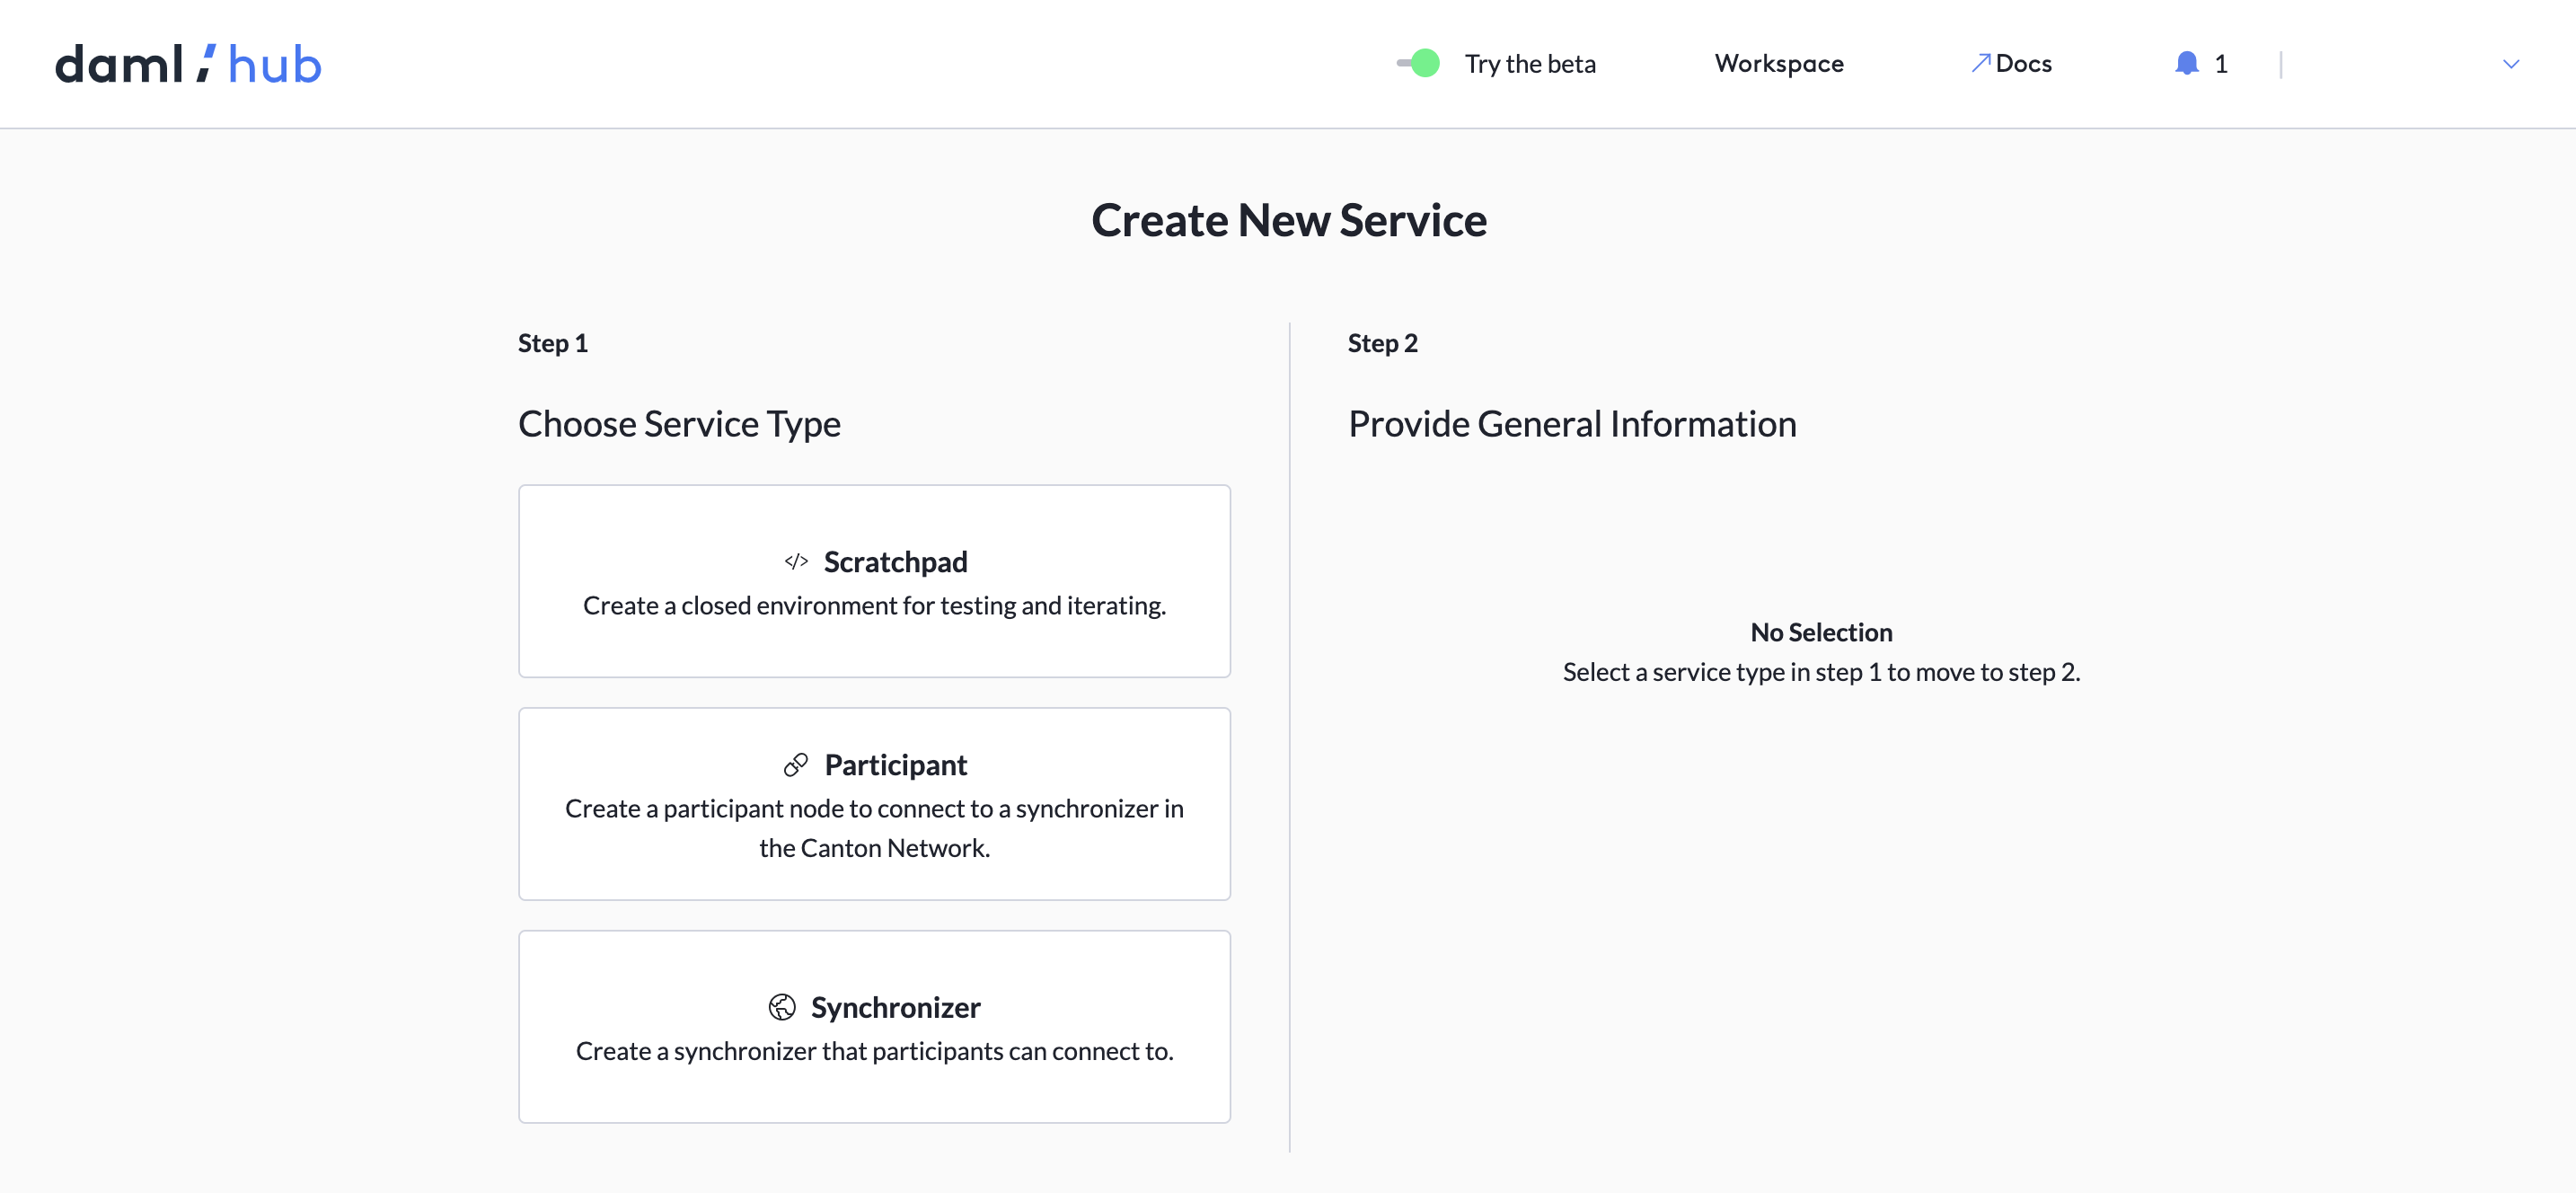
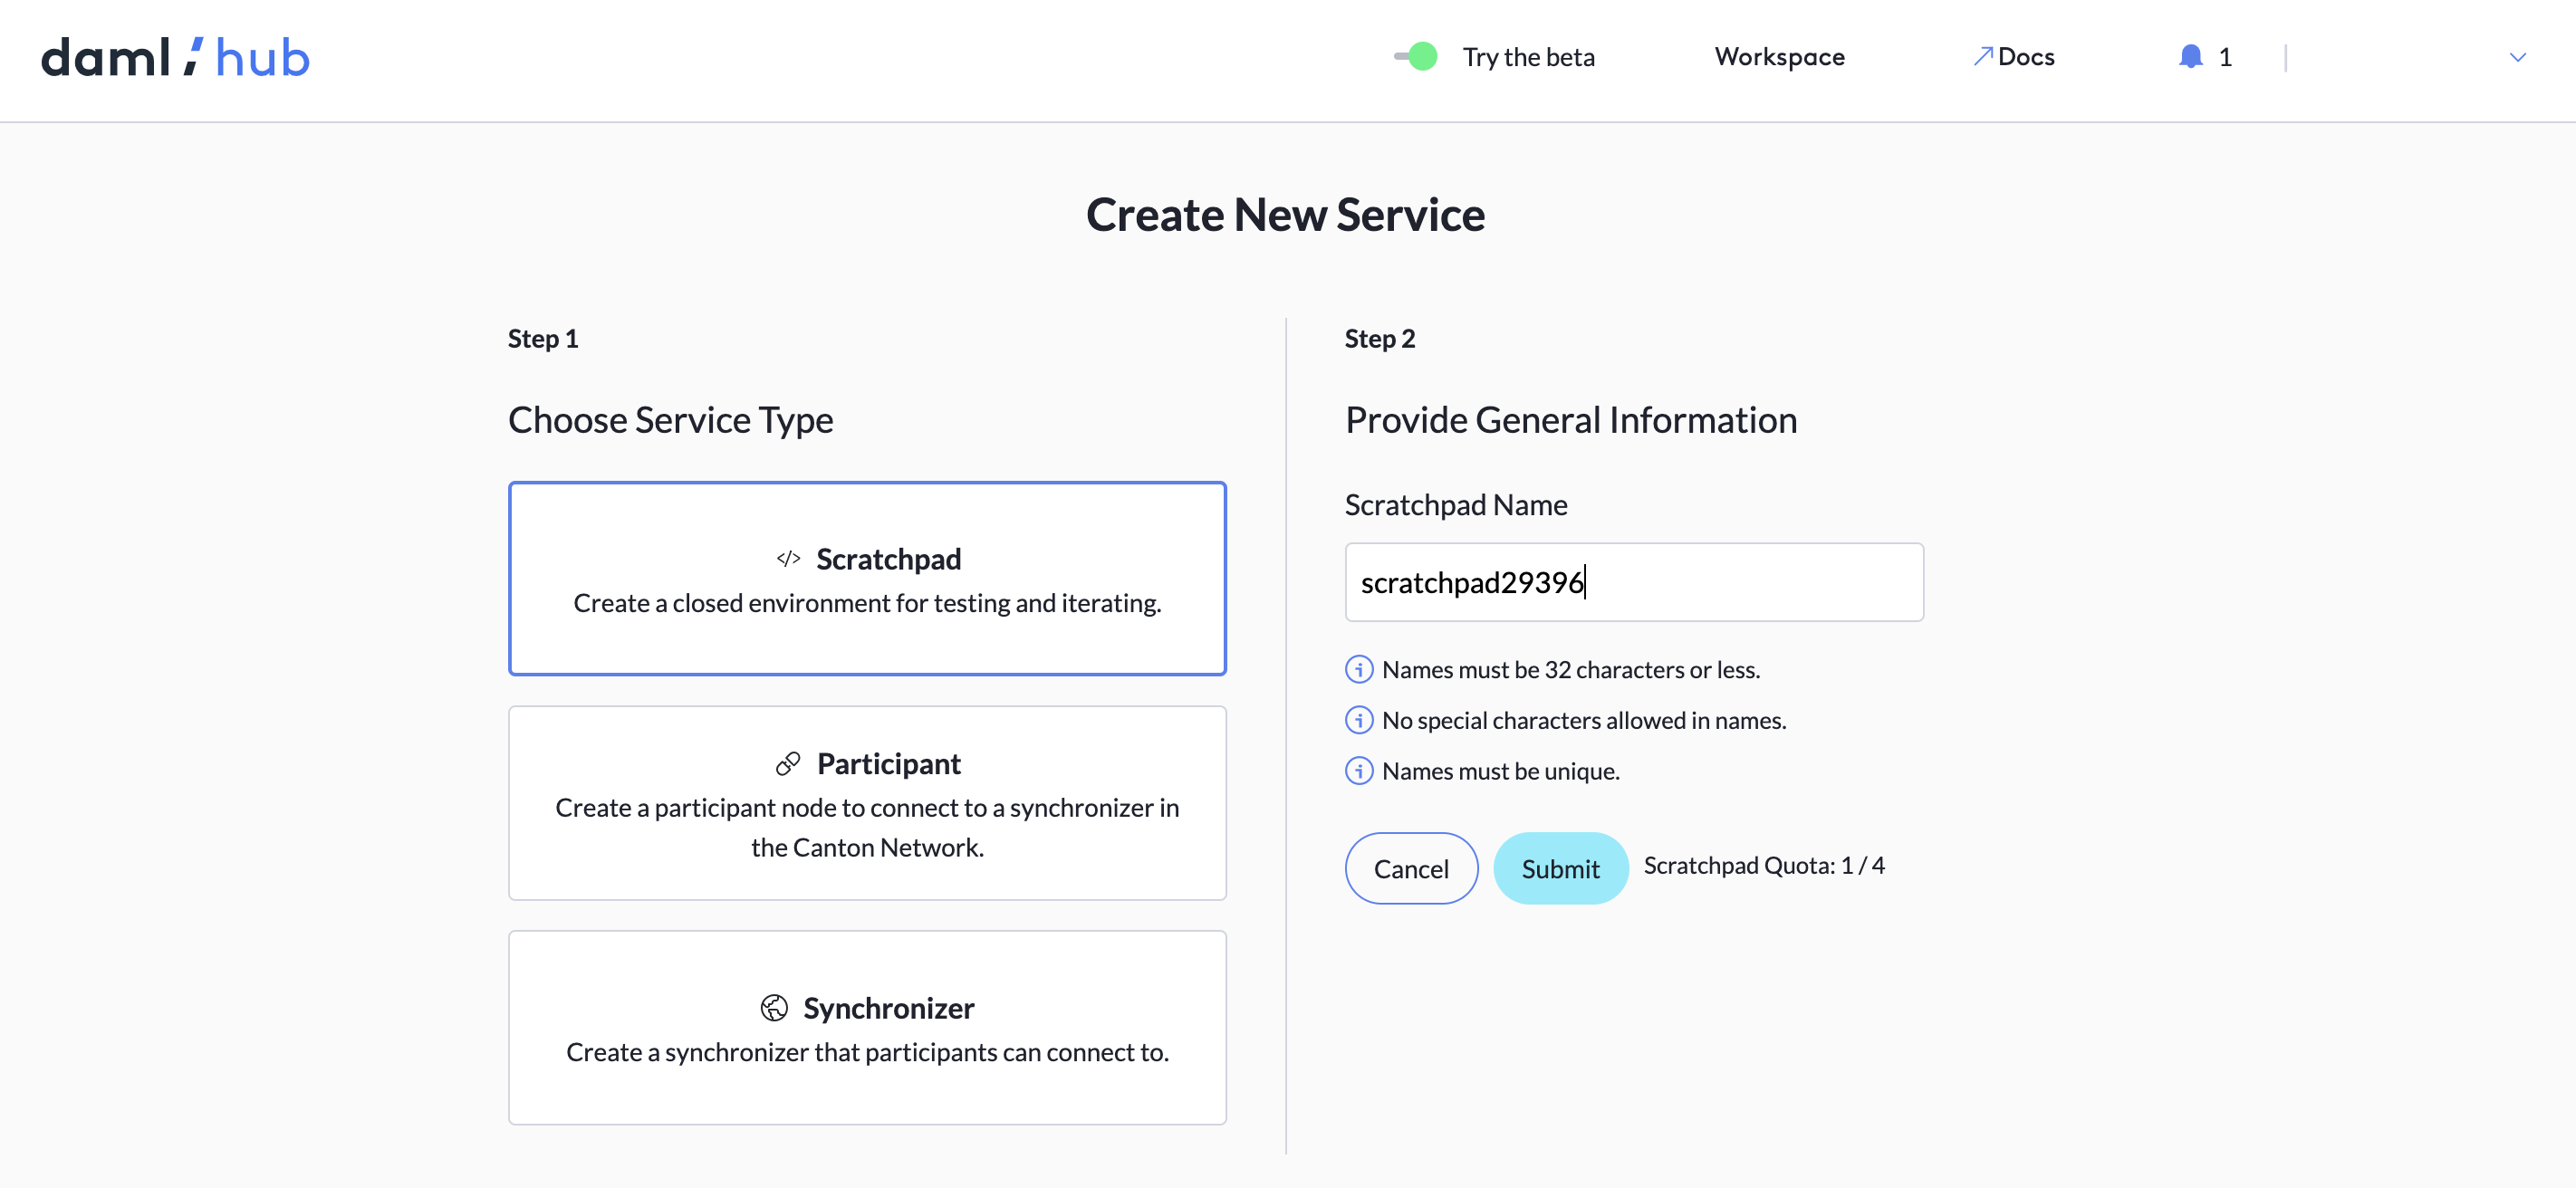
- Select Scratchpad in the left column.
- If you do not want to use the default name already in the Scratchpad Name field, enter a new name.
- Click Submit. The scratchpad appears in your workspace, but it may take a few minutes to become fully operational.
To access an existing scratchpad, select the Scratchpad tab in the Workspace. The artifacts currently deployed to your scratchpads are displayed in the Files column on the left of the screen.

Clicking on the tile for a scratchpad takes you to the Deployments tab for that scratchpad.
To deploy use the Deployments, Live Data, Identities, and Settings screens, see the documentation for the Services above.
Participant service
The participant service is a participant node that can connect to synchronizers hosted on Daml Hub or elsewhere. This service allows application operators to distribute nodes to individuals or organizations who want to access the operator's applications. Application users can then easily provision the enterprise-grade infrastructure they need to connect to permissioned Daml applications.
The participant service is available in standard and high capacity. The standard capacity participant service is for testing and developing distributed applications by connecting them to synchronizers. The high capacity participant service is suitable for running and testing production-level distributed applications workloads.
To create a participant:
- Click Create New in the Workspace. This opens the Create New Service screen.
- Select Participant in the left column.
- If you do not want to use the default name already in the Participant Name field, enter a new name.
- Choose Standard or High Capacity for the new participant.
- Click Submit.
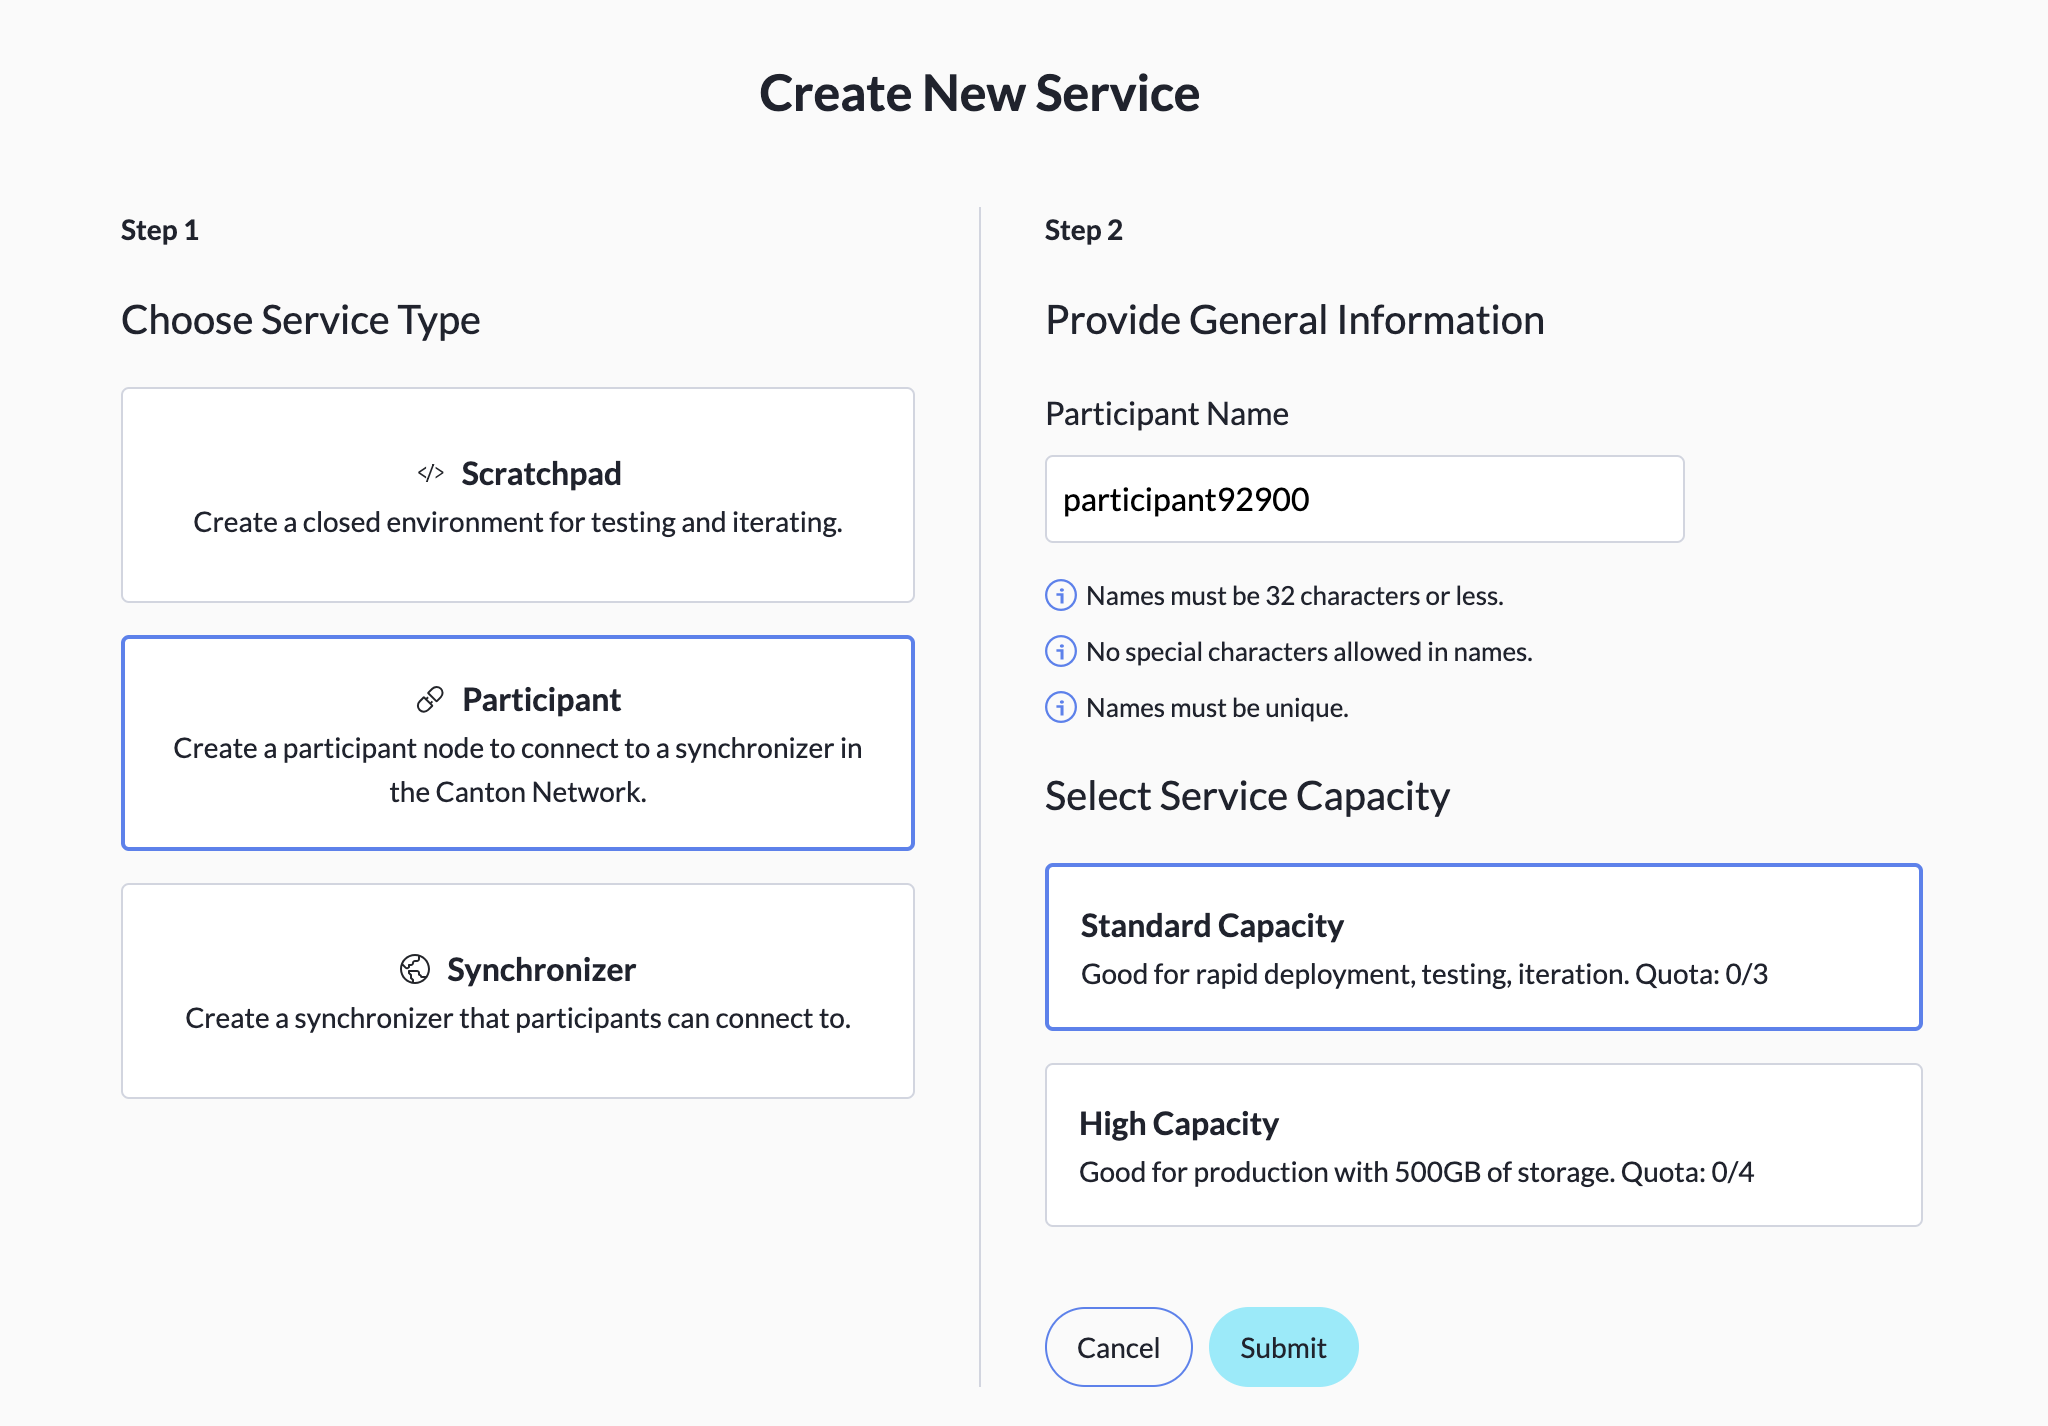
The participant appears in your workspace, but it may take a few minutes to become fully operational.
Synchronizer service
The synchronizer service is a synchronization domain that can receive connections from participant nodes hosted on Daml Hub or elsewhere to coordinate, sequence, and guarantee consistency and finality of transactions between participants.
The synchronizer service offers the option to run Canton Protocol 5 or 7. Both protocols are stable and fully supported for general use. The additional features Protocol 7 includes are detailed in the Daml 2.10 LTS Release Notes.
To create a synchronizer:
- Click Create New in the Workspace. This opens the Create New Service screen.
- Select Synchronizer in the left column.
- If you do not want to use the default name already in the Synchronizer Name field, enter a new name.
- Select the Protocol version you wish to run.
- Click Submit.
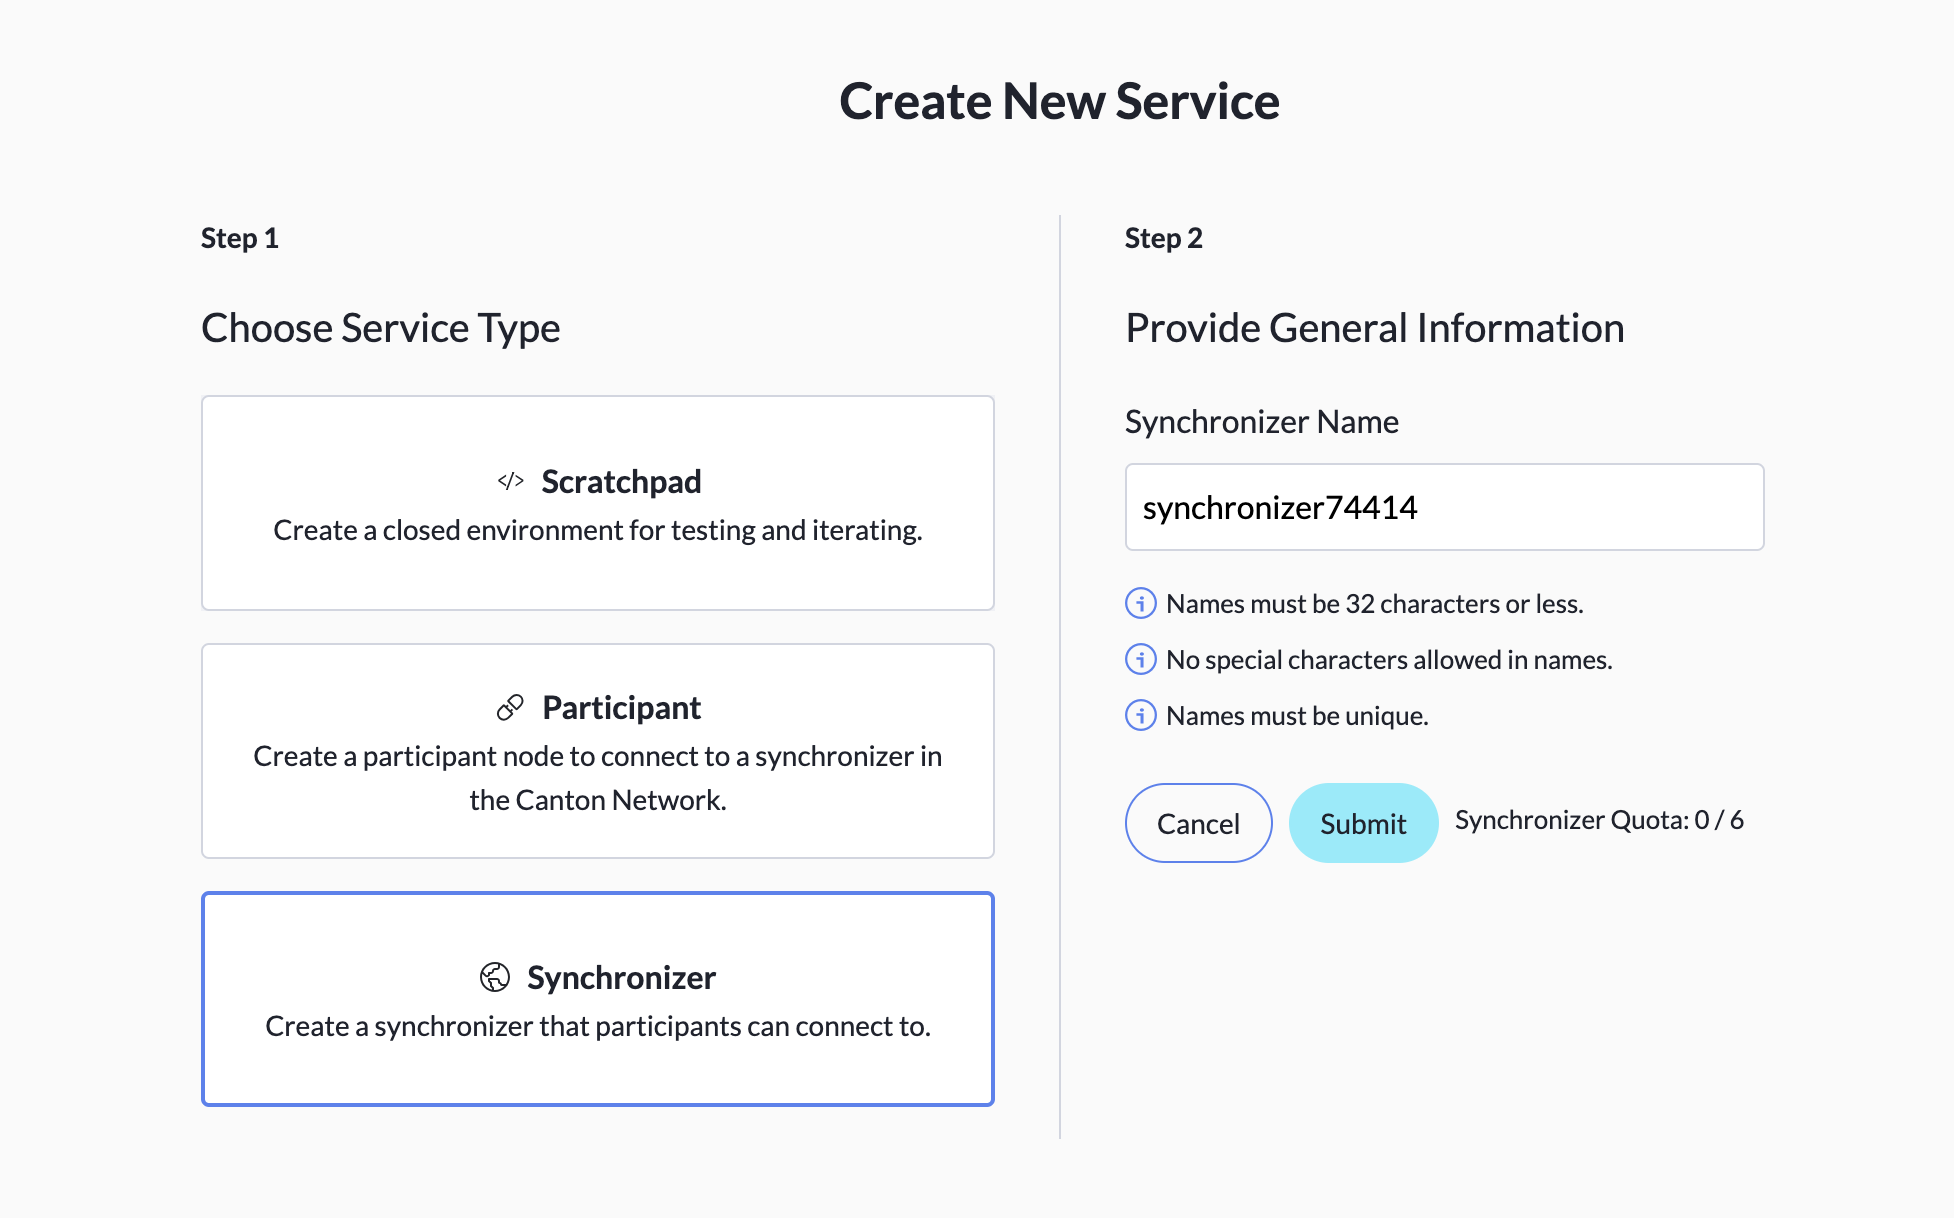
The synchronizer appears in your workspace, but it may take a few minutes to become fully operational.
Participant+Synchronizer service
The participant+synchronizer service allows you to create a participant and synchronizer simultaneously and automatically links them to one another.
As with the synchronizer service, the synchronizer in a participant+synchronizer pair can run Canton Protocol 5 or 7.
To create a participant+synchronizer:
- Click Create New in the Workspace. This opens the Create New Service screen.
- Select Participant+Synchronizer in the left column.
- If you do not want to use the default name already in the Participant Name field, enter a new name.
- Choose Standard or High Capacity for the new participant.
- If you do not want to use the default name already in the Synchronizer Name field, enter a new name.
- Select the Protocol version you wish to run.
- Click Submit.
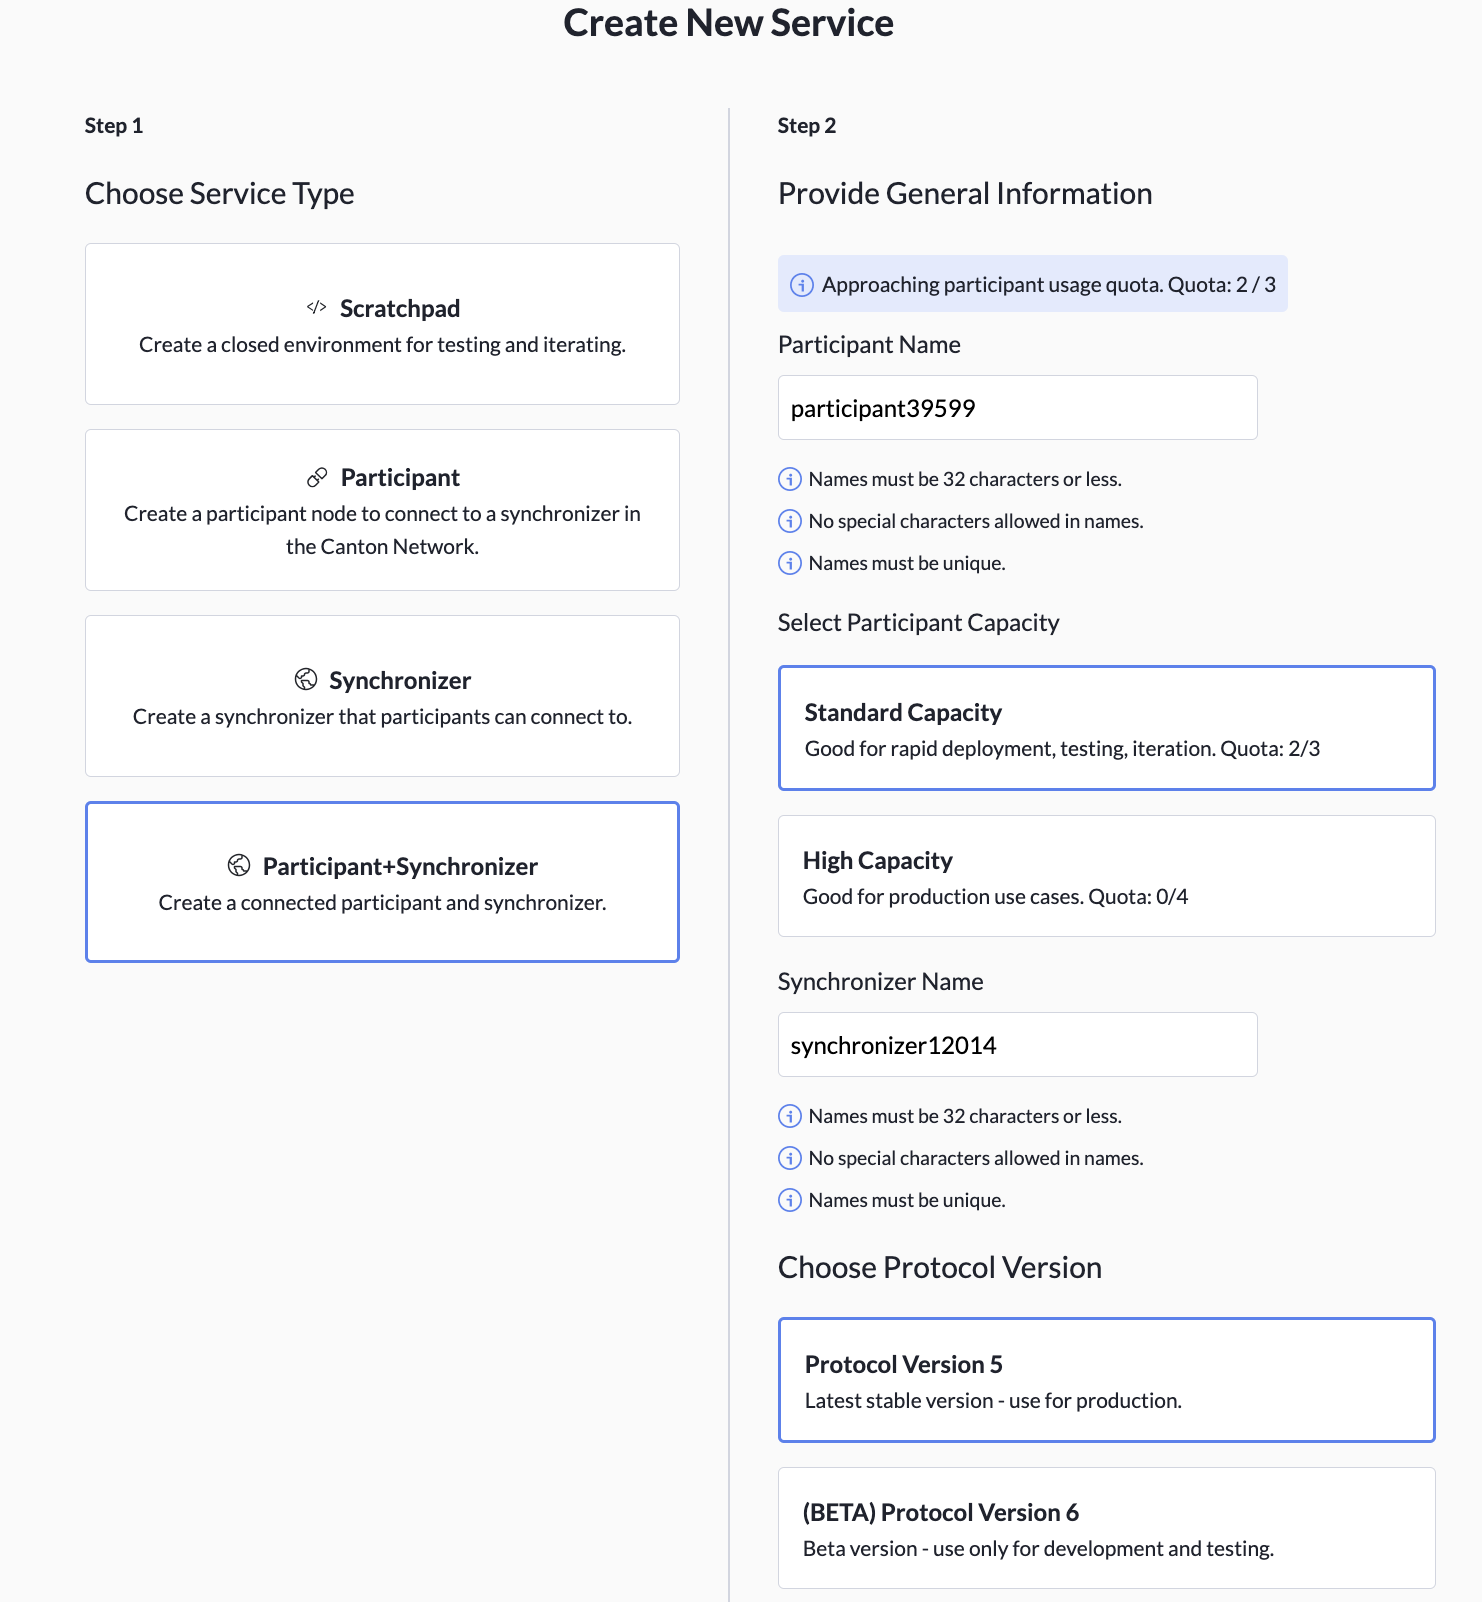
The synchronizer appears in your workspace, but it may take a few minutes to become fully operational.
Participant Query Store
The Participant Query Store (PQS) acts as an operational data store for a Daml scratchpad or participant node (standard or high capacity). It stores contract creation, contract archival, and exercise information in a PostgreSQL database using a JSONB column format, and allows you to perform complex or high-throughput queries related to active and archived contracts on the participant without impacting its performance. You can read more about the PQS in Daml here.
The PQS can be queried over JDBC in Daml Hub using a Java automation. Information on how to write a Java automation to query PQS and expose that to external services can be found in the guide to JVM automations.
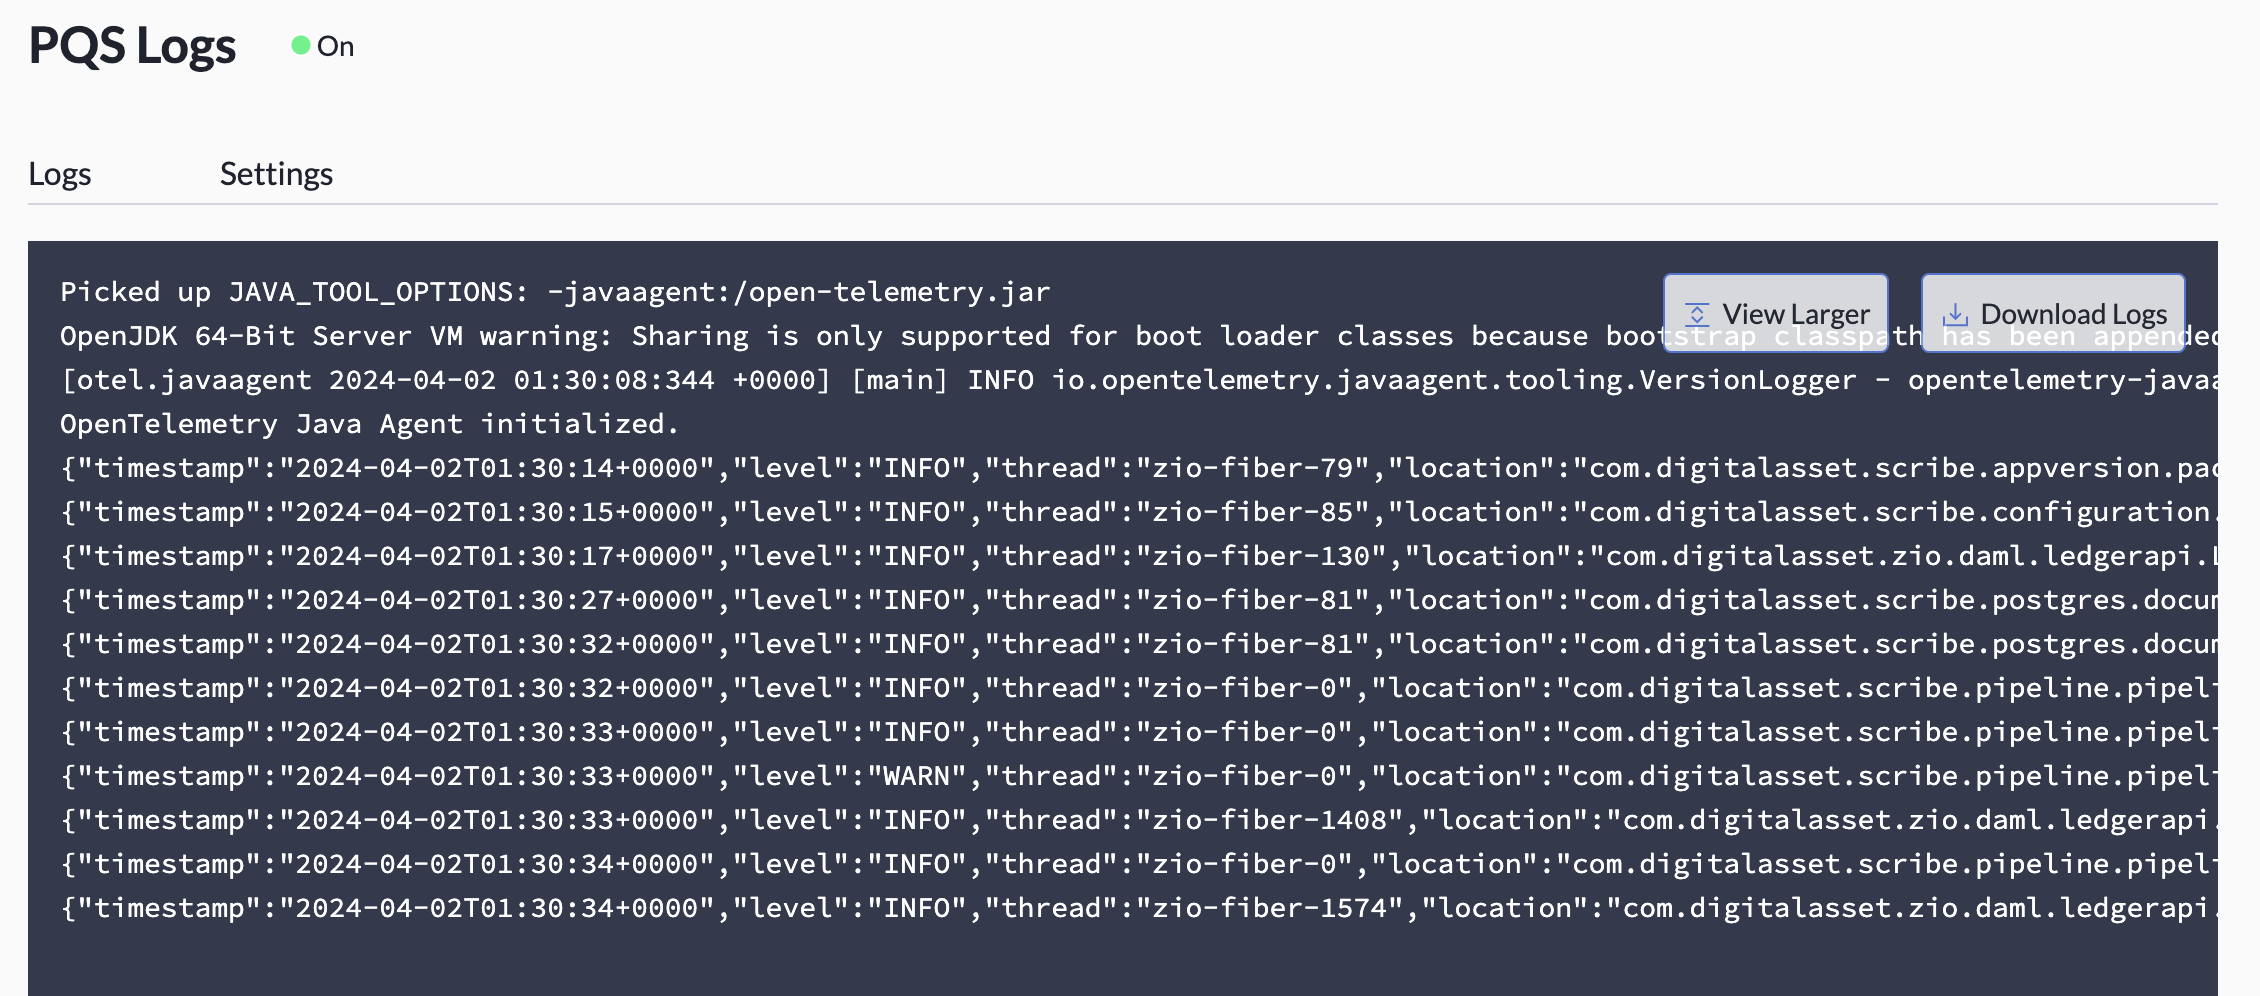
The logs for your running services can be seen in the Monitoring section of the Overview tab. Click View Logs to see the logs for a service.
PQS appears in the Monitoring section of the service Overview tab.
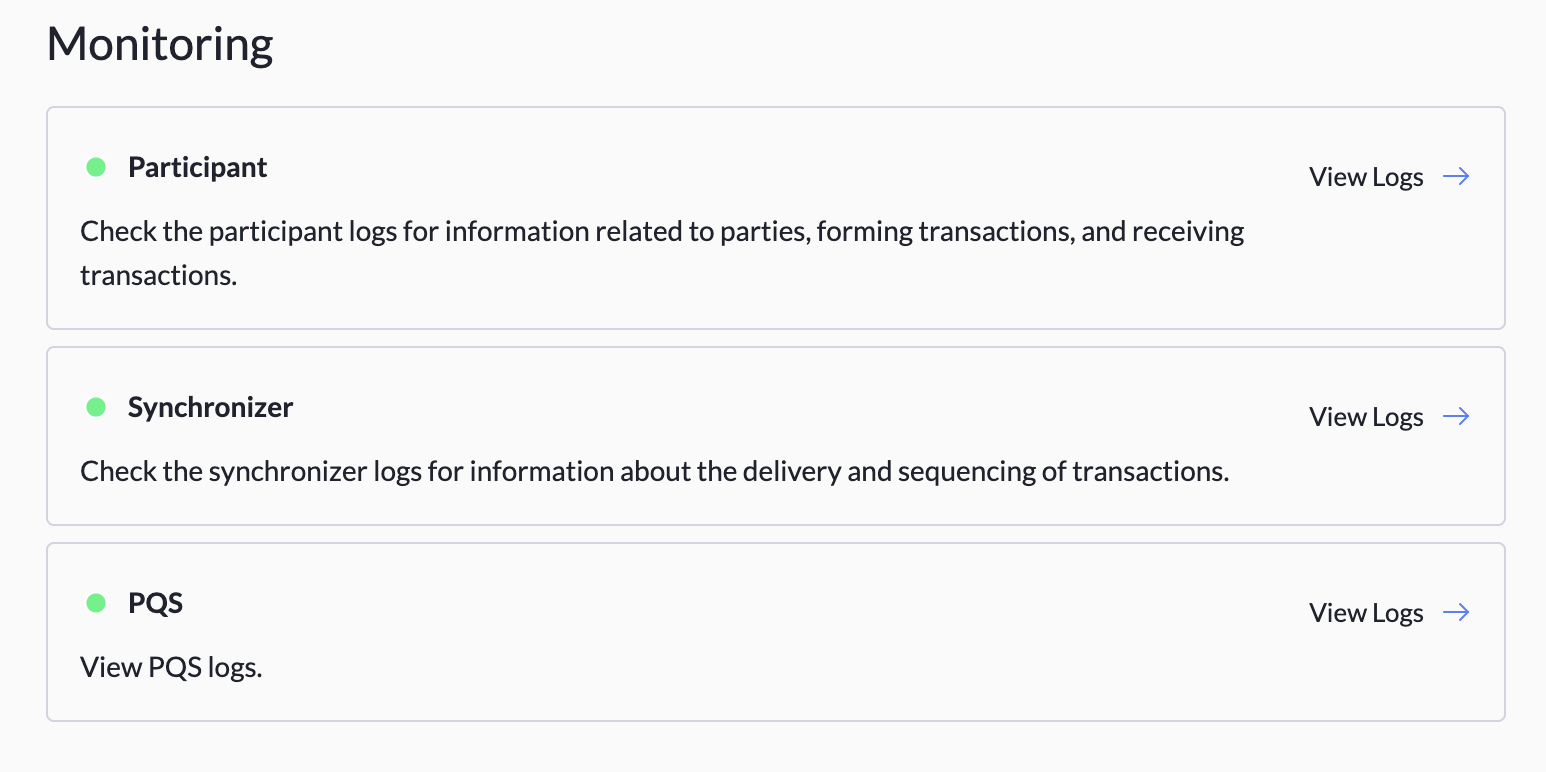
Click View Logs to see the logs of the process that populates PQS.
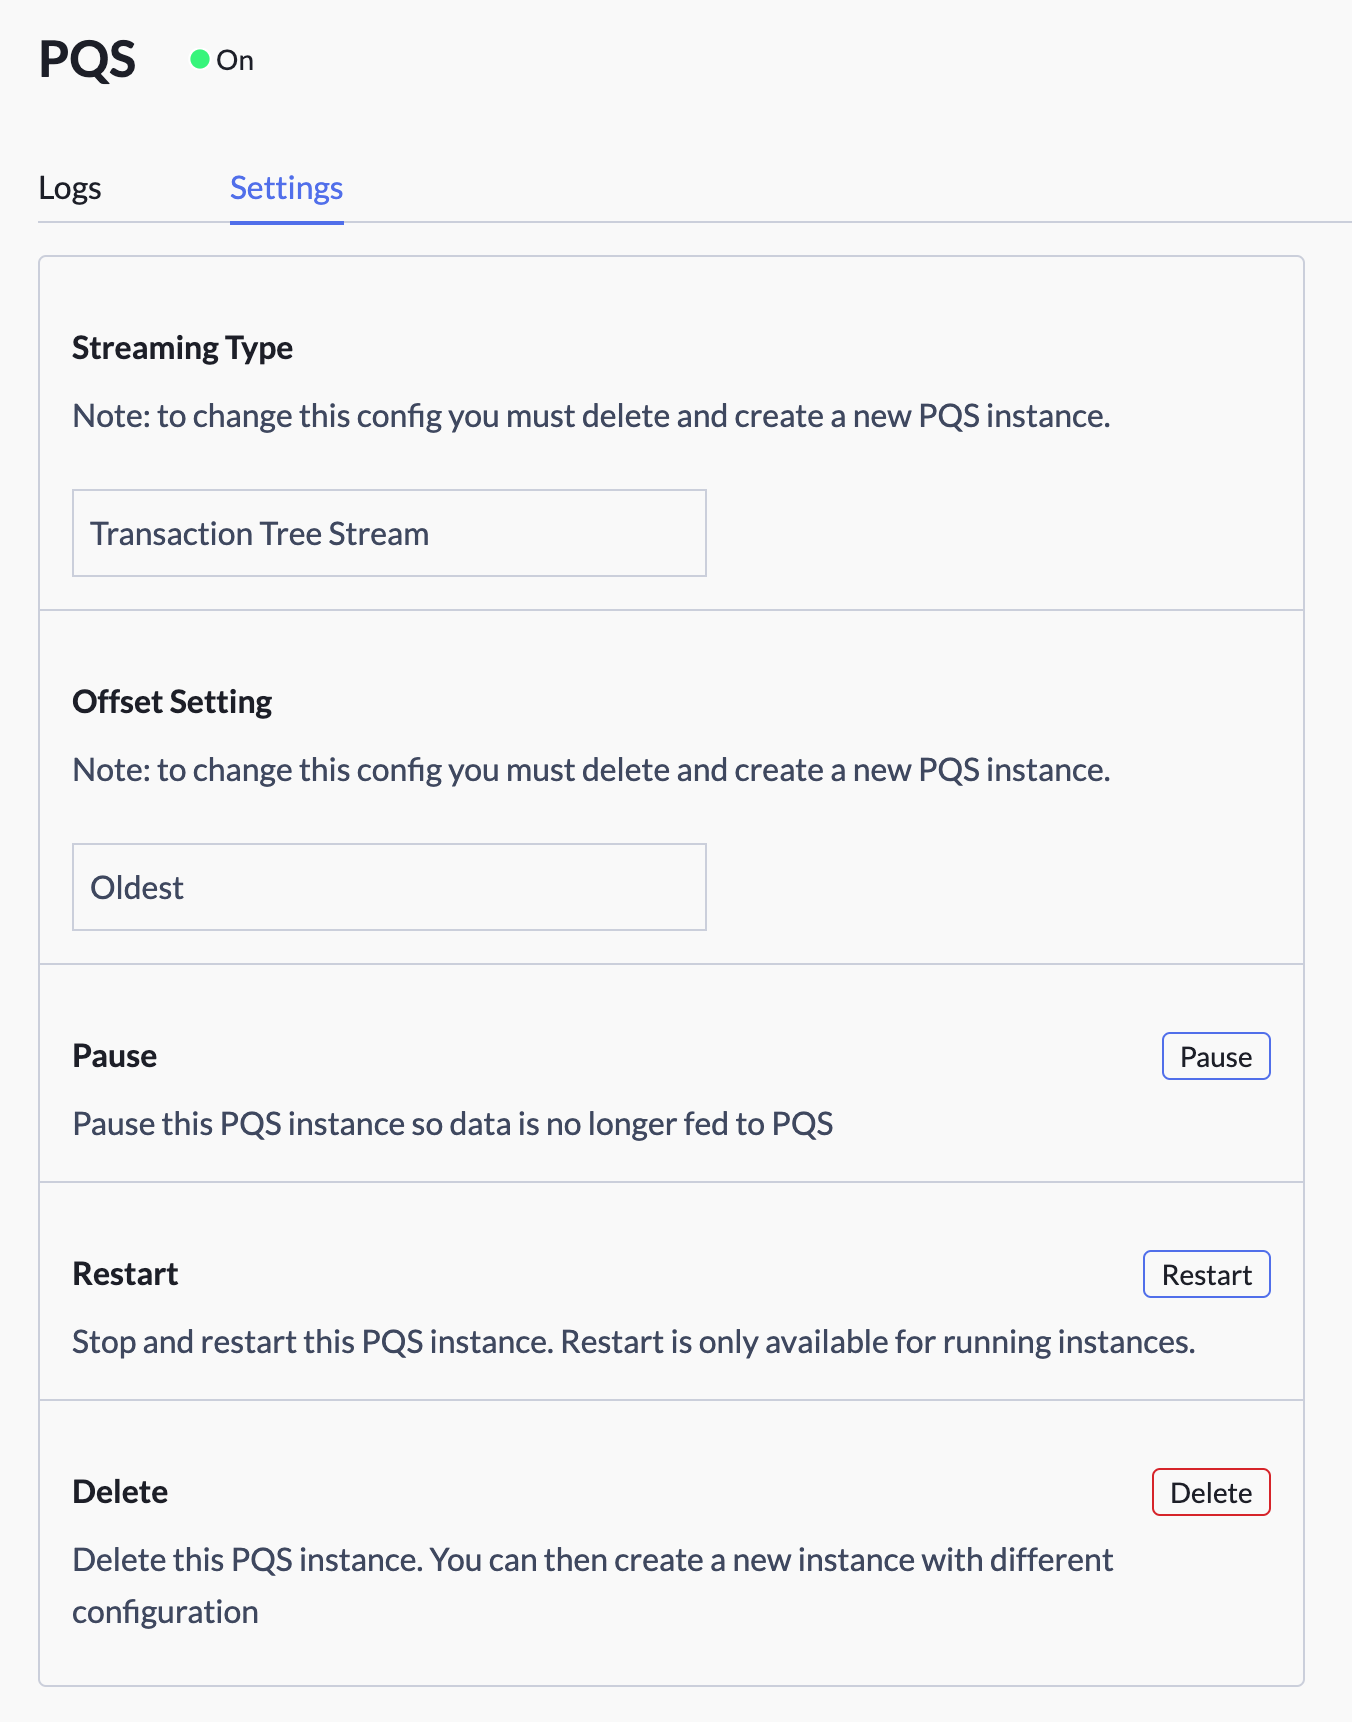
Go to Settings in PQS to pause, restart, or delete PQS.
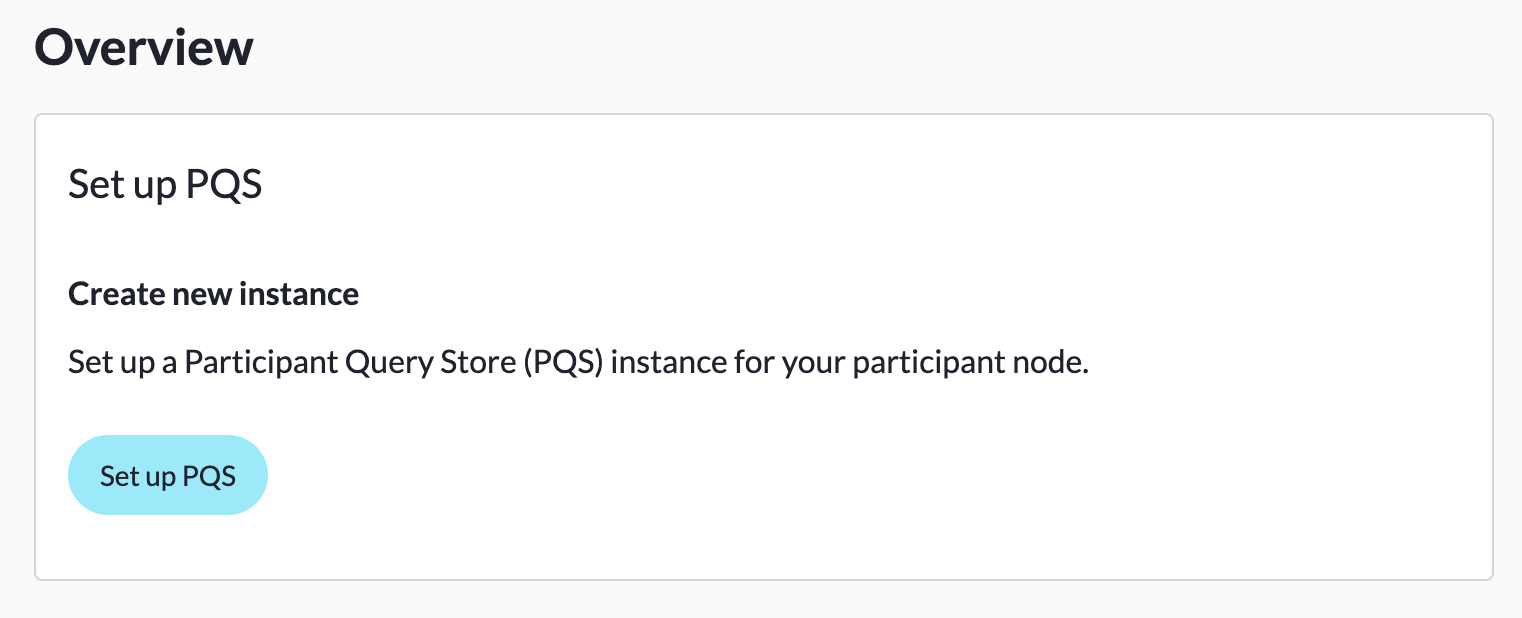
To set up PQS:
- Select a scratchpad/participant node and go to the Overview tab in the left nav bar.
- Click Set up PQS in the Set Up PQS tile. (Note: PQS cannot be set up until a DAR file has been uploaded to your ledger.)
- Select a streaming type:
- Transaction streams include creates, archives, and interface views but excludes transient contracts (those created and archived in the same transaction) and exercises.
- Transaction Tree streams include creates, exercises, and transient contracts but excludes interface views.
- Select an offset as a starting point for the PQS to read from. For details on starting point options, see the Daml docs):
- Start from the oldest contract available: Uses the oldest unpruned contract on the ledger or where PQS last left off.
- Start from current time: Uses the latest offset or where PQS last left off. This option should be used whenever restarting a PQS.
- Start from genesis: Uses the first offset of the ledger.
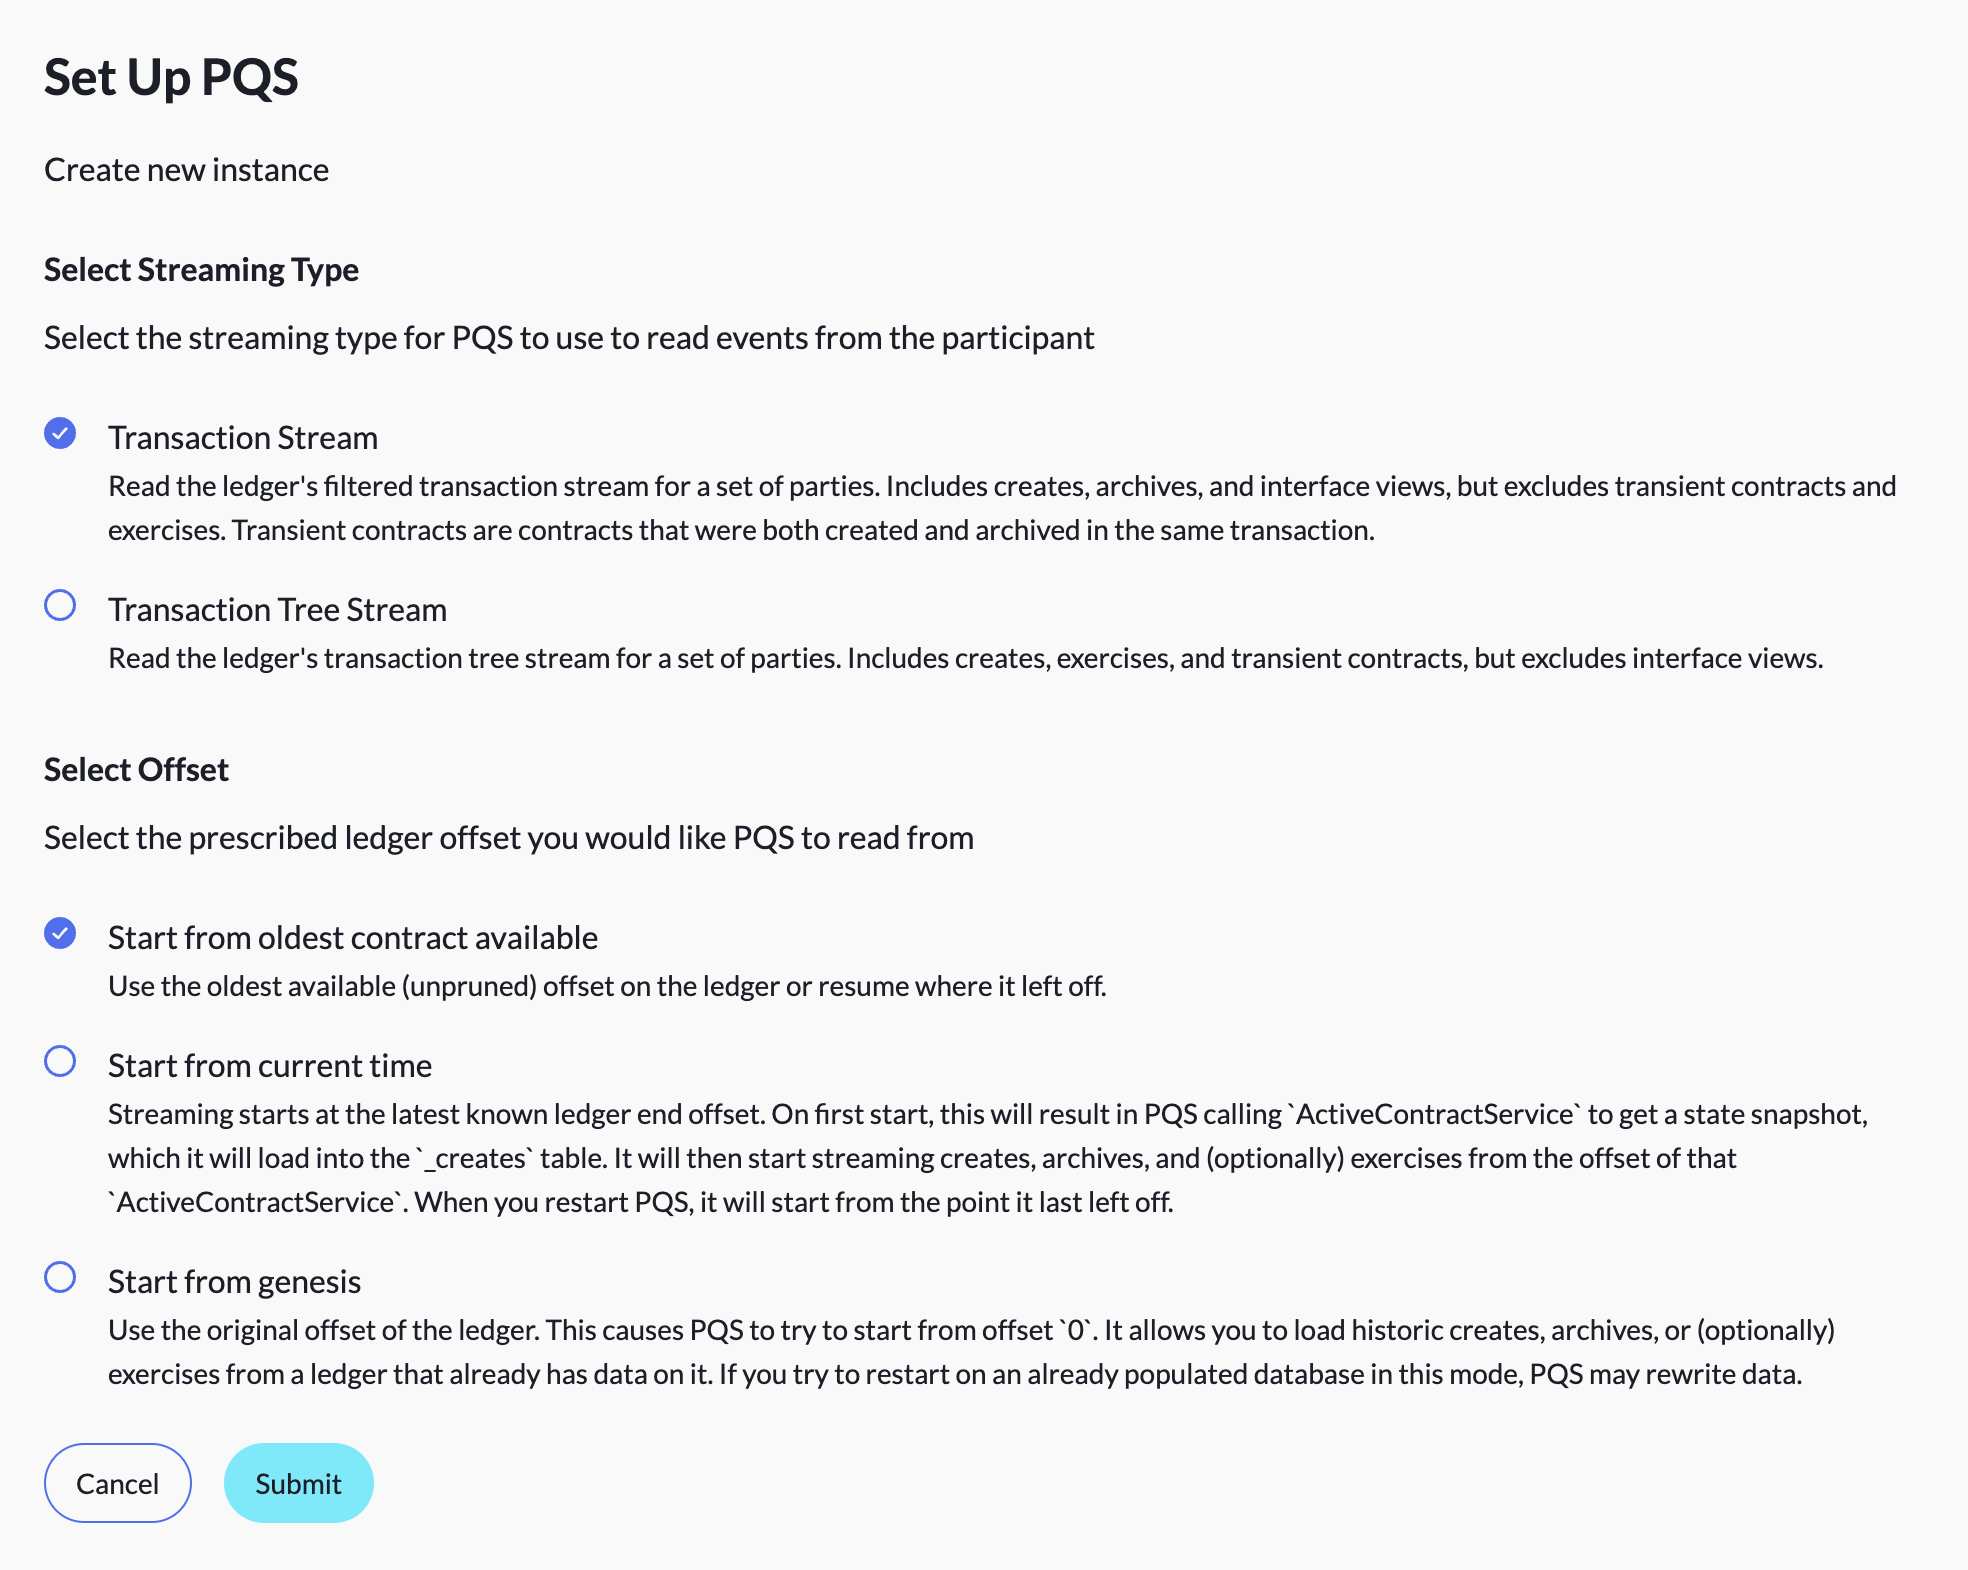
- Click Submit.
PQS may take several seconds to start up.
To modify existing PQS settings you must delete and recreate the PQS in PQS Logs>Settings.
Storage
A realtime view of the disk usage of your services is available in the Storage section of the Overview tab.

Deployments Tab
You can view the Deployments tab for a ledger by clicking on the ledger in the workspace. This tab is where you manage deployed artifacts, configure new instances, and publish a front end for your application.
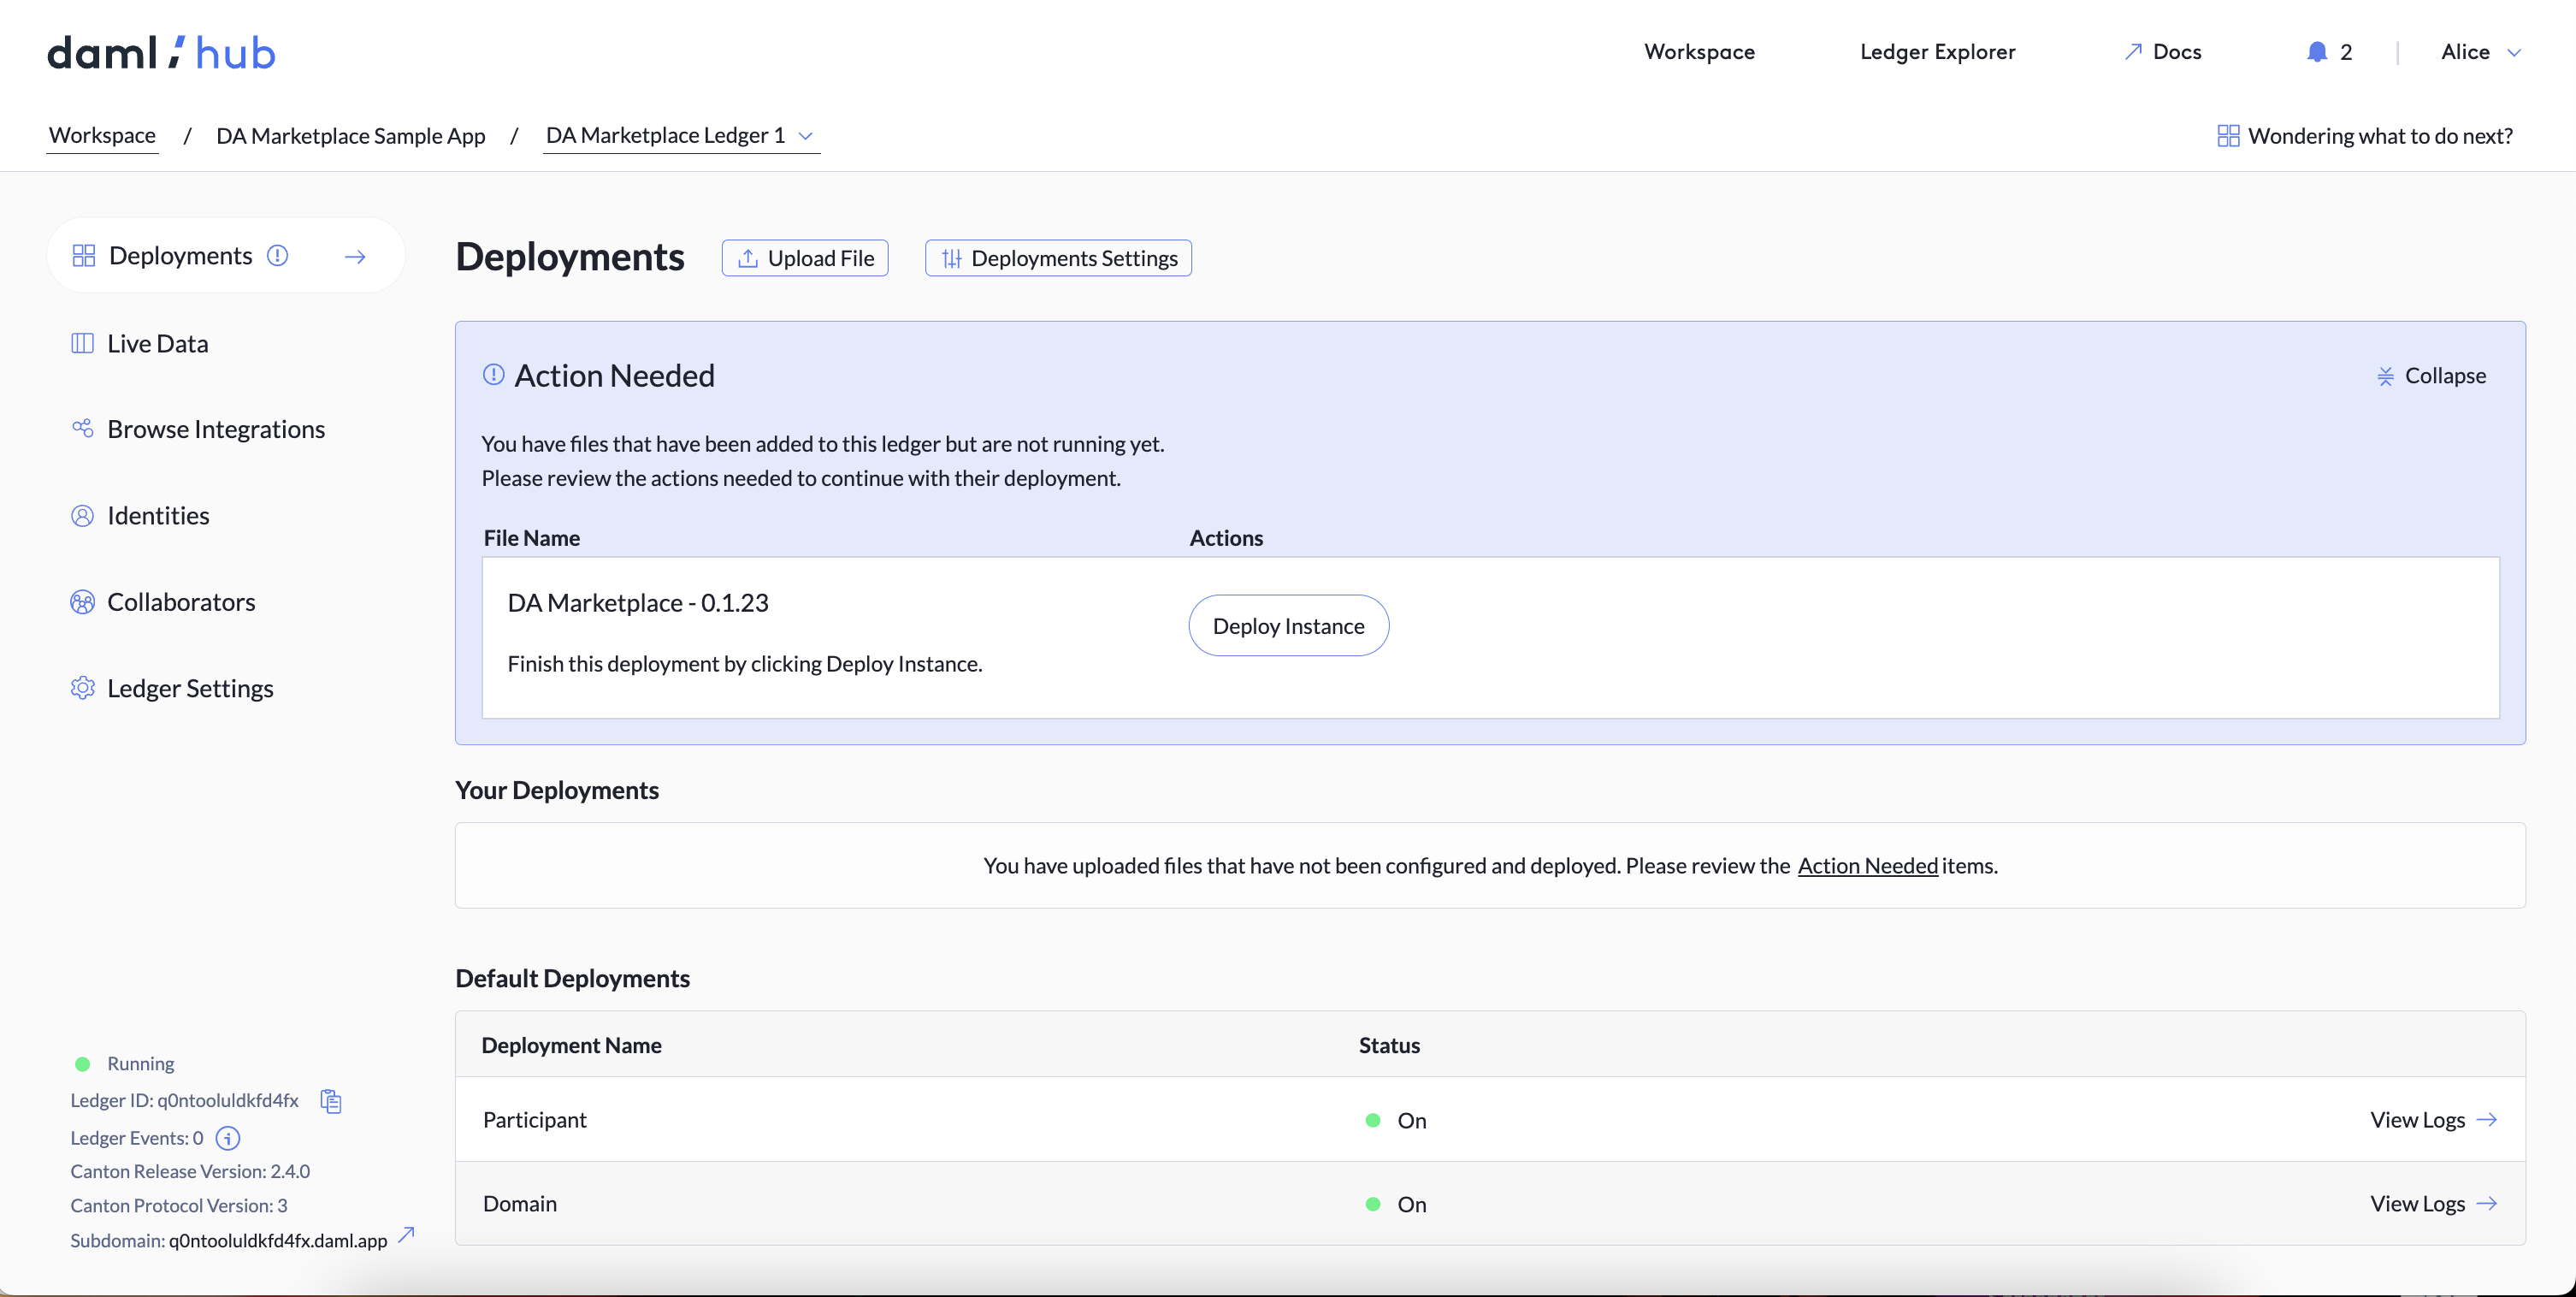
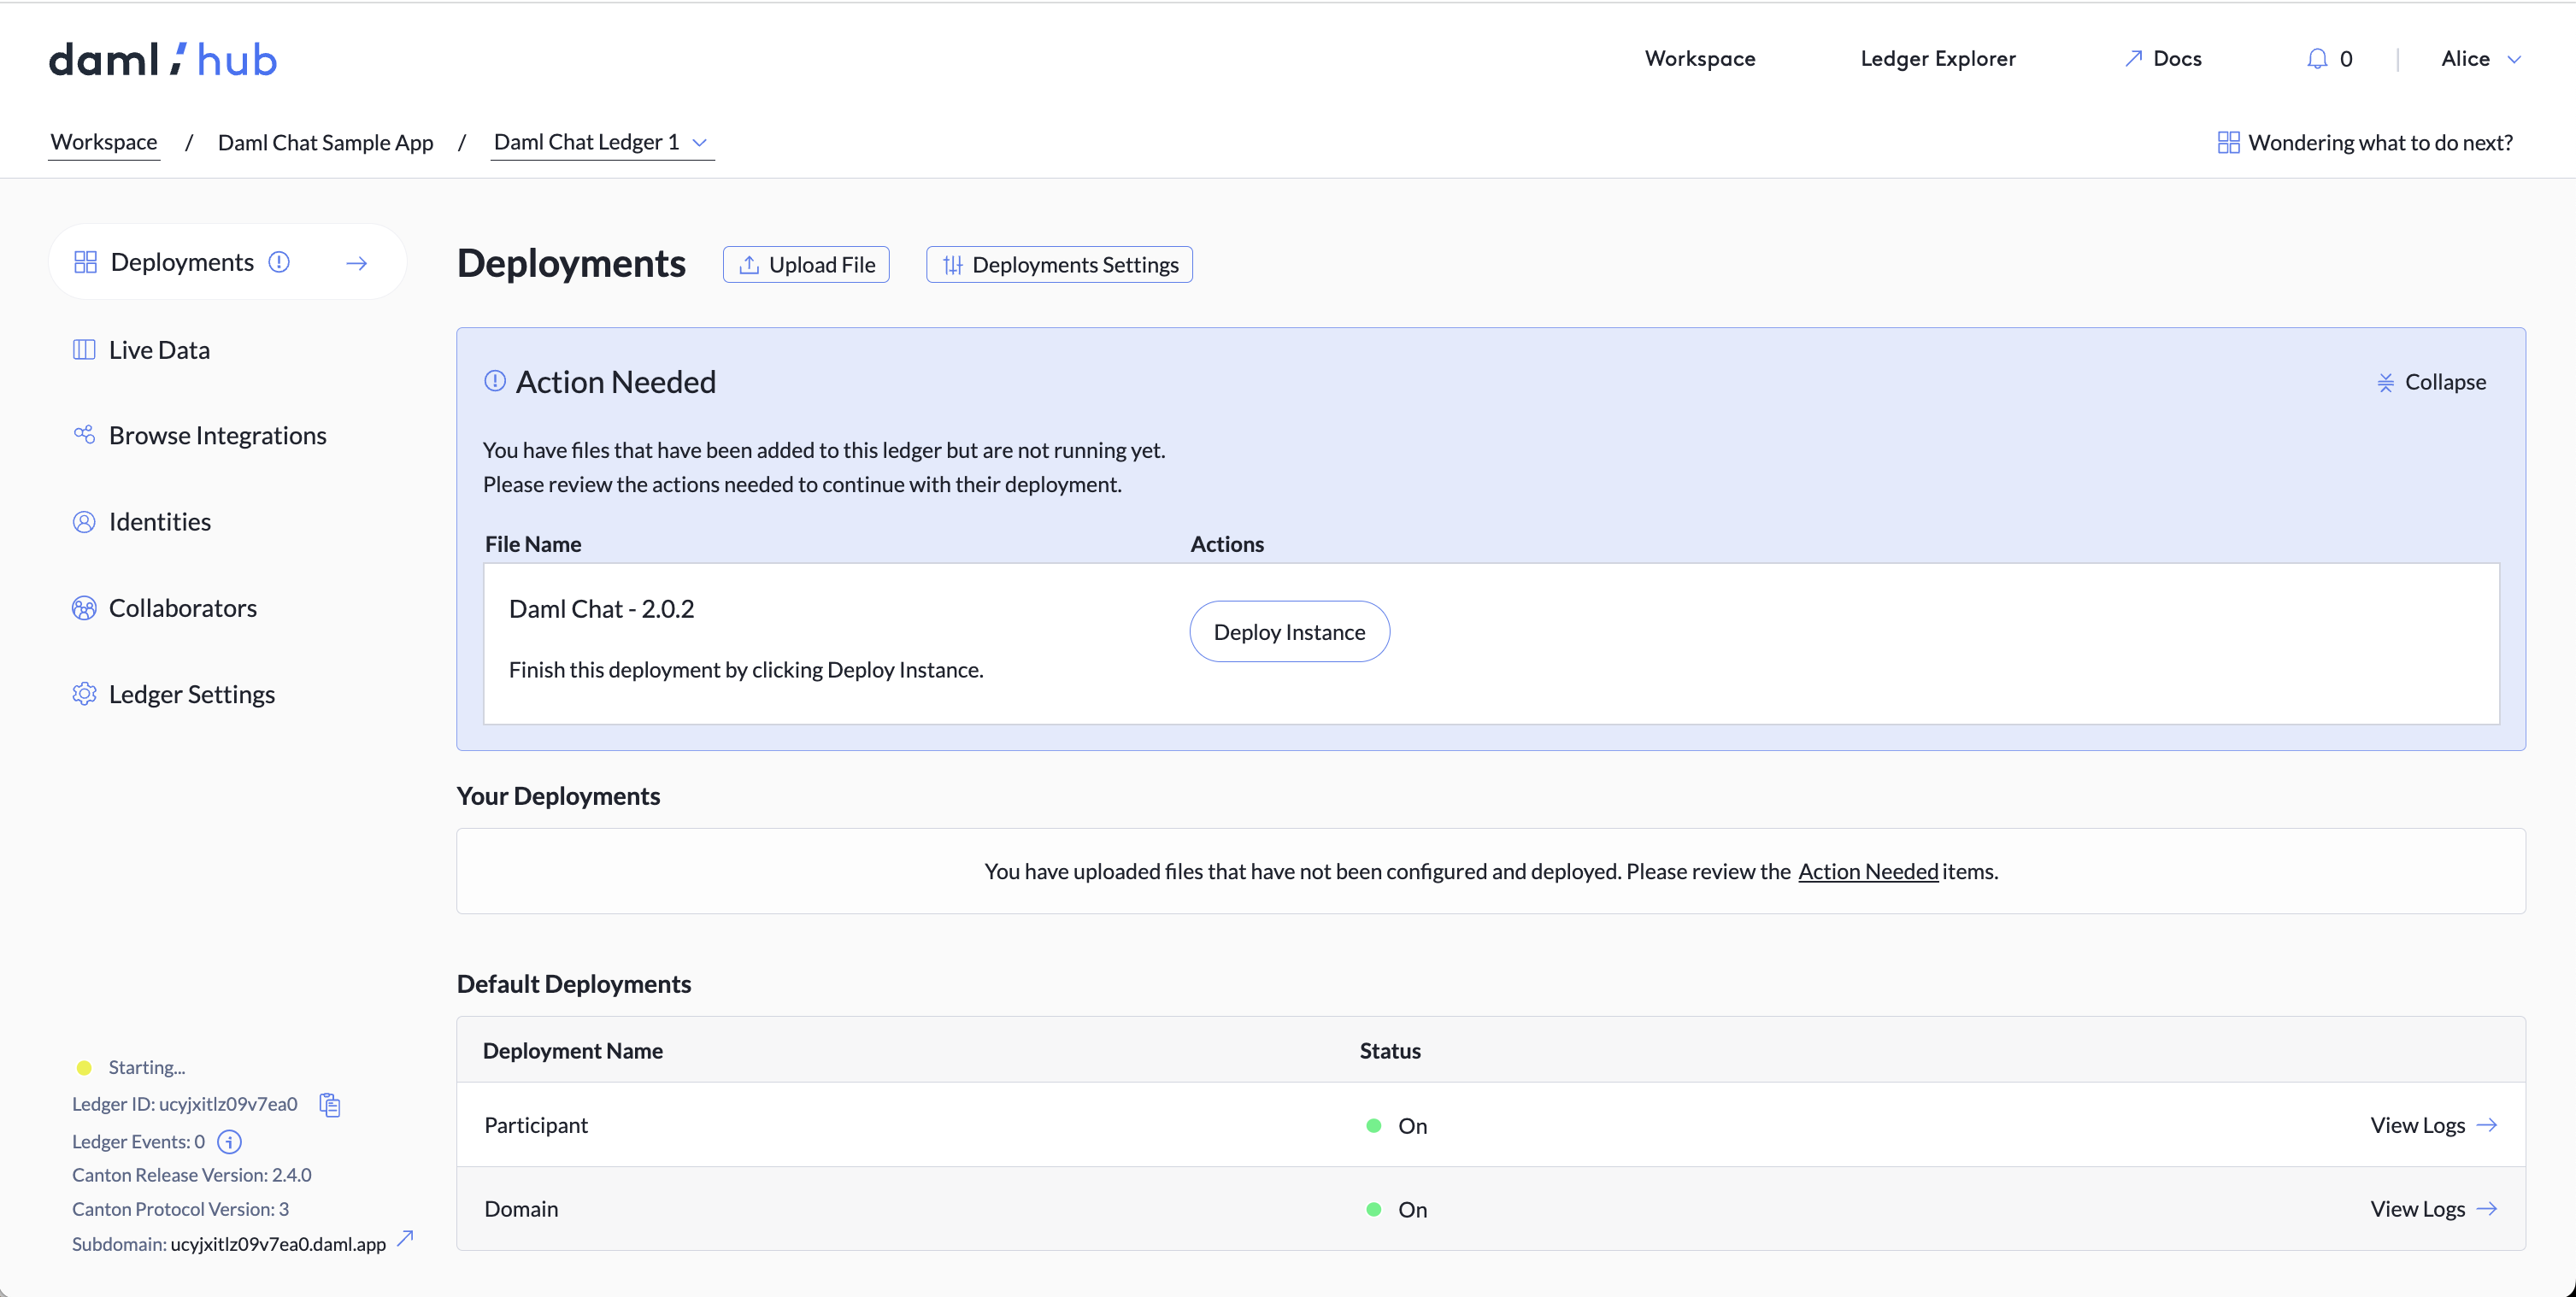
Deployments After you upload a file to your ledger, it first appears in the "Action Needed" tile of the Deployments tab as a deployed artifact. Here, you are prompted to configure the first instance of that artifact. Daml and UI Asset artifacts only need one instance to be deployed to your ledger, while automation, trigger, or integration artifacts can have multiple running instances.
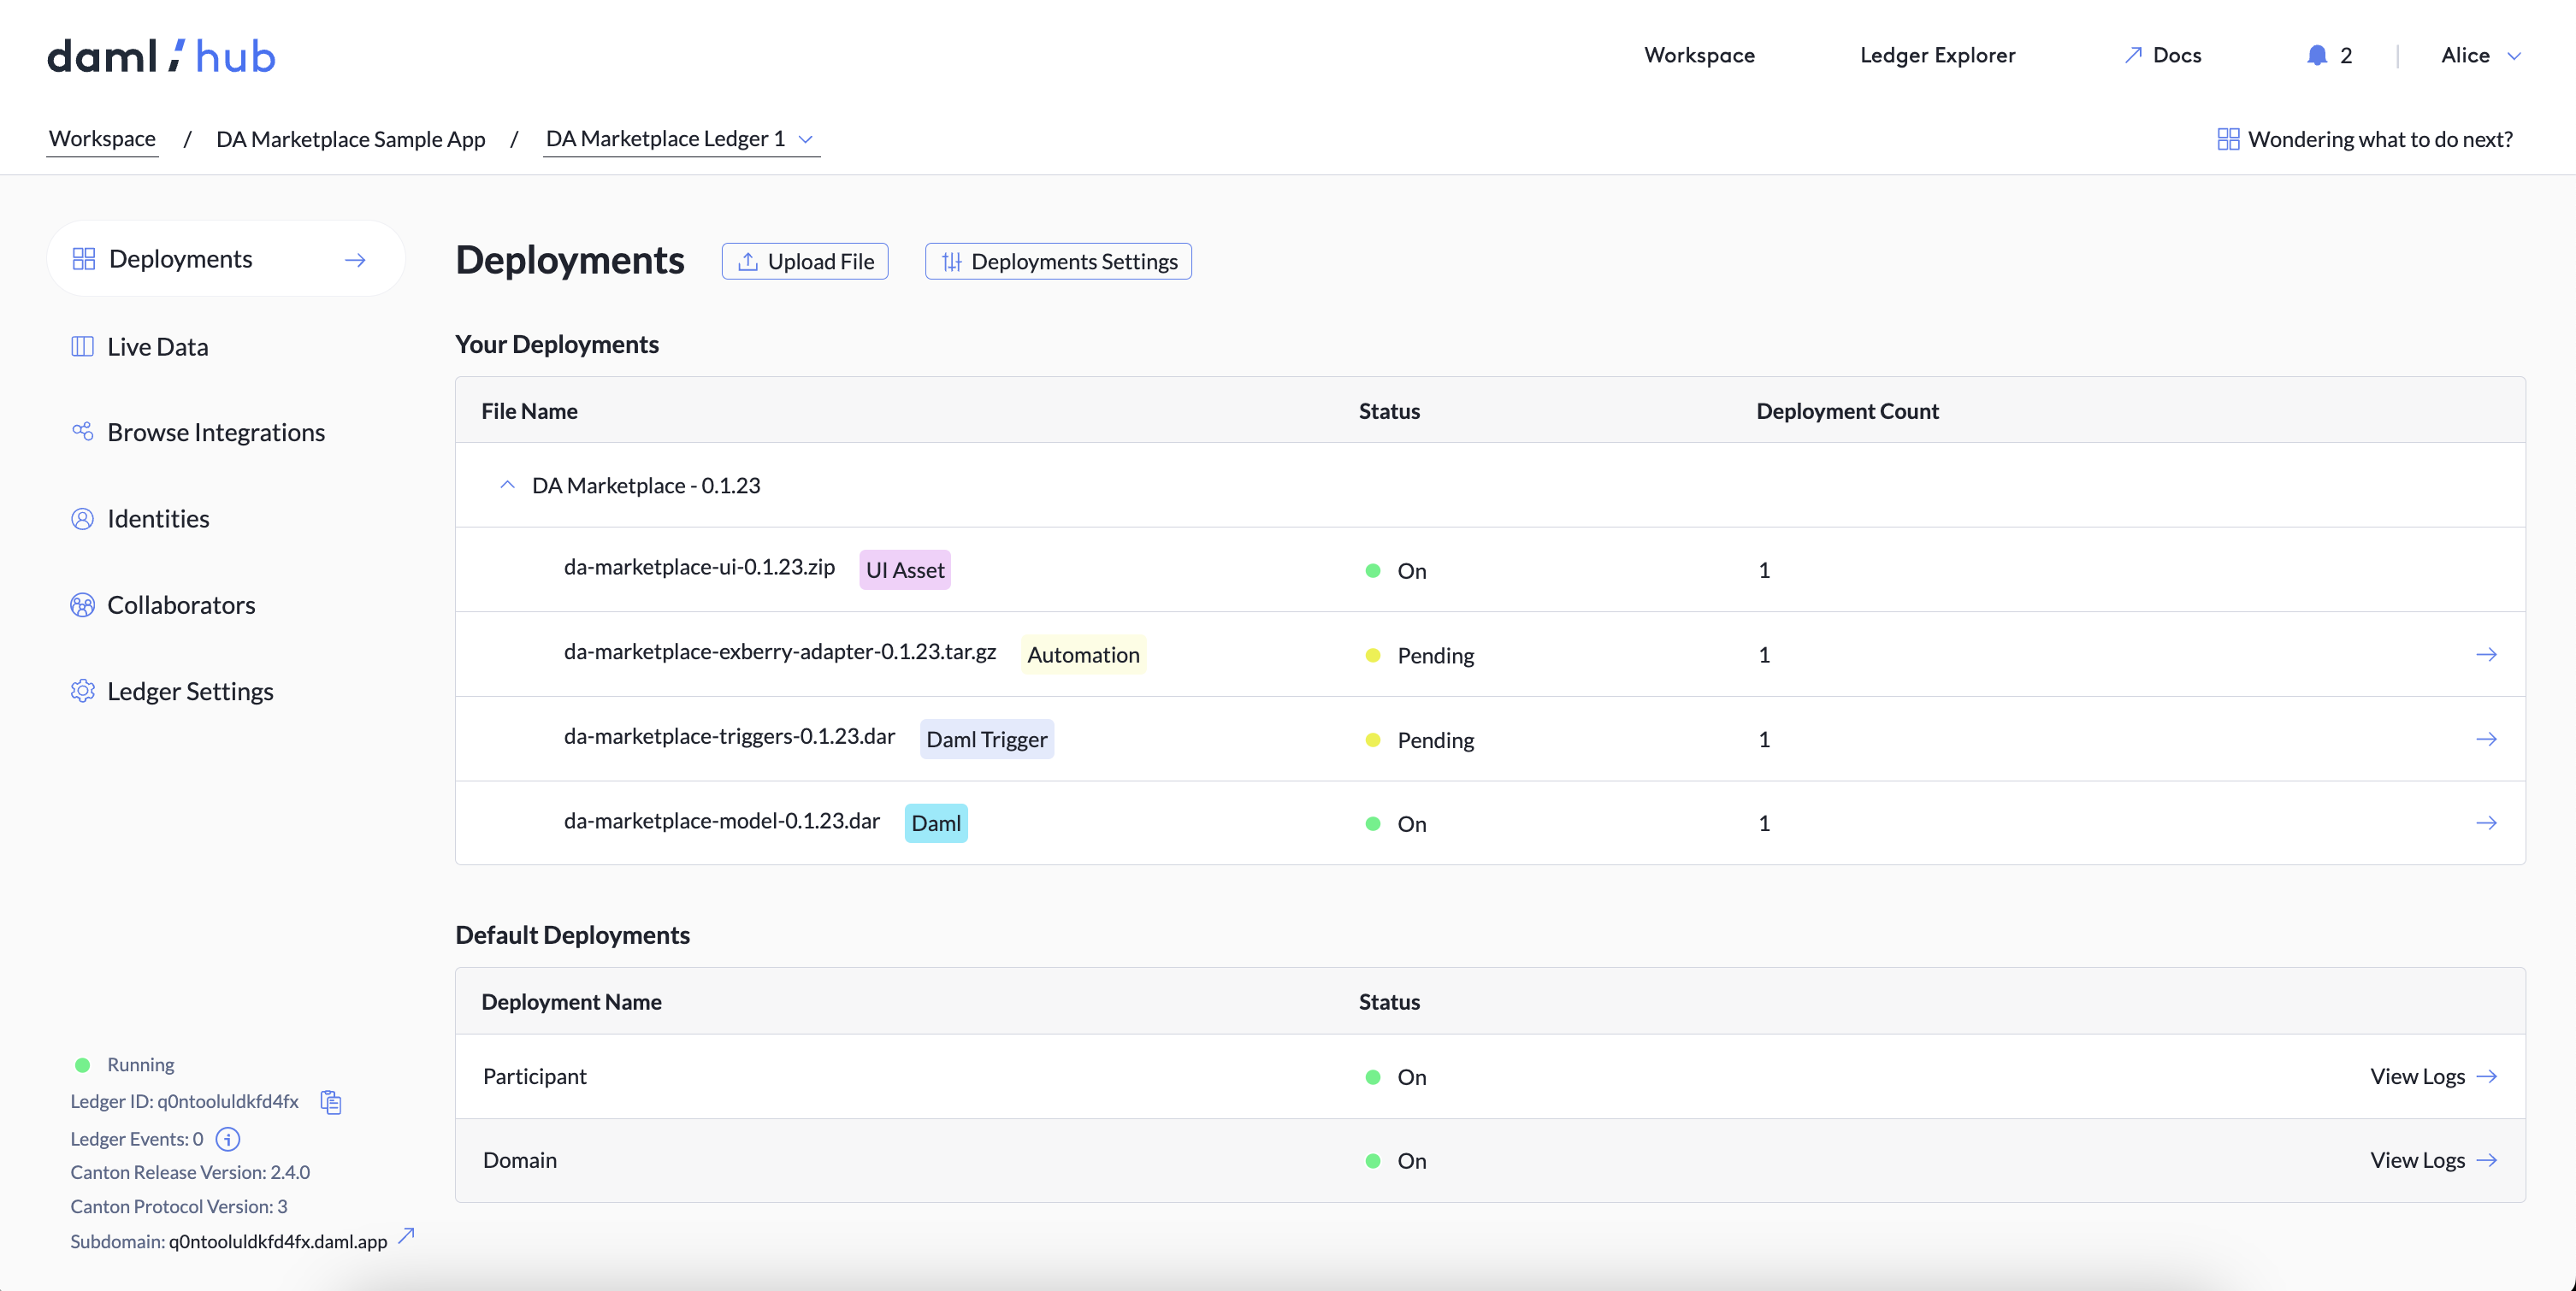
Deployed artifacts are listed in the Deployments table, which is divided into Your Deployment and Default Deployments. Here you can easily access and manage each artifact's data, instances, code, and settings.
View and Download Automation Logs
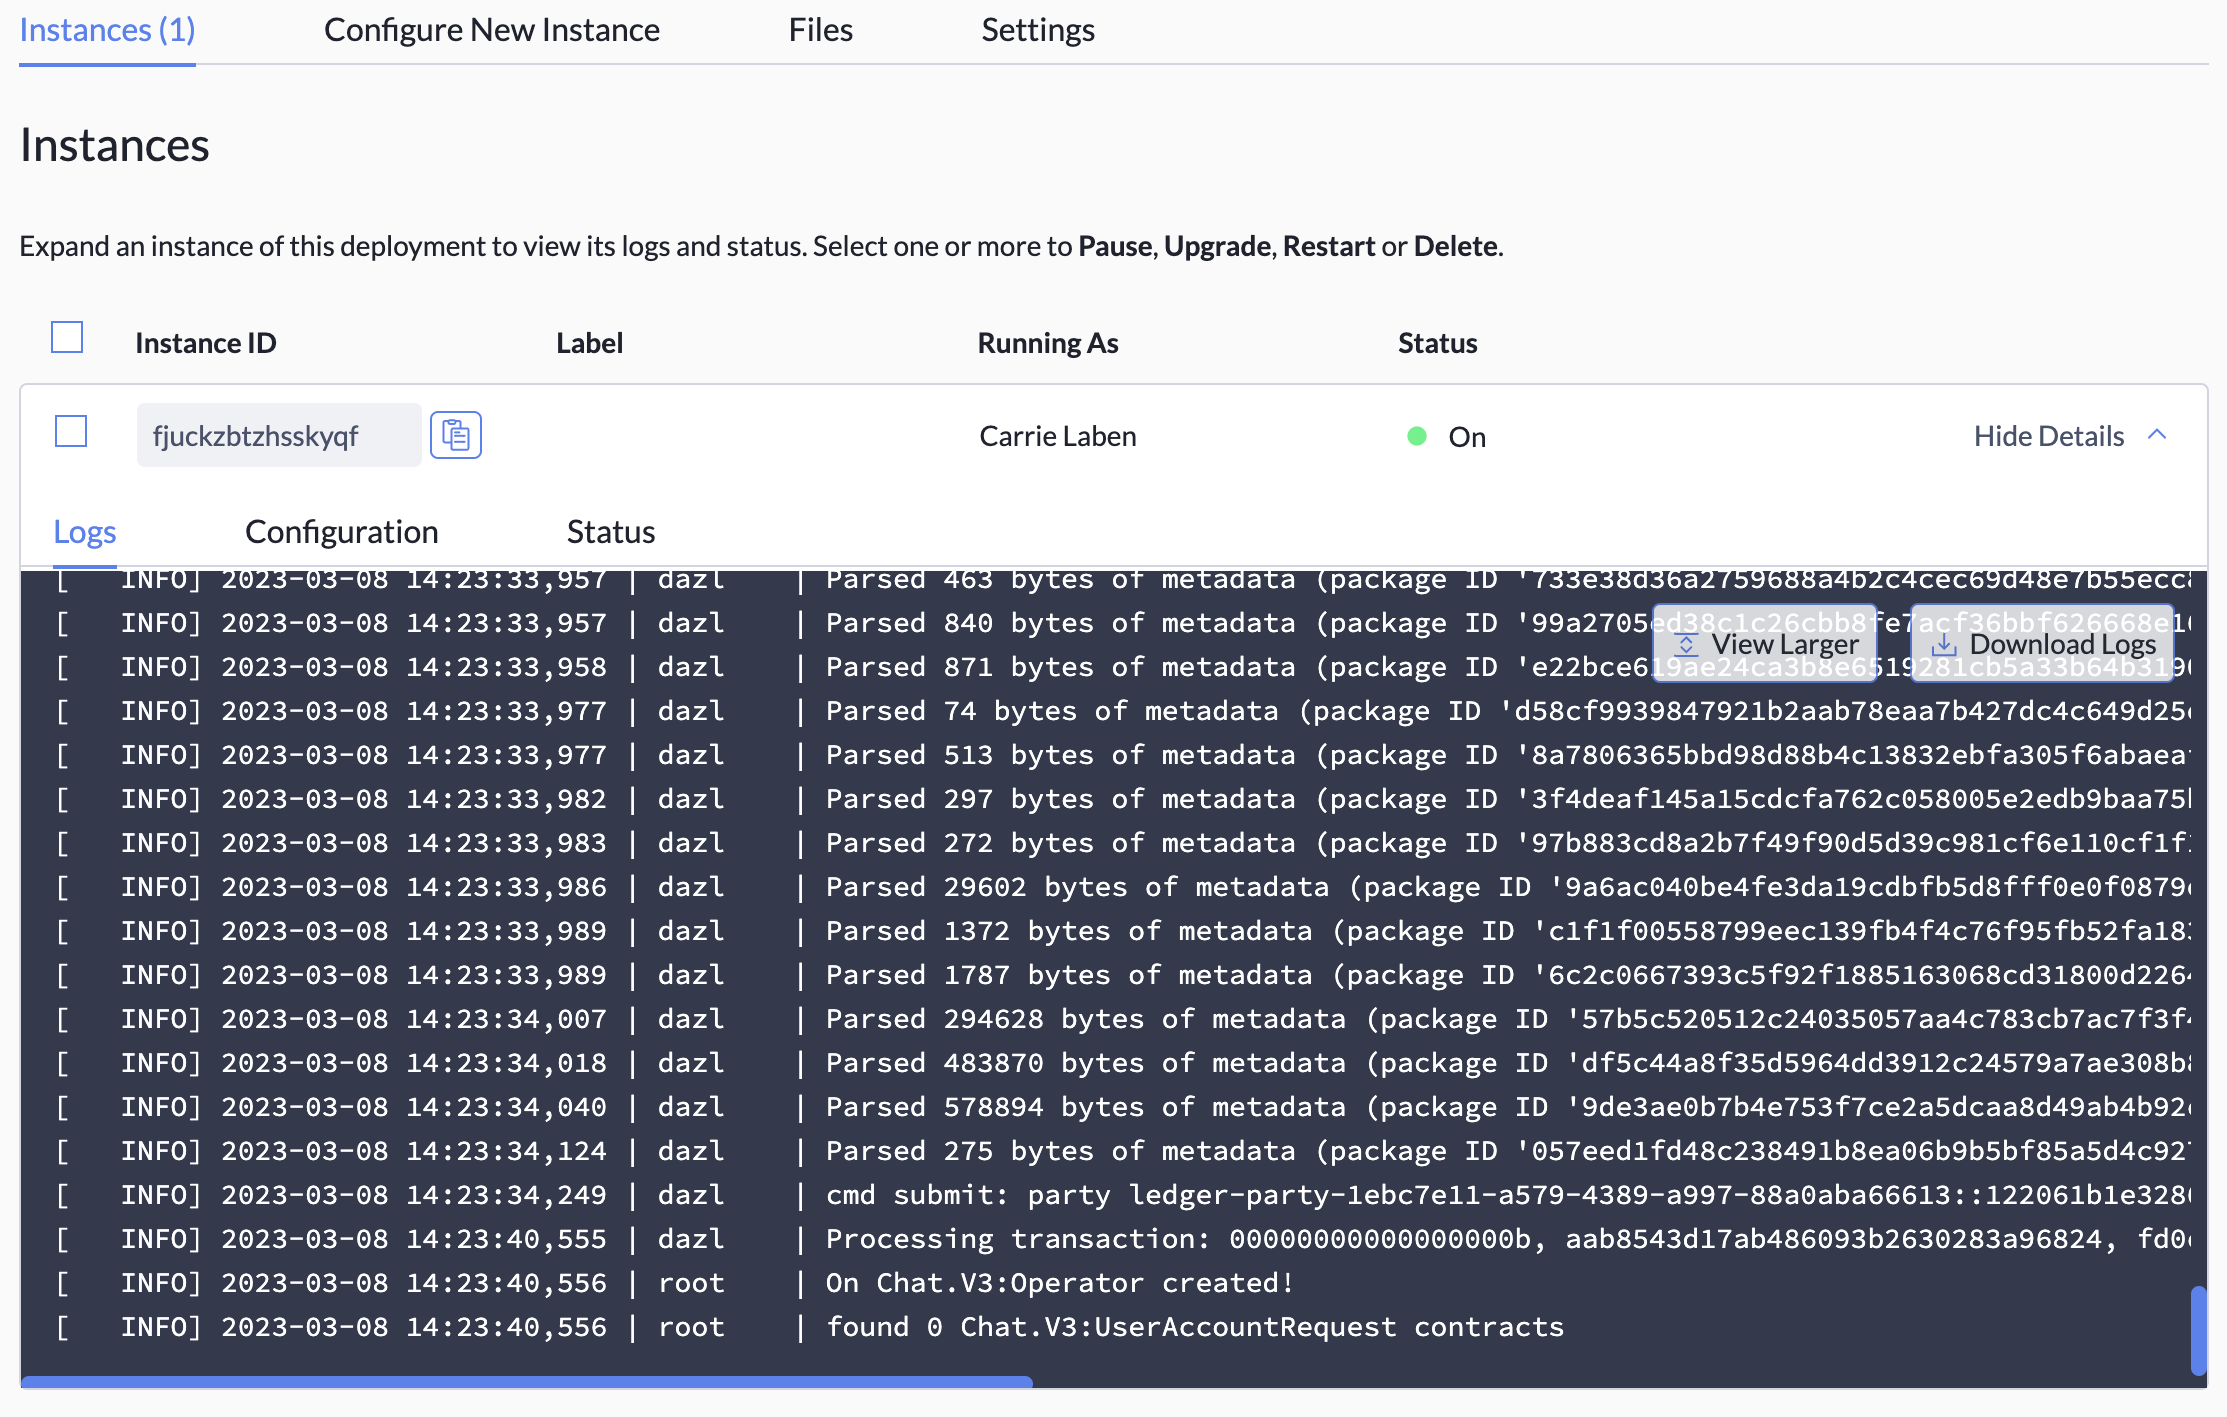
To view logs for an automation that you have deployed or are a collaborator on, go to the Deployments tab and click the arrow on the right side of that deployment's row in the Your Deployments table.

This opens the Instances screen. So long as at least one instance of the automation has been configured, you can view logs for that instance by clicking View Details for that instance.

From here, you can expand the log view or download the logs. You can also jump to the end of the logs if they expand beyond the view of a single screen.
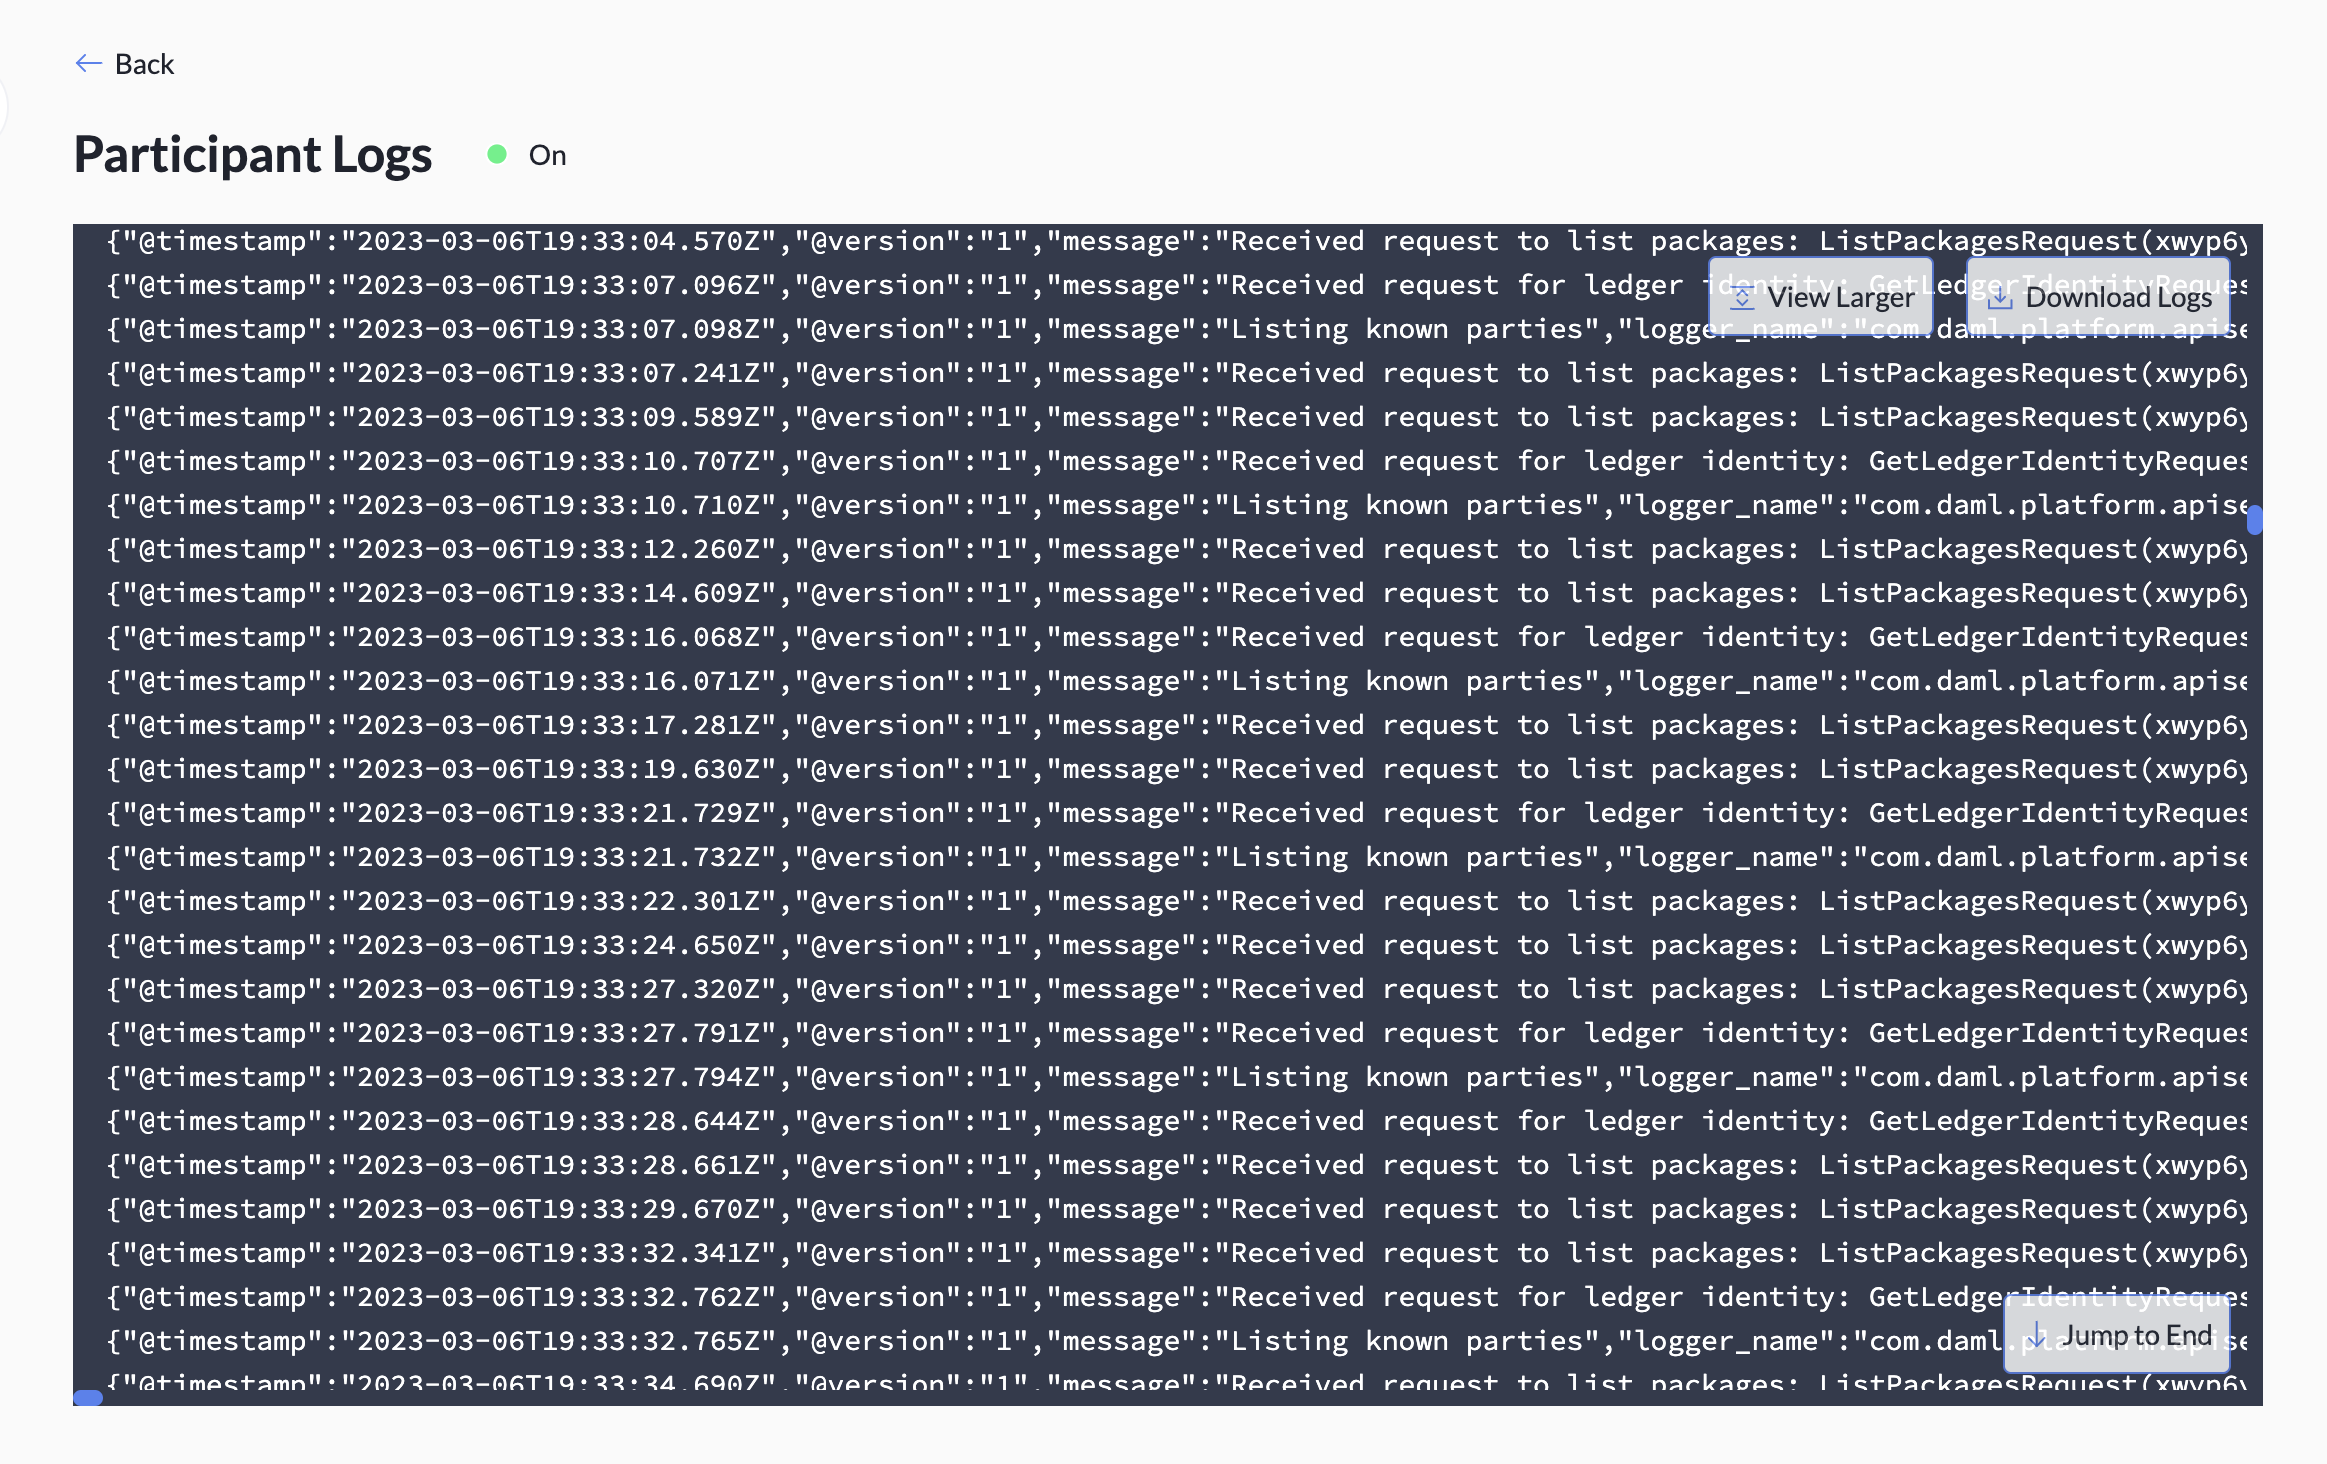
To view logs for a particular participant or domain, click View Logs in that deployment's row in the Default Deployments table.

This opens the Participant Logs or Domain Logs screen. You can expand the log view or download the logs from this screen. You can also jump to the end of the logs if they have expanded beyond the view of a single screen.
Live Data Tab
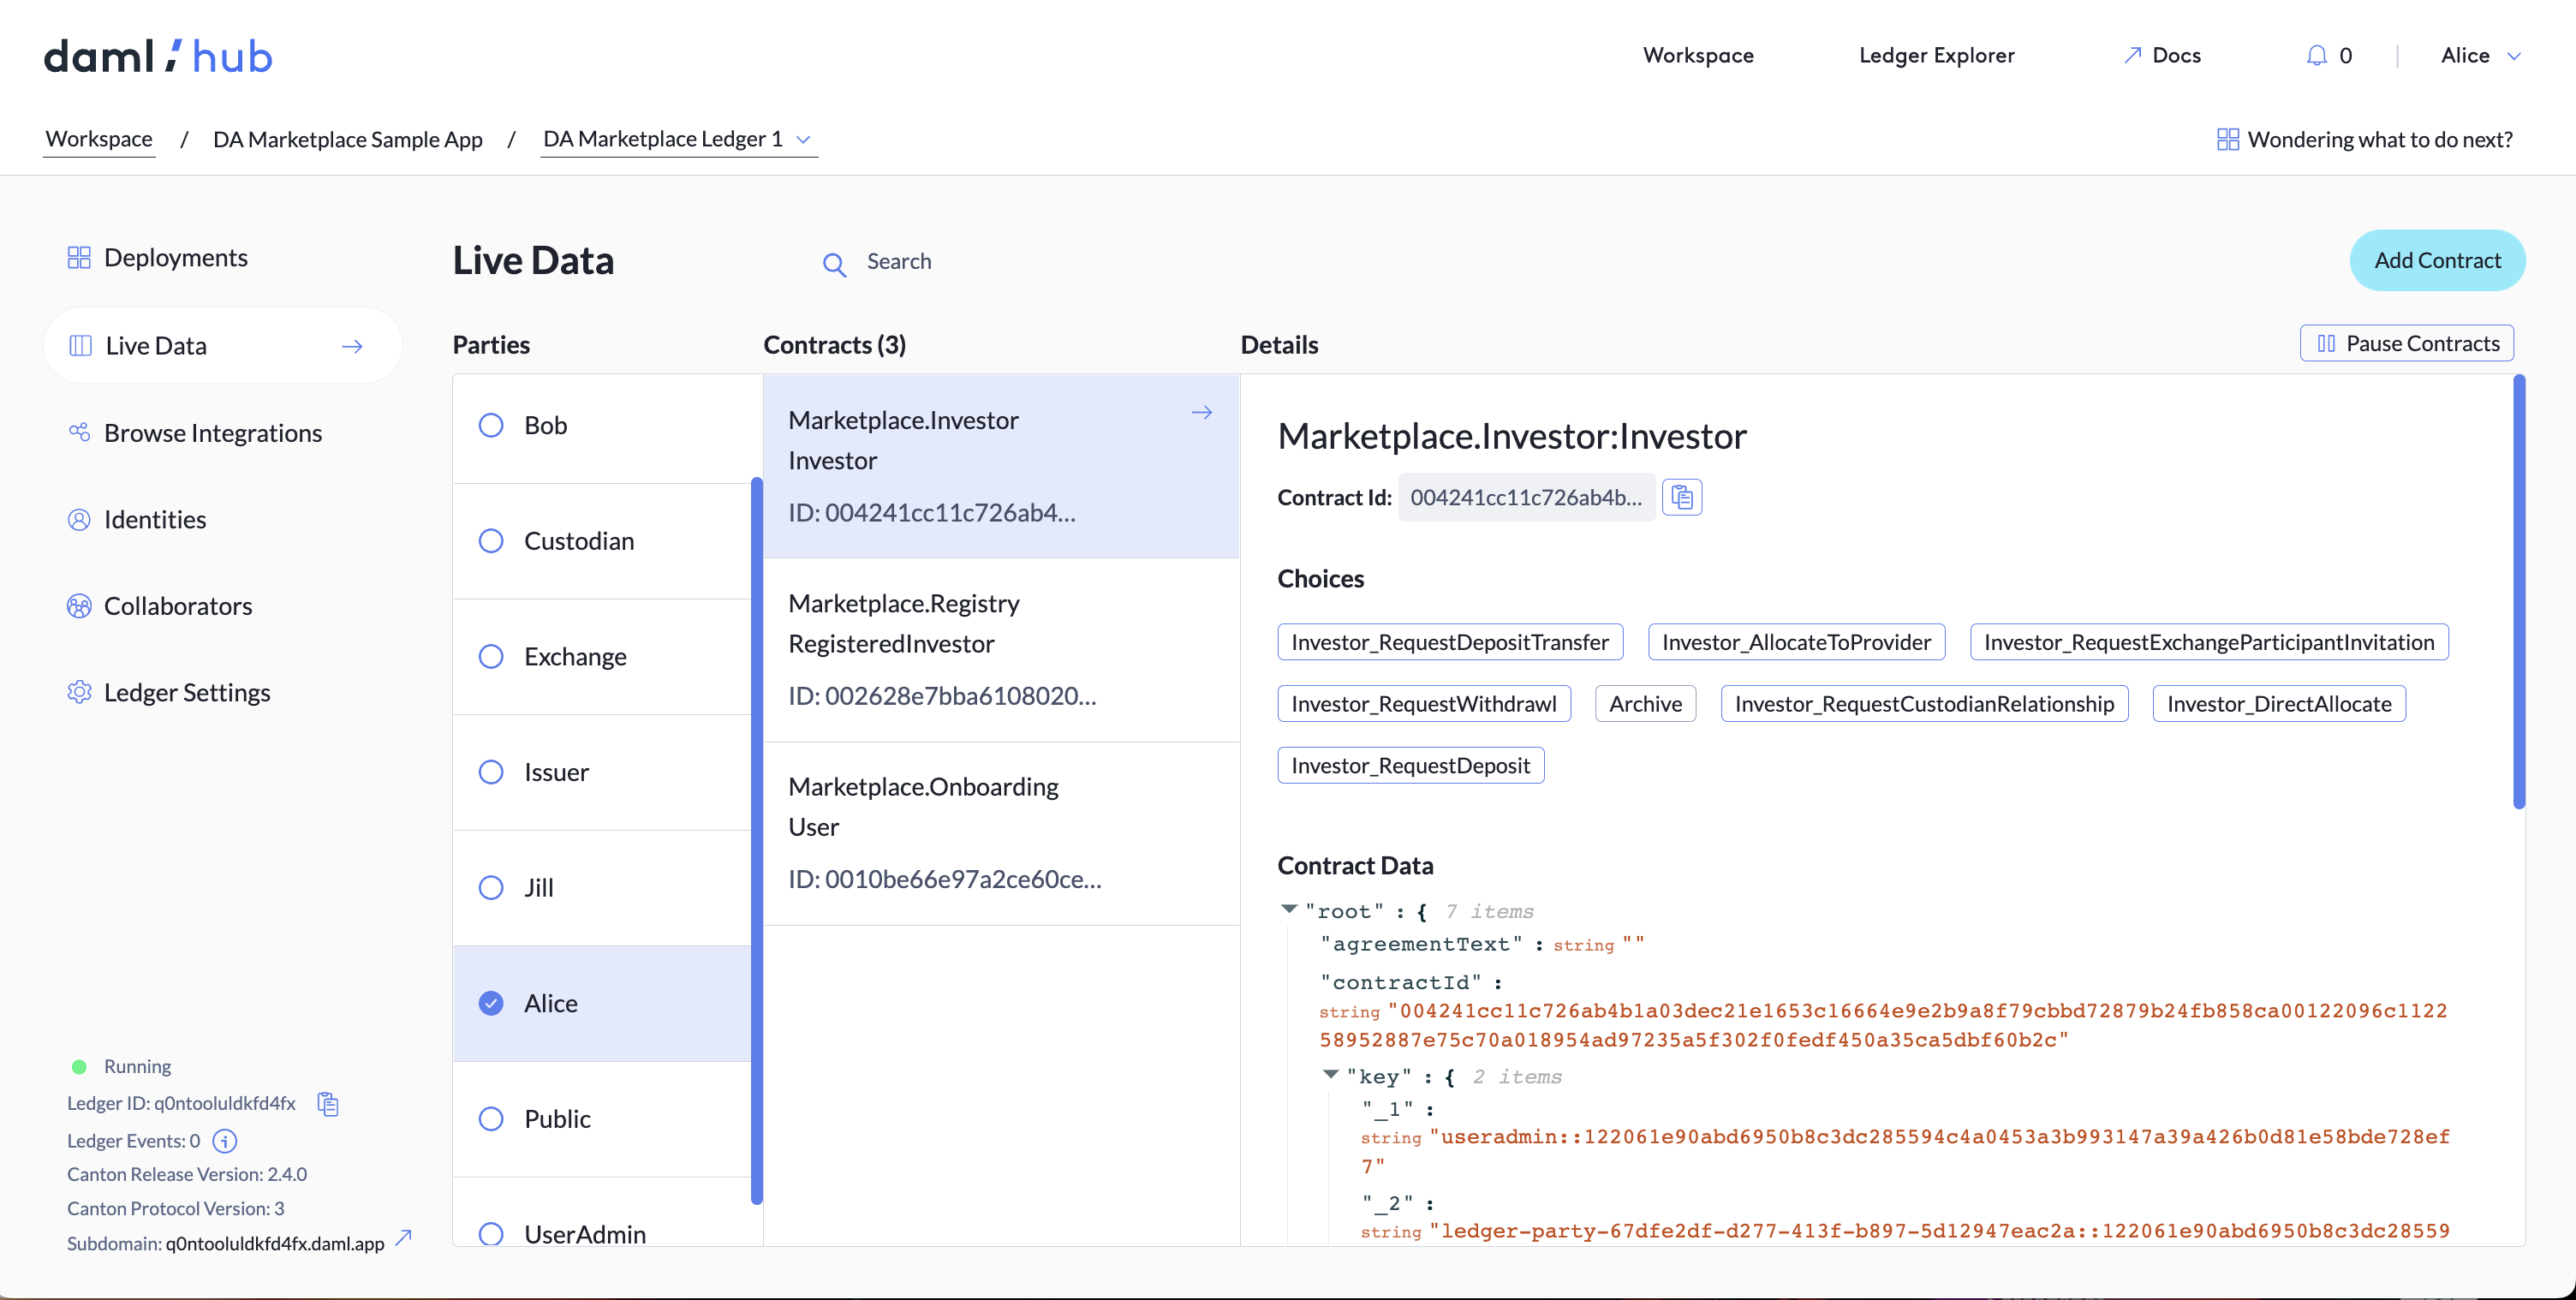
The Live Data tab allows you to explore the Daml contracts on your ledger.
The table displays a list of contracts filtered by party. Therefore, the contracts listed at any given time are those that the selected party can view and act on. You can add and manage ledger parties in the Identities tab.
You can view a specific contract's data by selecting it from the center column. Additionally, you can exercise choices on behalf of your currently selected party. Daml contracts can be created in two ways: by clicking the Add Contract button and creating a new contract from a template, or by exercising a choice on an existing contract. New contracts are temporarily marked with a green dot to indicate that they have been recently created.
The Create Contract interface supports the following Daml
Types: Bool, ContractId, Date, Decimal, GenMap, Int, List, Map, Numeric, Optional, Party, Text, Time,
and Unit. For more details on Daml data types, visit
the Daml Docs.
When creating a contract from a template through the Create Contract interface, note the following type structure:
-
Primitives - For
Int,Decimal,Text,Timestamp,Scenario, andContractId, enter the value in the empty field.Datelets you select the date you want from a calendar.Boollets you select a boolean value.Partylets you select the desired value from a drop-down.Note: The
Partydrop-down displays only the parties visible to you. If you create the ledger, you can see all the parties for each user who has joined. If you join someone else's ledger, you can only see the parties you create. If you want to input a party you don't have visibility into, you need to ask that party's user for their party ID and paste it directly into the drop-down. -
Lists -
[v₁, ..., vₙ]
Enter each list value separately and press enter. If you don't enter any values, an empty list is created. If you wish to delete a single value, press on the x that appears above it. -
Optionals - You can either fill in optional fields or leave them blank. If the field is left blank, its value is encoded as
null. -
Maps and TextMaps -
{ k₁: v₁, ..., kₙ: vₙ }
Maps and Text Maps are represented as objects containing a series of key-value pairs. Keys and values each have their separate input fields. -
GenMaps -
[ [k₁, v₁], [kₙ, vₙ] ]
Gen Maps are represented as lists of pairs. Keys and values each have separate input fields. -
User-Defined Types - Variants appear as drop-down menus, and records appear as blocks containing their values. Variants with constructors appear as drop-down menus, with each constructor as an item in the menu. Once you choose a constructor, the input fields for that constructor appear below.
The representation of user-defined types may become arbitrarily complicated, and this user interface assumes a relatively simple structure. To request support for unsupported types or report bugs, post on the Daml Forum.
Identities Tab
The Identities tab lets you manage your ledger's parties and users. This page becomes available once the ledger is running. It has three zones: Parties, Users, and Service Accounts.
To learn more about parties and users in Daml, see the Daml docs. To understand parties and users in Daml Hub, see Users and Parties
Parties
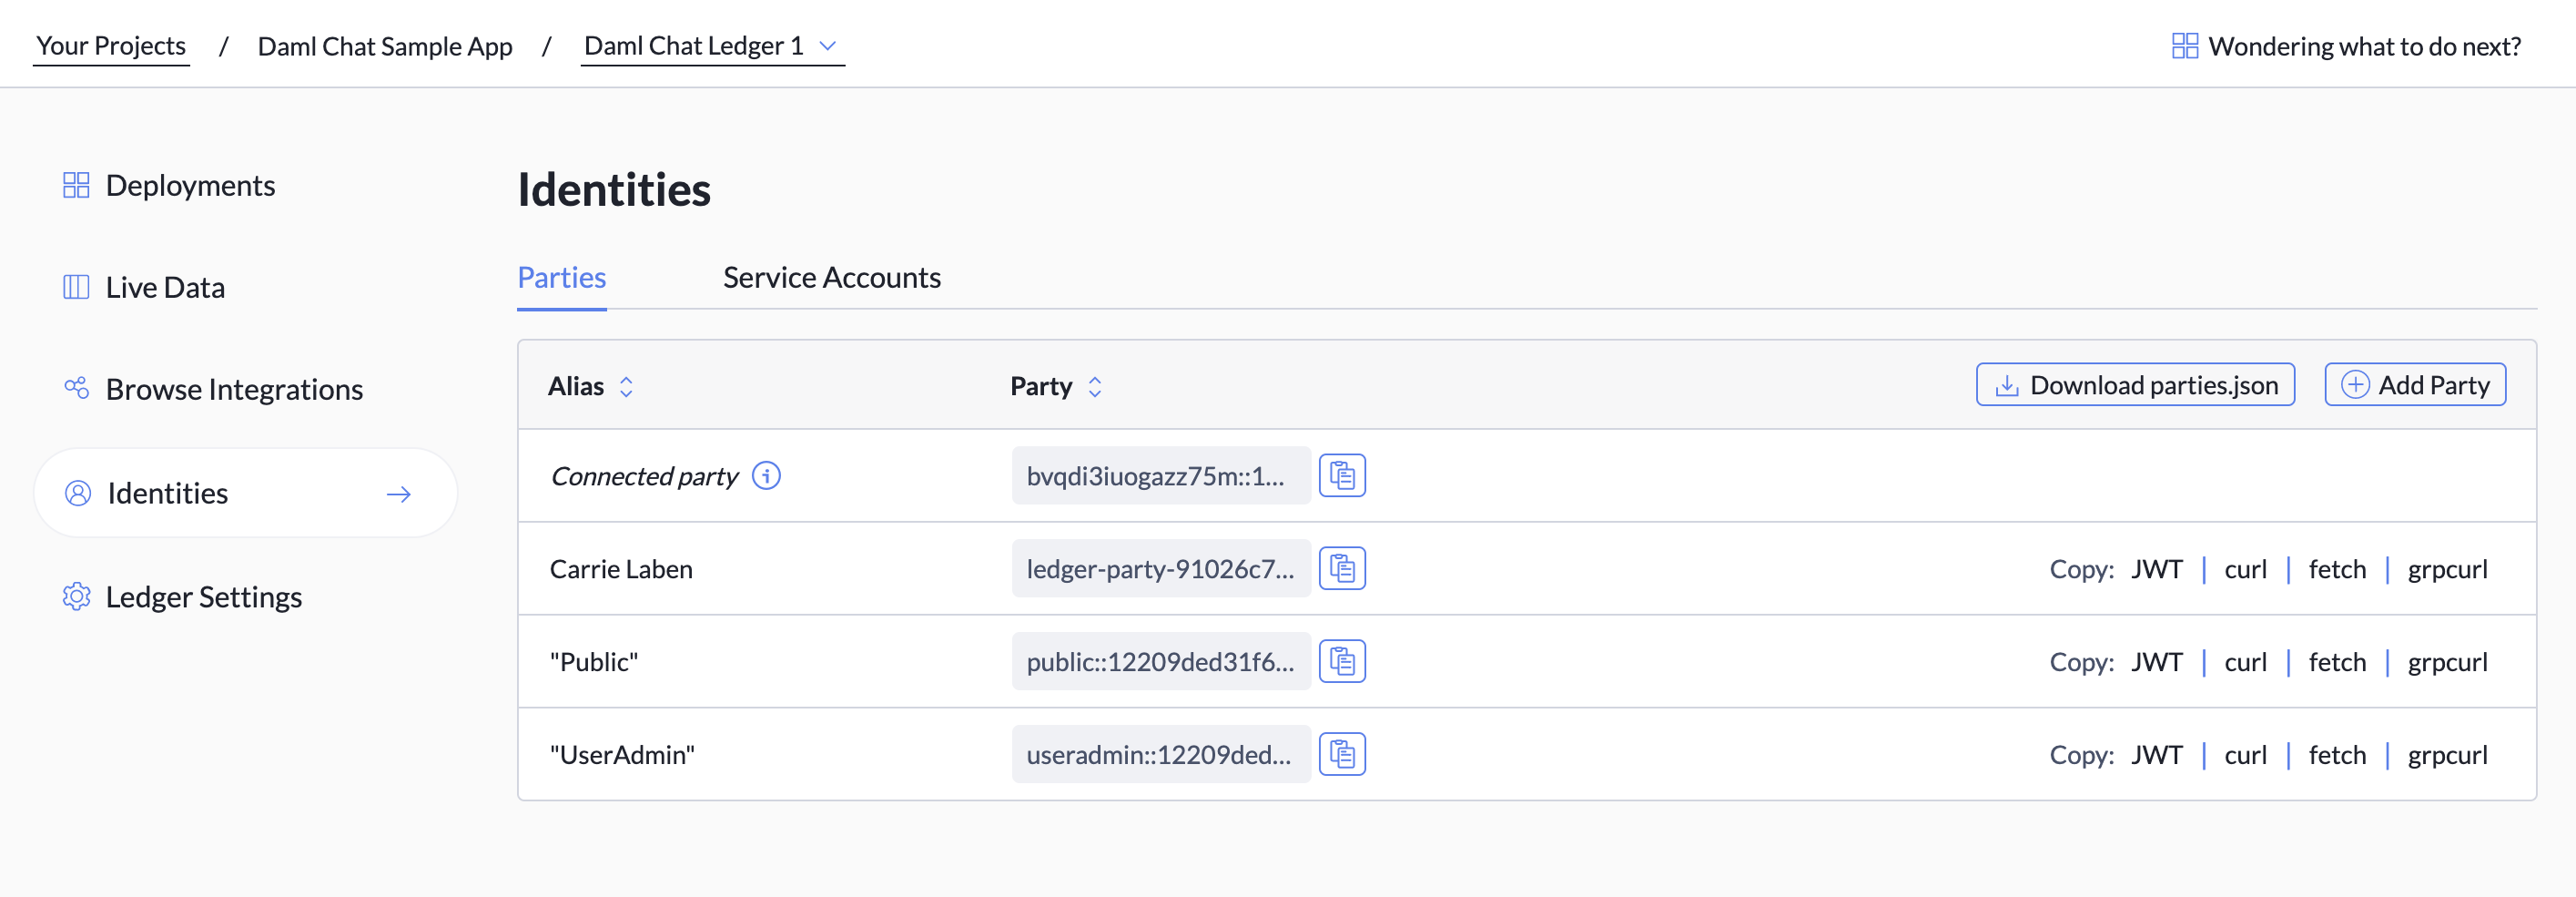
Parties shows a table with all the existing parties on your ledger, as shown below. You can create and delete ledger parties here.
Users
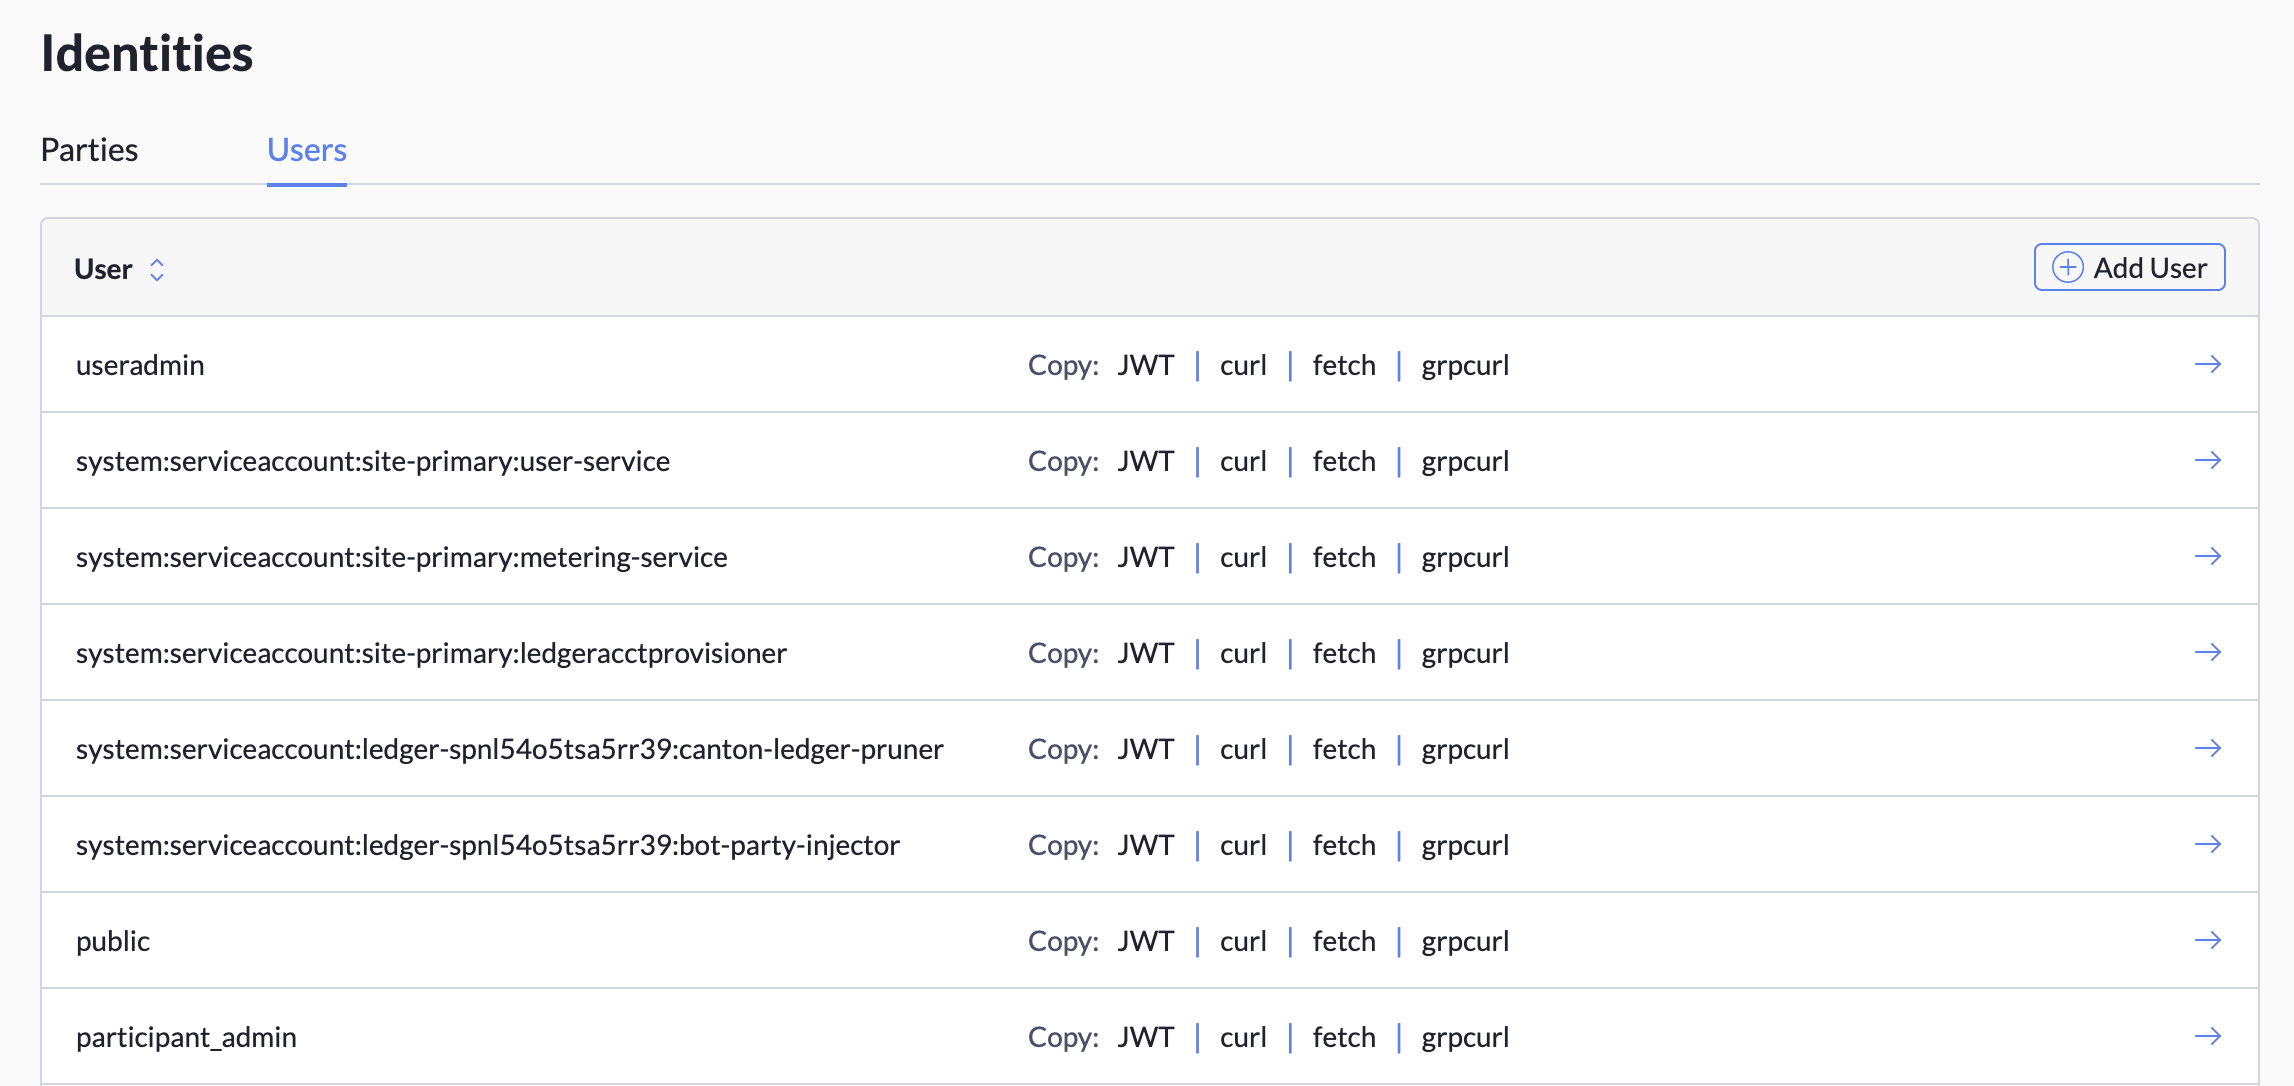
Users shows a table with all the existing users on your ledger, as shown below. Selecting a user in the table shows the list of parties the user can read and/or act as. You can create new users here, as well as delete existing users.
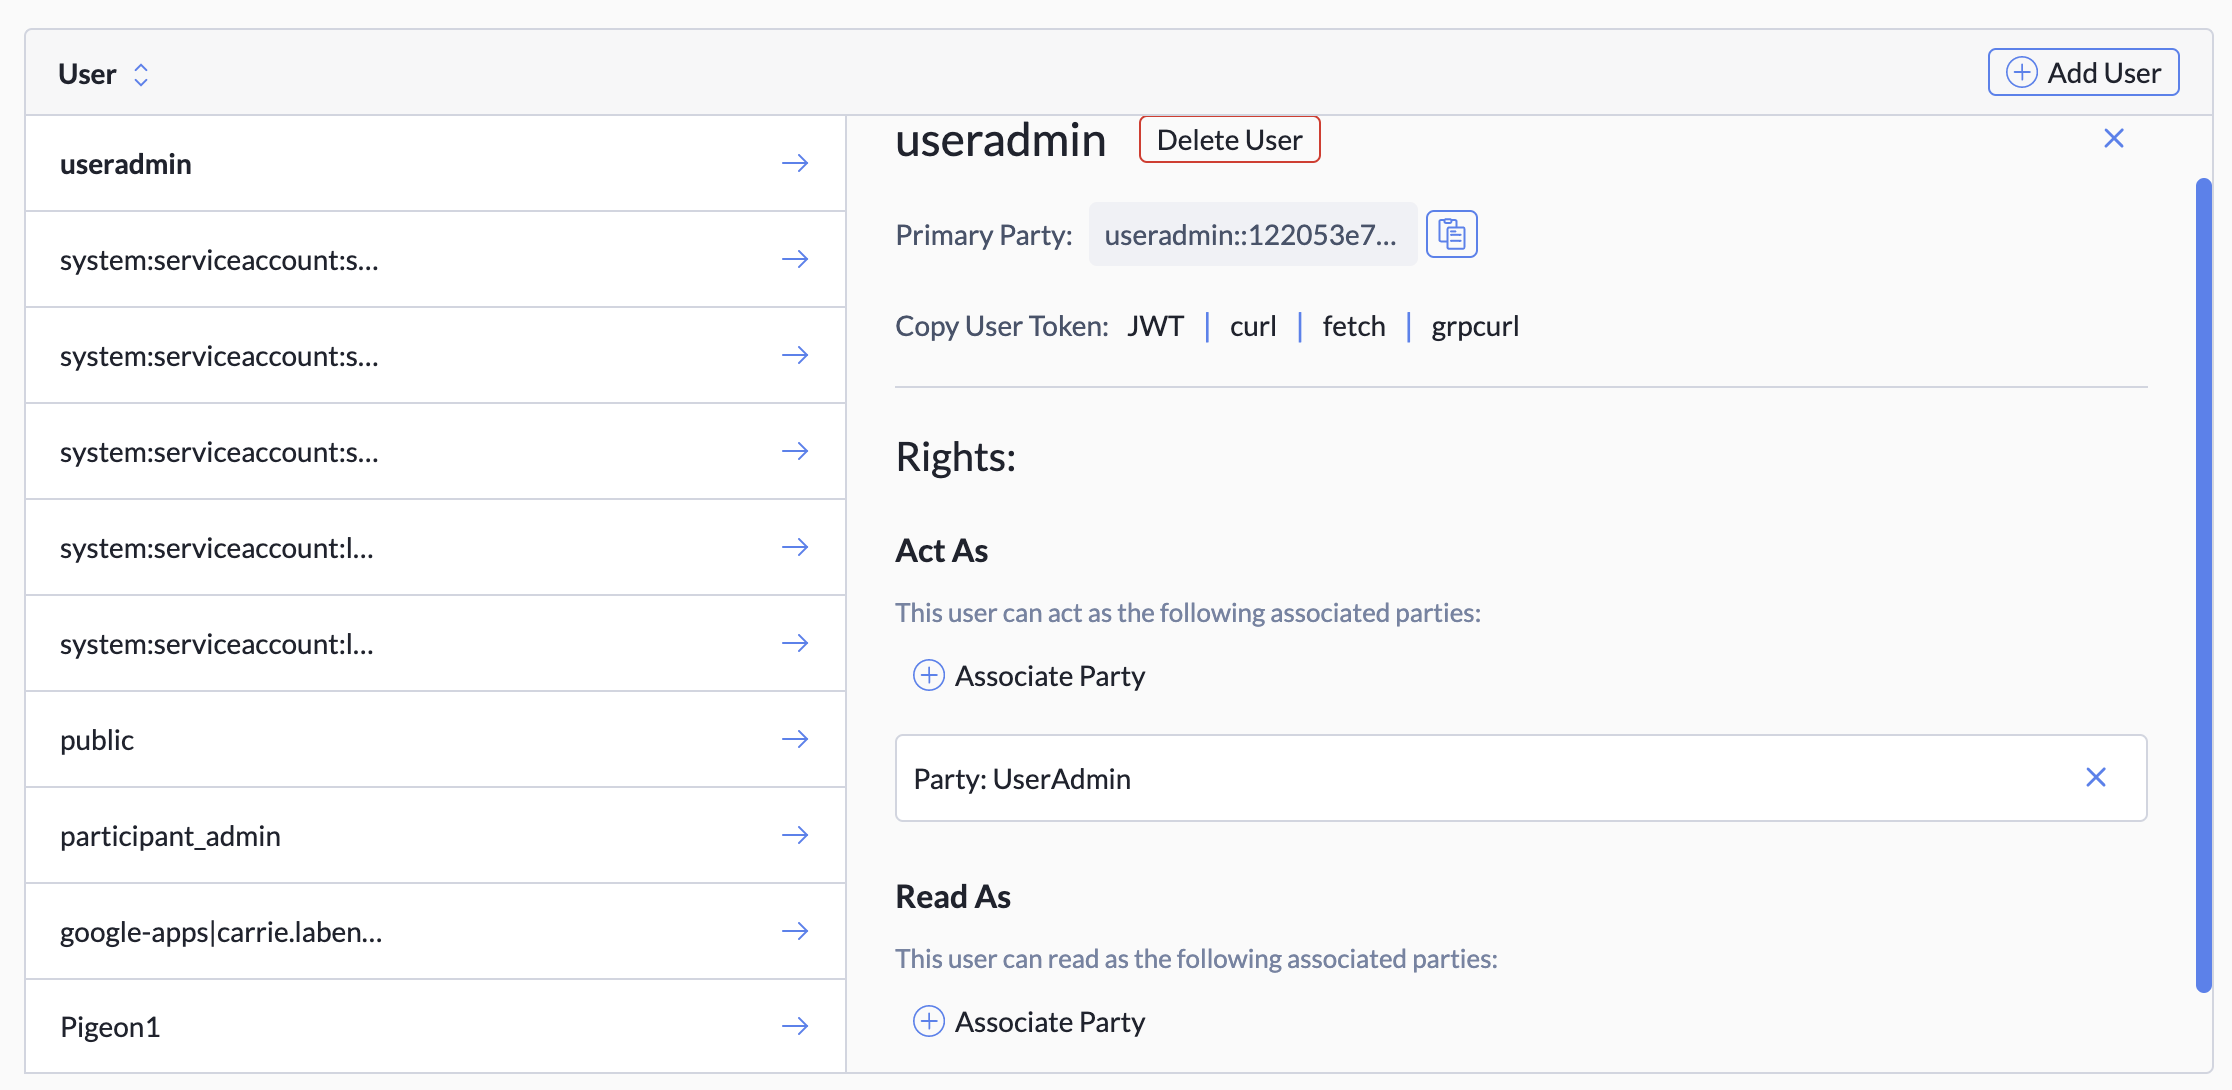
Clicking a user's name in the table displays their associated parties, rights, and a delete button.
Collaborators Tab
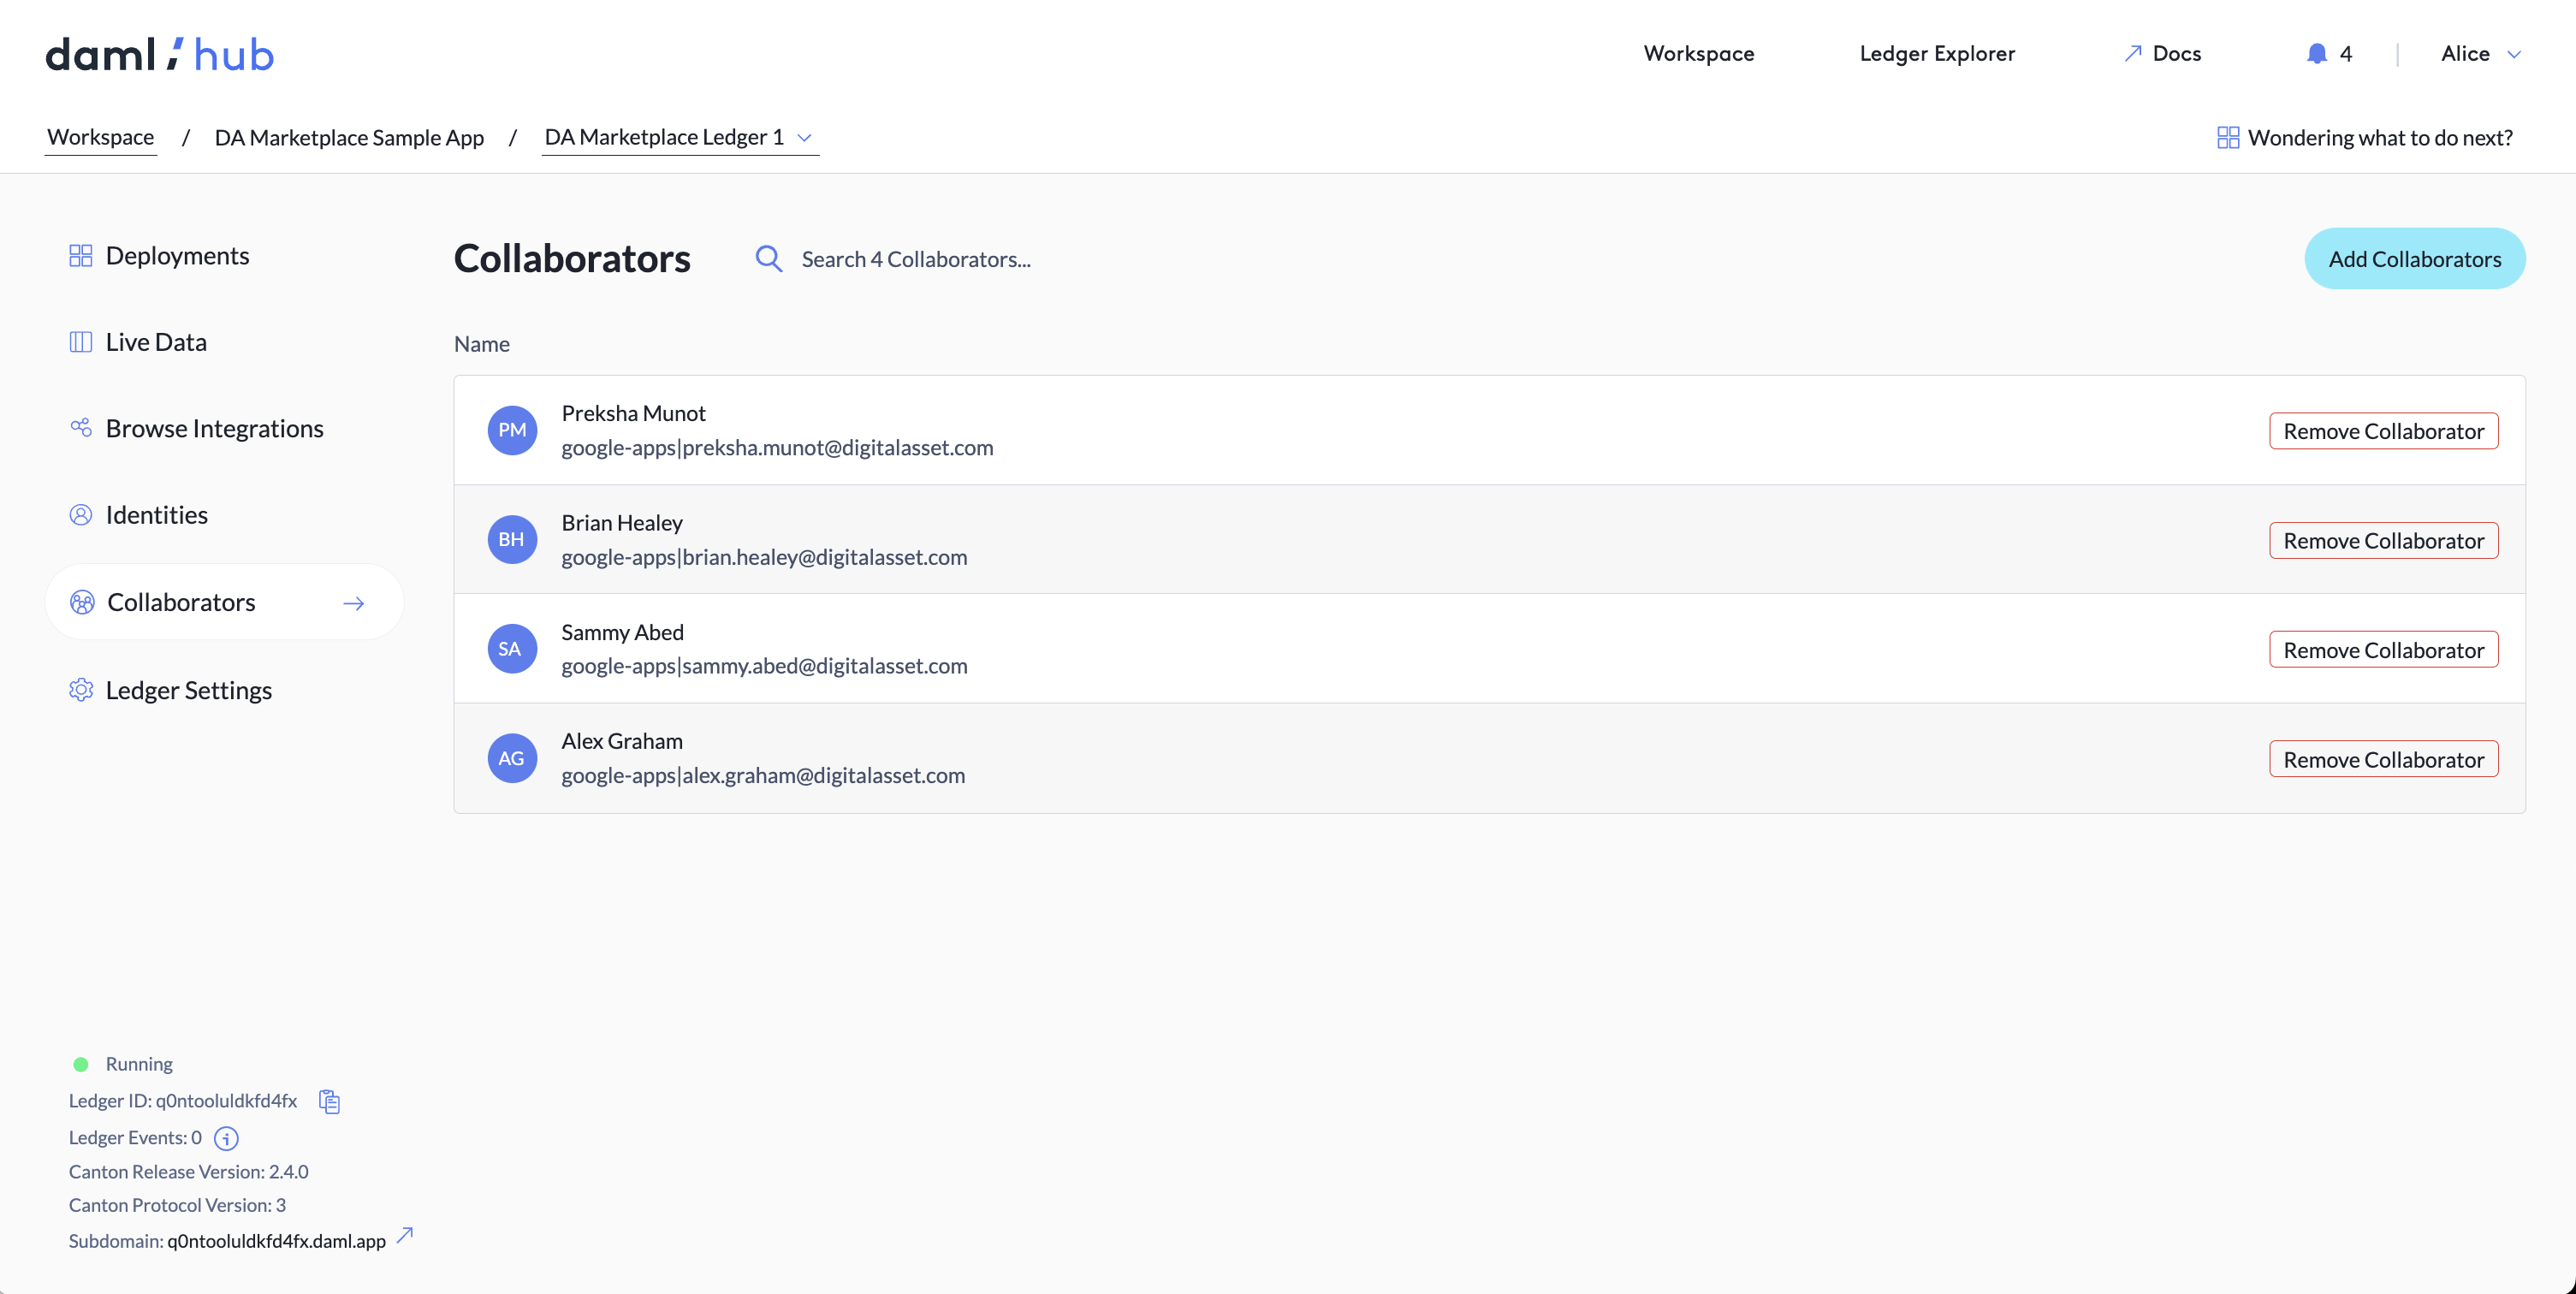
The Collaborators tab lets you manage the other Daml Hub users contributing to your ledger. Ledger collaborators can do nearly everything a ledger owner can do, but they cannot delete the ledger, change ledger capacity, add/change subdomains, or add/remove other collaborators. Any collaborator added to your ledger gains a UserAdmin token and has administration rights on that ledger; see Default Parties in the Parties section for more details.
To add collaborators to your ledger, you must have their User IDs (which they can copy from their Account Settings page under the heading "User ID"). From the workspace, click the Options drop-down on the ledger's project tile and select "Share Ledger". Choose the ledger you wish to share and enter the User IDs of desired collaborators. Alternatively, you can add collaborators directly from your ledger in the Collaborators tab by selecting Add Collaborators. The ledger(s) you share appears in the collaborator's Shared Ledgers tab in their account's workspace.
Integrations
Datadog Logging Integration
Setup
Daml Hub supports exporting ledger and automation logs to Datadog. To export them, obtain a Datadog API key and configure your ledger to use it.
To configure your ledger:
- Click on a ledger in your workspace to navigate to the ledger view
- Open the Integrations tab
- Click on the Datadog integrations tile
- Paste in your Datadog API key and click submit
Your Datadog instance begins to receive logs for this ledger once Hub validates the API key. Note: As of 6/2/2023, there is a delay between creating a Datadog token and it being usable. You may have to wait briefly between creating the token and setting up your integration in Daml Hub. Until the token is active, using it in Daml Hub to integrate with Datadog results in the error "Error creating datadog integration: Provided Datadog API key did not work"
Which Logs Get Exported?
This Datadog integration exports logs for
- The participant, and
- Any automations you have deployed and are running
Filter Logs in Datadog
Once the logs are in Datadog, you can filter by ledger ID, automation ID, or container name, such as "participant".
Which Ledgers Can Export Logs?
Logs can only be exported on high-capacity ledgers.
Settings
The settings tab includes the following sections:
-
Tag service as production
- This setting is used to visually indicate a service is a production instance.
-
Pause service
- Takes a backup of the service's data before pausing it. This service can be resumed at a later time.
-
Delete service
- Permanently and irrecovably deletes the service and its data.
-
Storage
- Details at Storage
-
Default Participant Domain
- URL to access the participant service.
Default Participant Domain
Account Settings
To reach the Account Settings screen, click on your user name in the upper right corner of the Console and choose " Account Settings" from the drop-down.
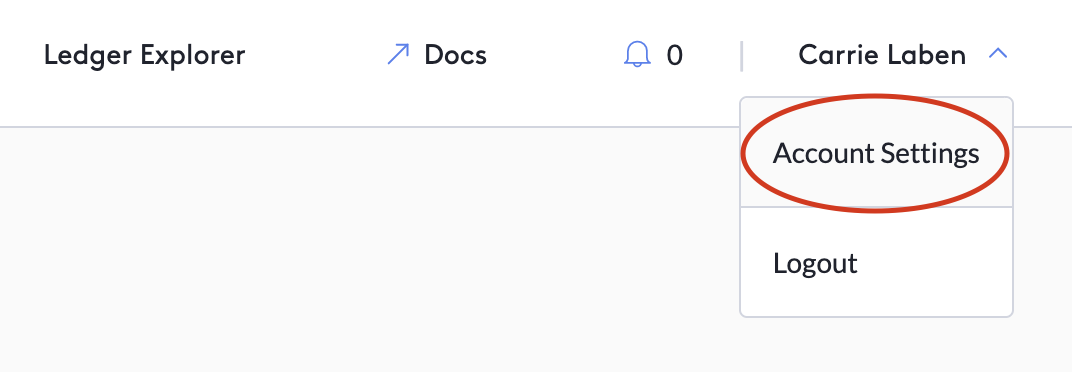
From Account Settings, you can access the Profile, Ledger History, and Personal Access Credentials tabs. This is formerly where you would access the Site Credentials tab, which is now deprecated.
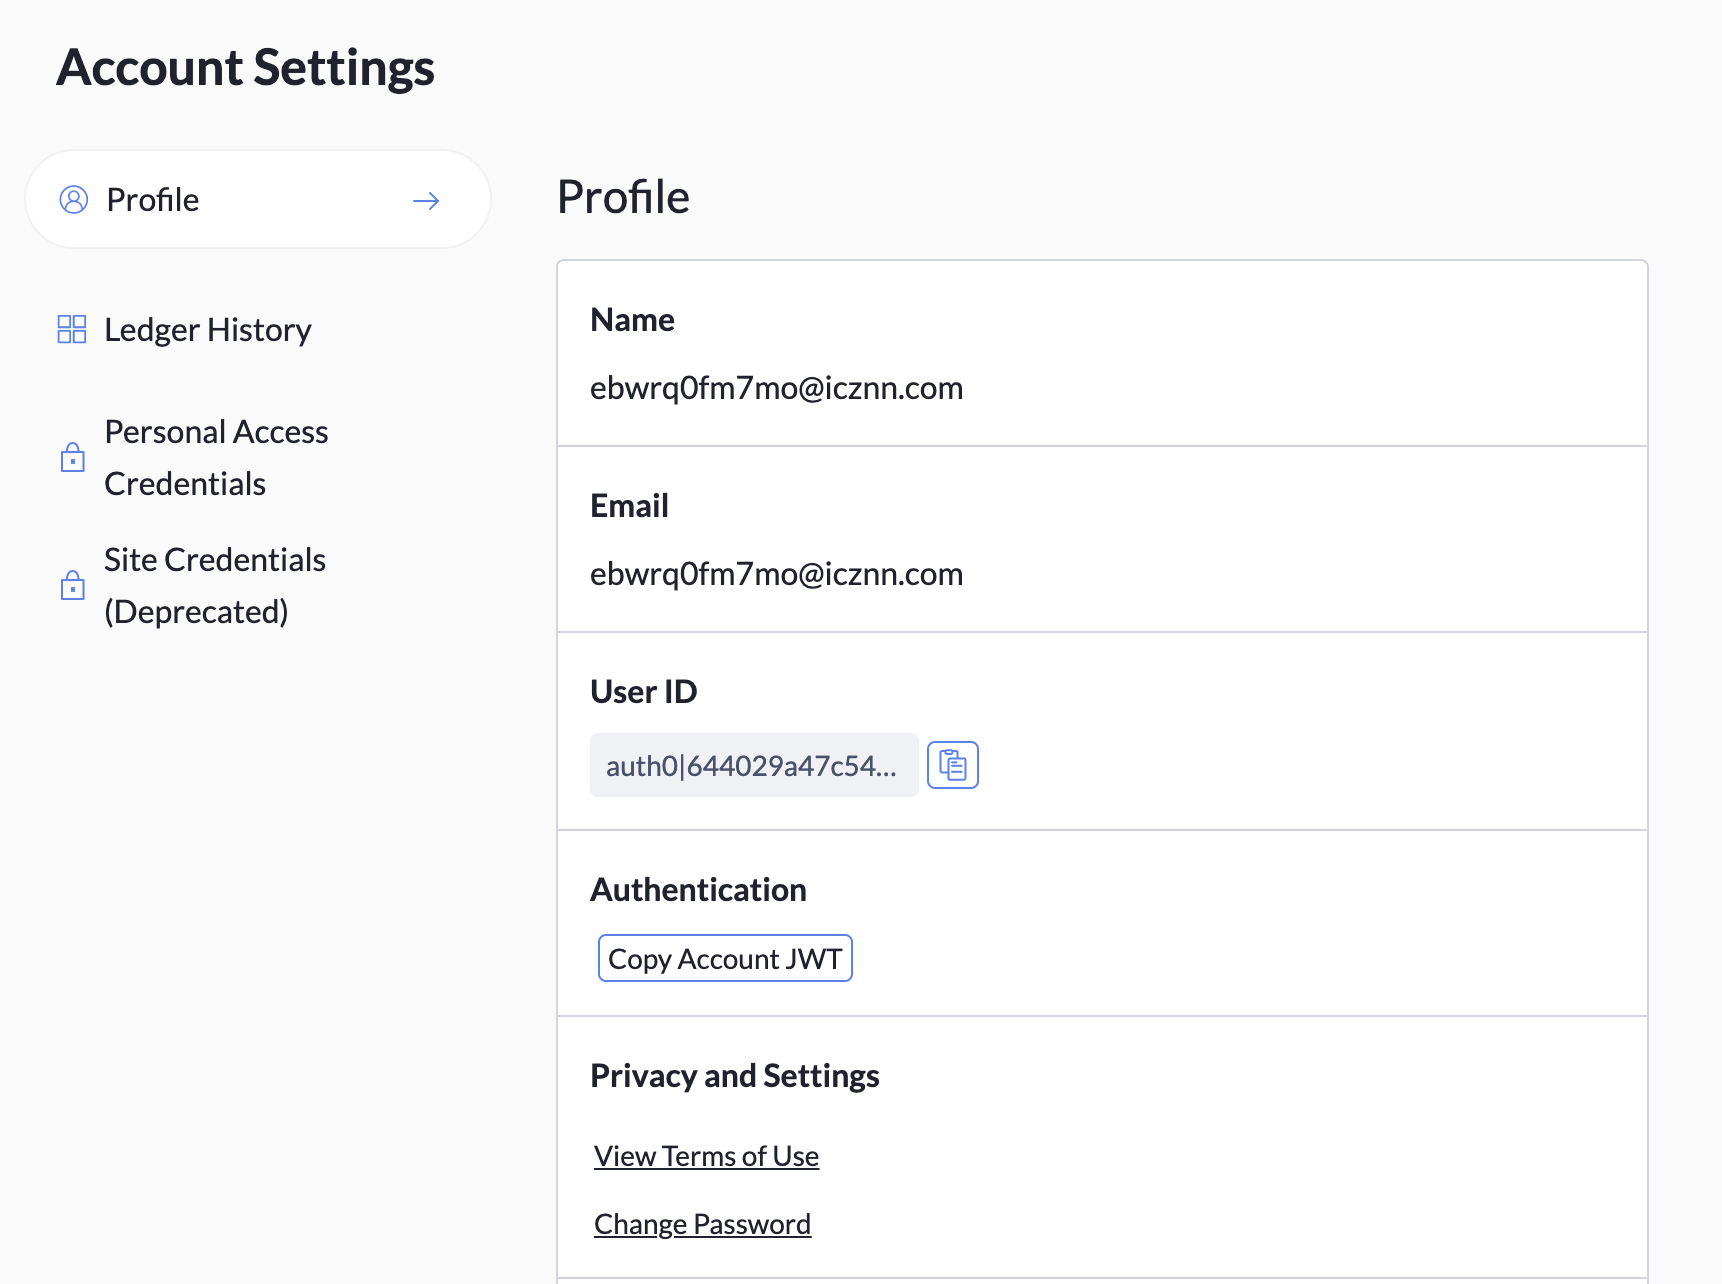
Profile
The Profile tab provides basic information about your Daml Hub account. It also allows you to copy your account's JSON Web Token (JWT) and choose whether to see pre-release versions of sample apps and integrations in your Workspace and the Integrations tab.
Ledger History
The Ledger History tab shows each of your ledgers with its ID, date of creation, status, and the number of events that have occurred on the ledger. You can also pause your ledger(s) from this tab.

Personal Access Credentials
Personal Access Credentials (PACs) are long-lived, stable credentials that you can configure with human-readable names, set expiration dates, and specific permissions. From these PACs you can generate short-lived access tokens used when making API requests to Daml Hub.

Note: When you generate a new PAC, you must save the secret associated with the PAC at once. You cannot retrieve the secret once you navigate away from the Personal Access Credentials tab.
Site Credentials (deprecated)
The use of Site Credentials is deprecated, and PACs should be used instead.
Service Accounts
Service Accounts lets you generate a credential to interact with external services.
Operate and Maintain Apps On Daml Hub
User Management
The User Management service eliminates the need for multi-party tokens and simplifies the assignment of read-as and
act-as rights assigned to various parties.
Users and Parties
Parties and users are distinct concepts in Daml - a user can read and act as multiple parties at once.
The easiest way to think about parties and users is by analogy to classical databases: Users are analogous to database
users, while Daml parties are analogous to database roles. Additionally, the rights granted to a user are analogous to the
database roles assigned to the user.
Types of Parties
Daml Hub includes two types of parties: default parties and ledger parties.
Default Parties
Default parties are created automatically when you create a Daml Hub ledger, and are initially the only type shown in the Parties zone of the Identities tab. These include the UserAdmin and Public parties and are also referred to as “well-known” parties. They can be used by your Daml Hub application for the convenience of users and administrators. Users of your application (or UI) can find the default party identifiers using the getDefaultParties Endpoint.
The Public party is useful when you want to expose some contracts on the ledger to every user of the application. This is achieved by providing the Public party identifier as an observer to any contract you create that you want to expose publicly. Anyone can fetch a read-only token for the Public party using the getPublicPartyToken Endpoint and use it to query the ledger for public data.
The UserAdmin party grants administration rights and can be used as a ledger operator to help orchestrate administrative
workflows, such as onboarding new users and granting any roles or privileges you have defined within your app's Daml
models. The UserAdmin’s read/write token is only available to the ledger owner and to collaborators.
Ledger Parties
The parties listed under Ledger Parties are the ones created by you, the ledger owner, or on your behalf by any
collaborators on your ledger. For more information on ledger parties, refer to the Daml documentation site,
specifically Parties and Users On a Daml Ledger.
Manage Parties
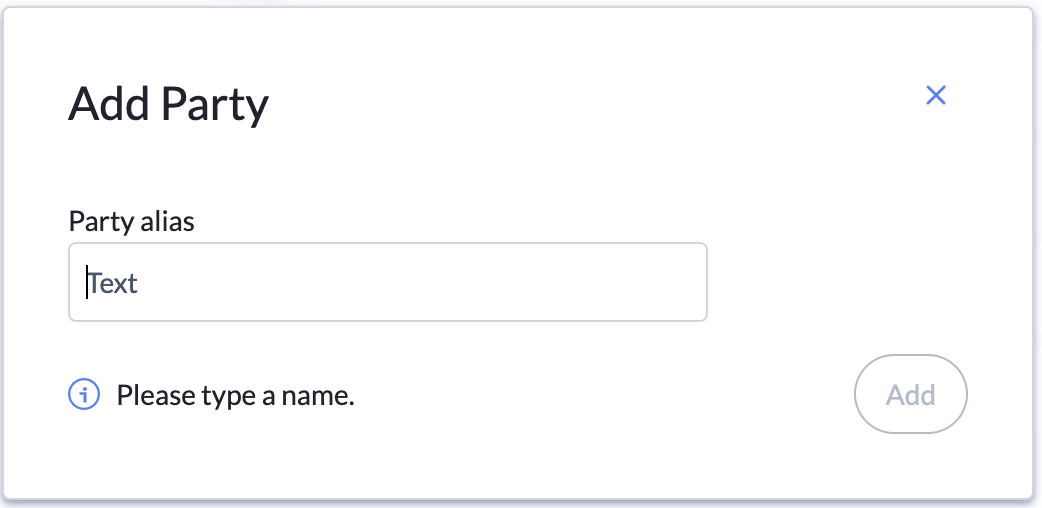
Clicking the Add Party button launches the Add Party pop-up, where you can enter an alias for a new ledger party. For the alias, select a unique name that does not contain any special characters.
Manage Users
To add a new user click the Add User button. This launches the Add User pop-up, where you can enter an alias for a new user.
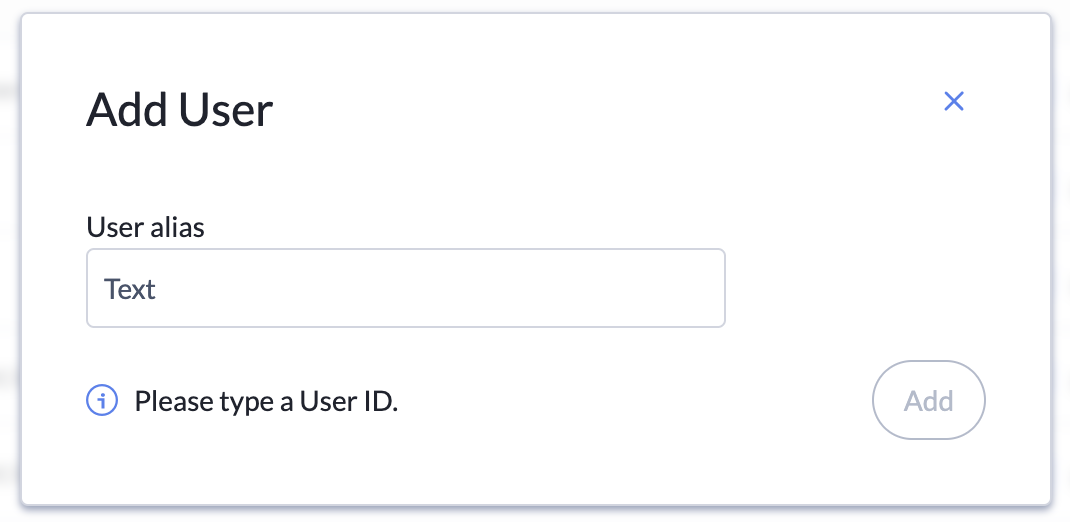
Each user is associated with a primary party created by default at the time of user creation. The newly created user has both the read-as and the act-as rights of the primary party.
To grant the user additional act-as rights, go to the Rights section and click the + icon labeled Associate Party under Act As.
To revoke act-as rights from the user, click the X icon to the right of the party with the rights you are removing.
To grant the user additional read-as rights, go to the Rights section and click the + icon labeled Associate Party under Read As.
To revoke read-as rights from the user, click the X icon to the right of the party with the rights you are removing.
To delete a user entirely, click the Delete User button (bordered in red) next to the user's name.
To grant the user administration rights, add a collaborator following the steps in Collaborators. All collaborators have UserAdmin rights by default.
Ledgers
After signing in to Daml Hub, you are able to navigate to the Ledgers view by clicking the Show Ledgers View toggle at the top.
The Ledger View workspace is where you manage your projects, ledgers, files, and ledgers that have been shared with you. Each project can contain multiple ledgers that differ based on their deployments. Both projects and ledgers can be created and deleted within the workspace. For more information on ledgers, see the Daml Ledger Model.
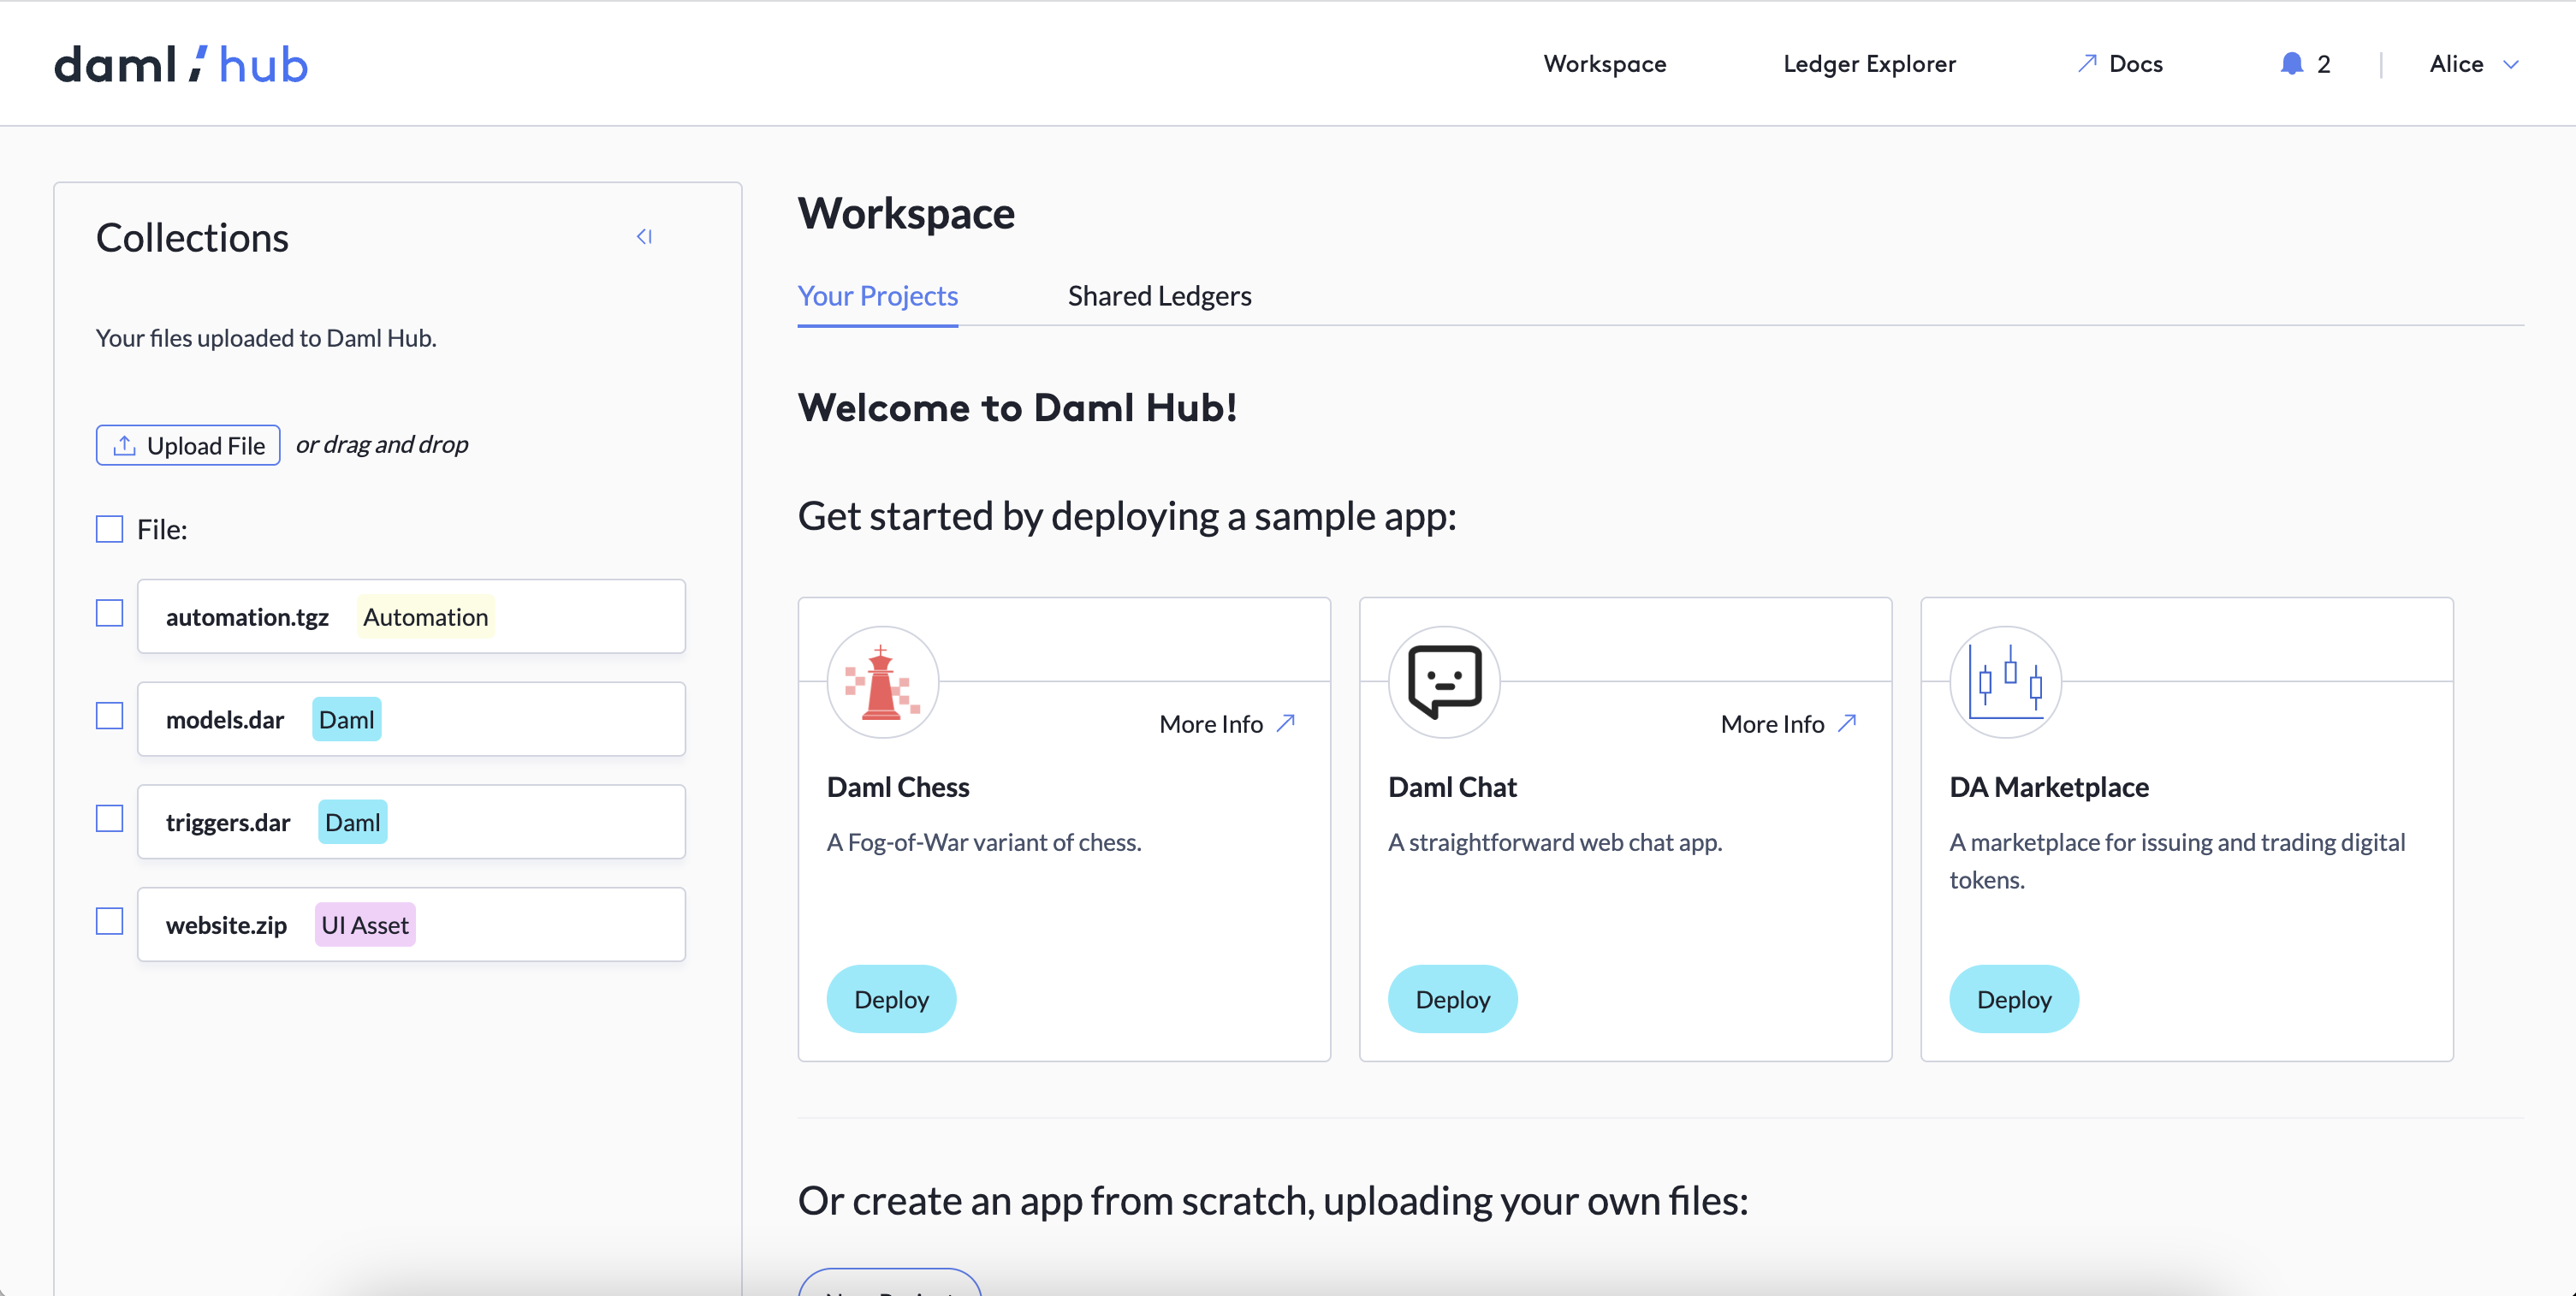
The workspace is split into two zones, Your Projects and Shared Ledgers. Your Projects is where your projects and ledgers live. Shared Ledgers is where you find ledgers that have been shared with you. Collaborating on ledgers allows two or more Daml Hub users to configure, deploy artifacts to, and manage the same ledger instance. As a collaborator on a ledger, you can do everything the ledger owner can do, with four exceptions: you cannot delete the ledger, change the ledger capacity, add/remove other collaborators, or add/change a subdomain for the ledger.
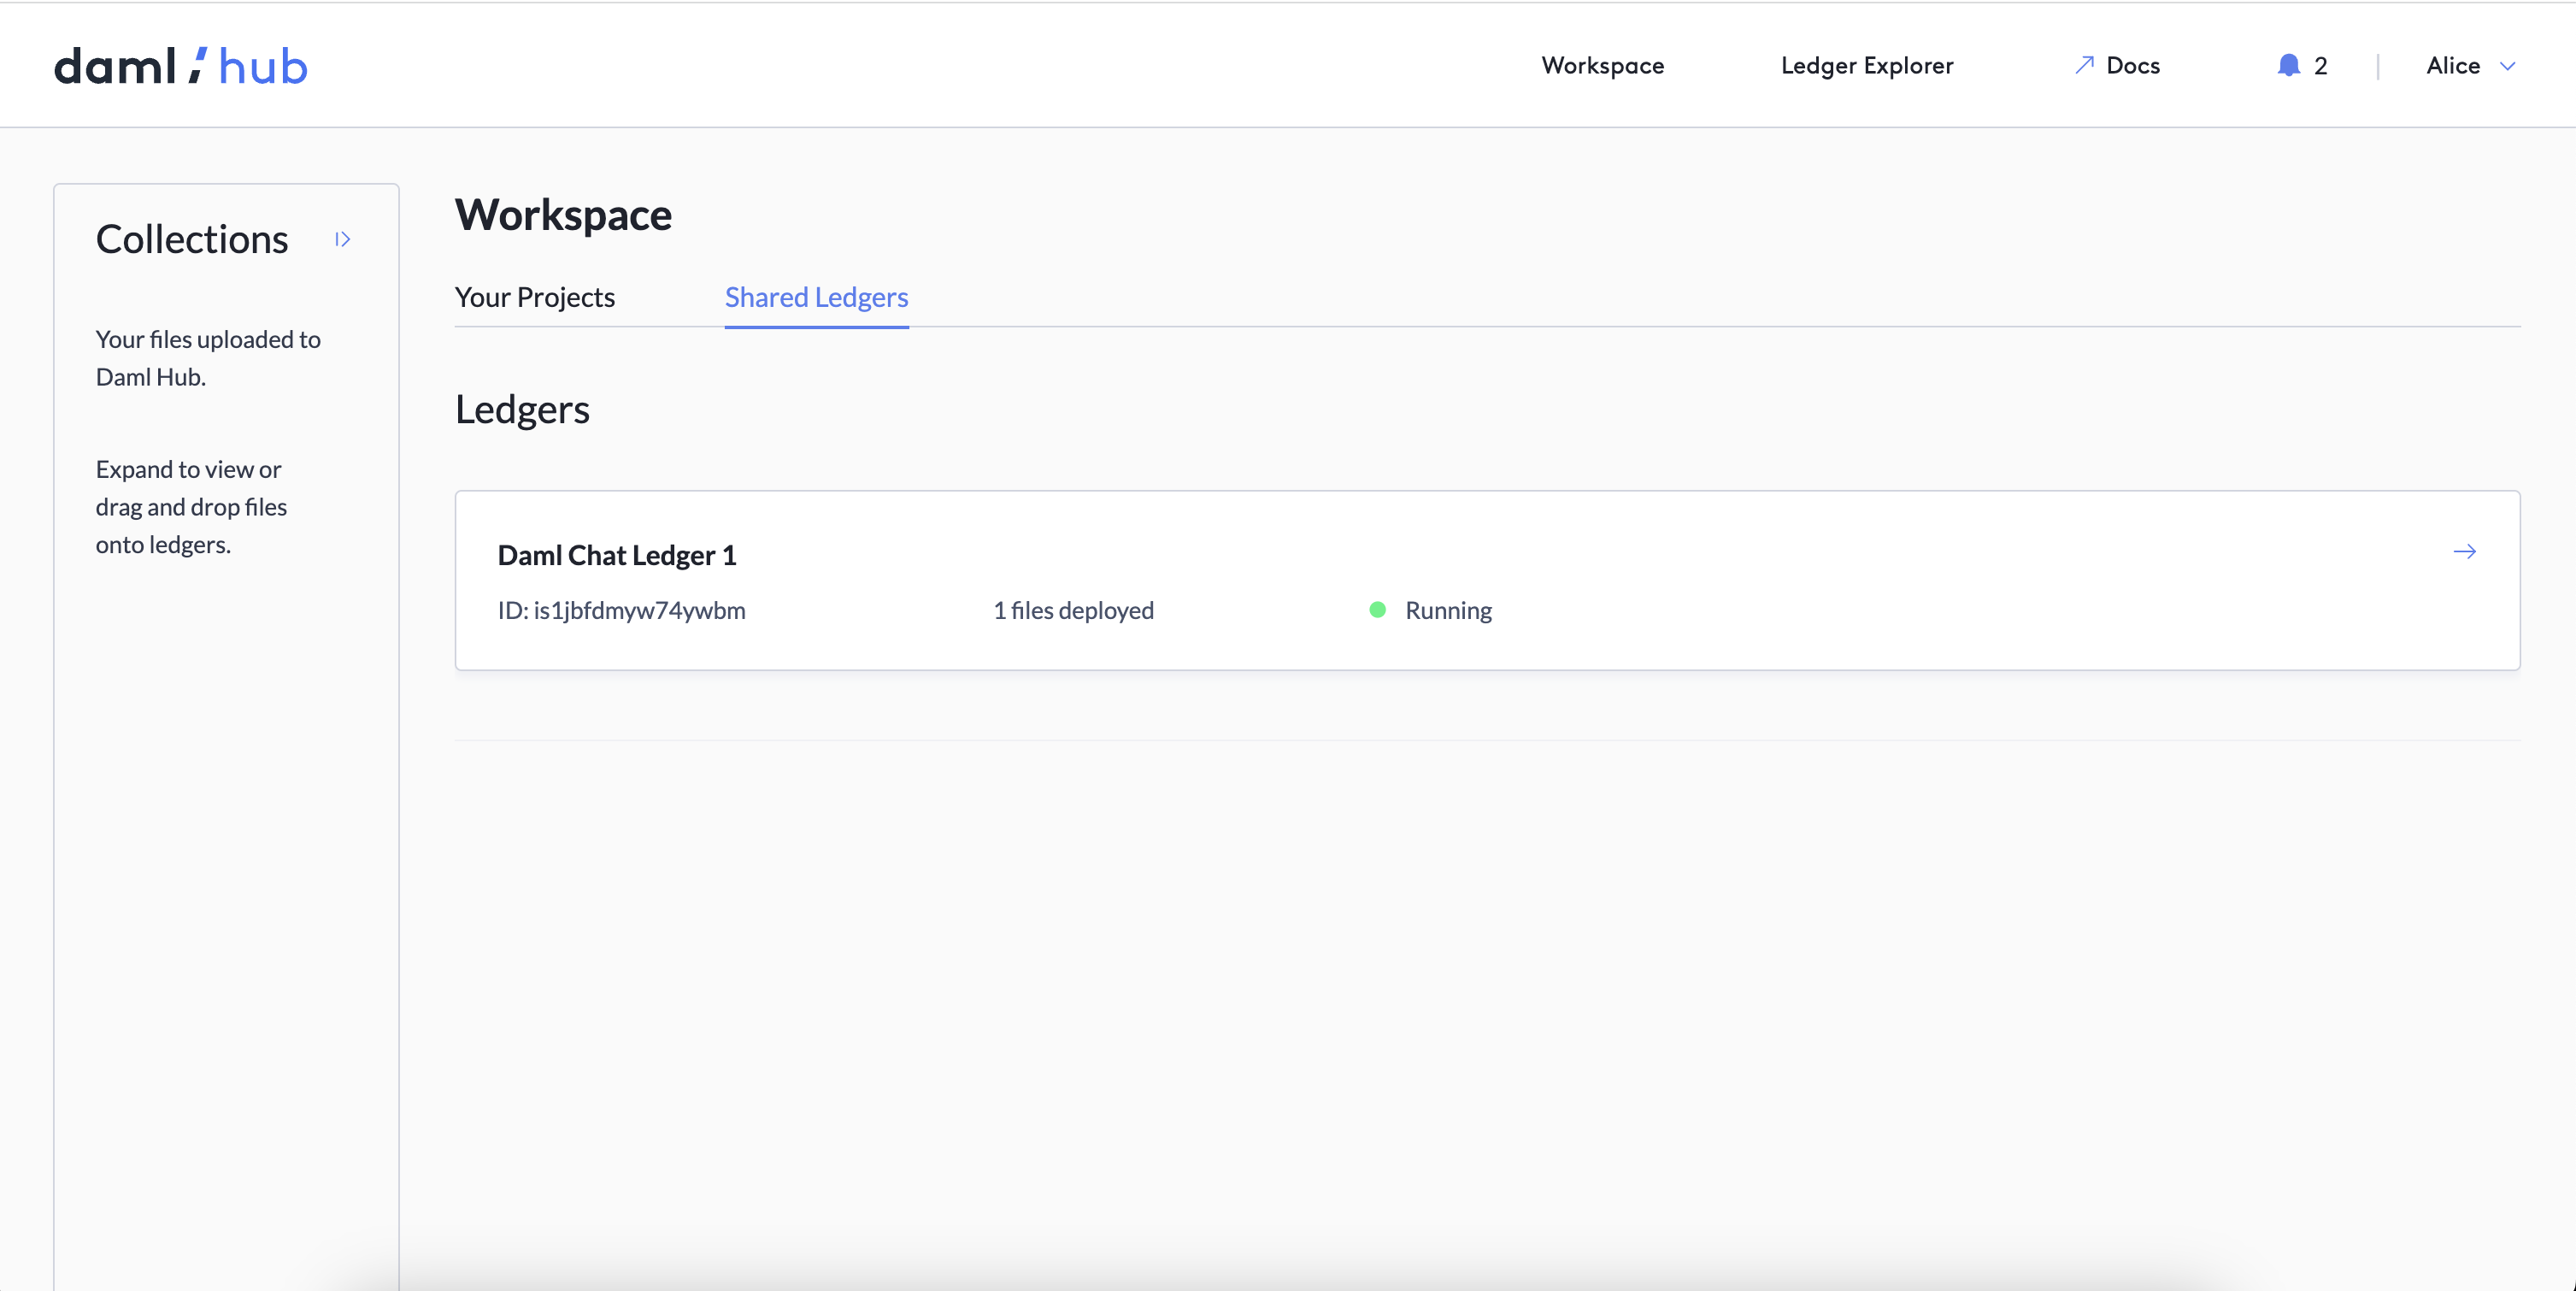
Collections
The Collections column at the left of the workspace lets you upload and manage files containing Daml models and triggers, automation, and UI assets. Keeping your files in your workspace collection makes it easy to deploy and re-deploy them across multiple ledgers. Files can be deployed into a ledger from the workspace collection by clicking the button Deploy to... or by dragging and dropping the file into a ledger.
The workspace is also home to fully functional, pre-built sample applications. You can deploy these applications to dedicated ledgers with a single click. For more information and a quick start guide, see Sample Apps.
Quick Build Tab
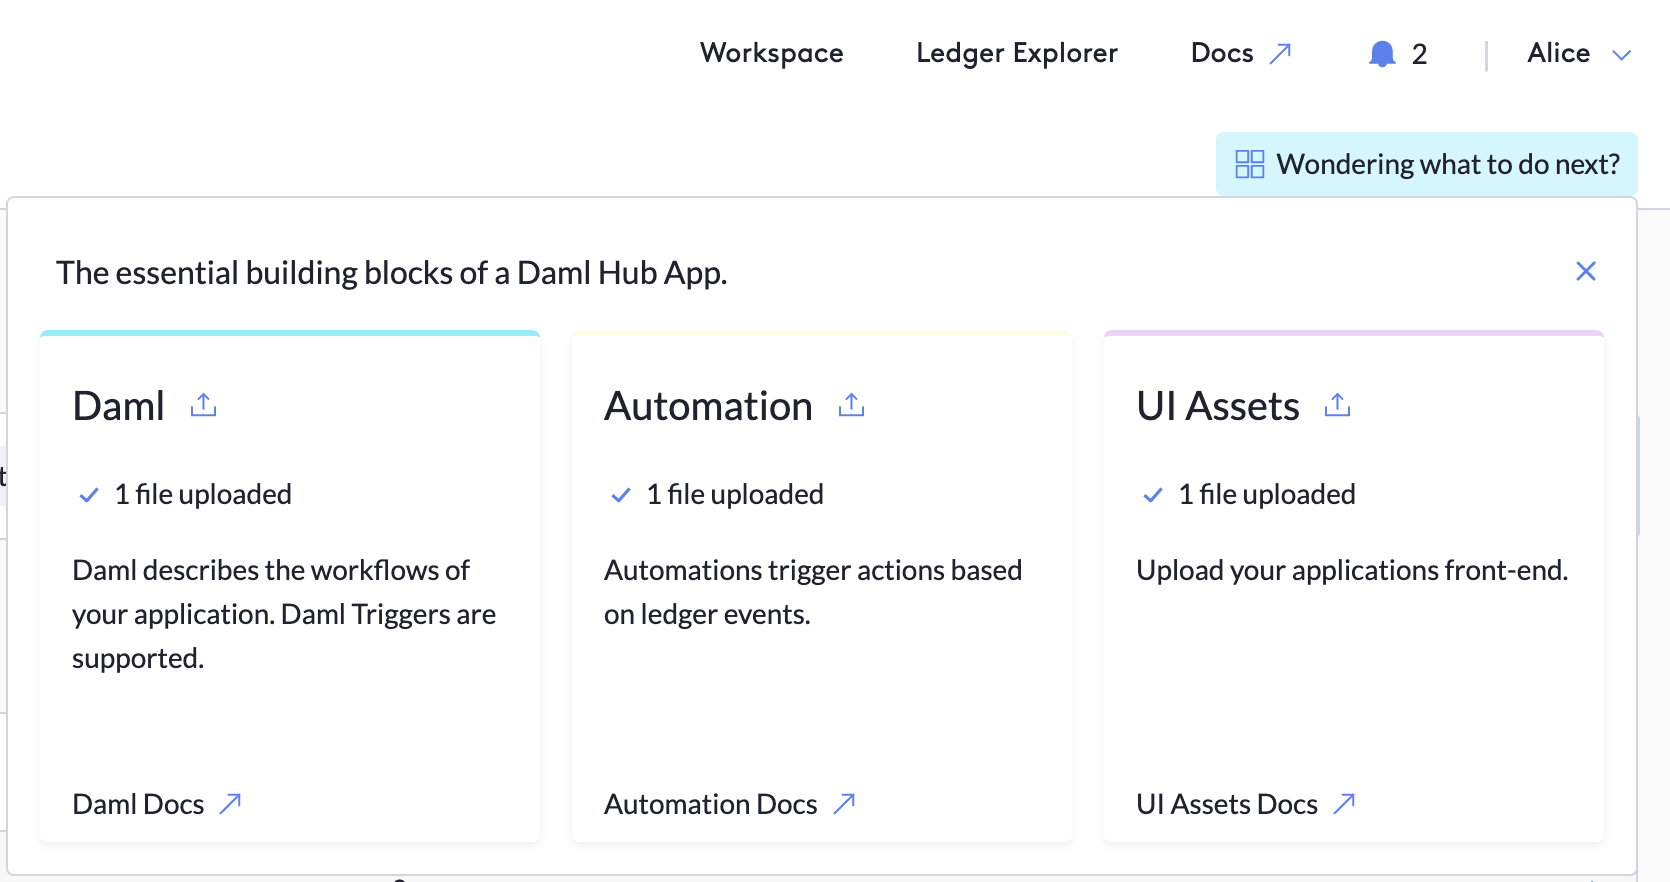
The Quick Build tab is revealed when you click Wondering what to do next? It shows you the building blocks of a Daml Hub app and the file count of your current ledger. Click on a tile to upload Daml, Daml Triggers, automation, and UI assets directly to your ledger. These tiles also contain links to their corresponding sections of the Daml Hub documentation.
Service Accounts
Service Accounts lets you generate a credential to interact with external services.
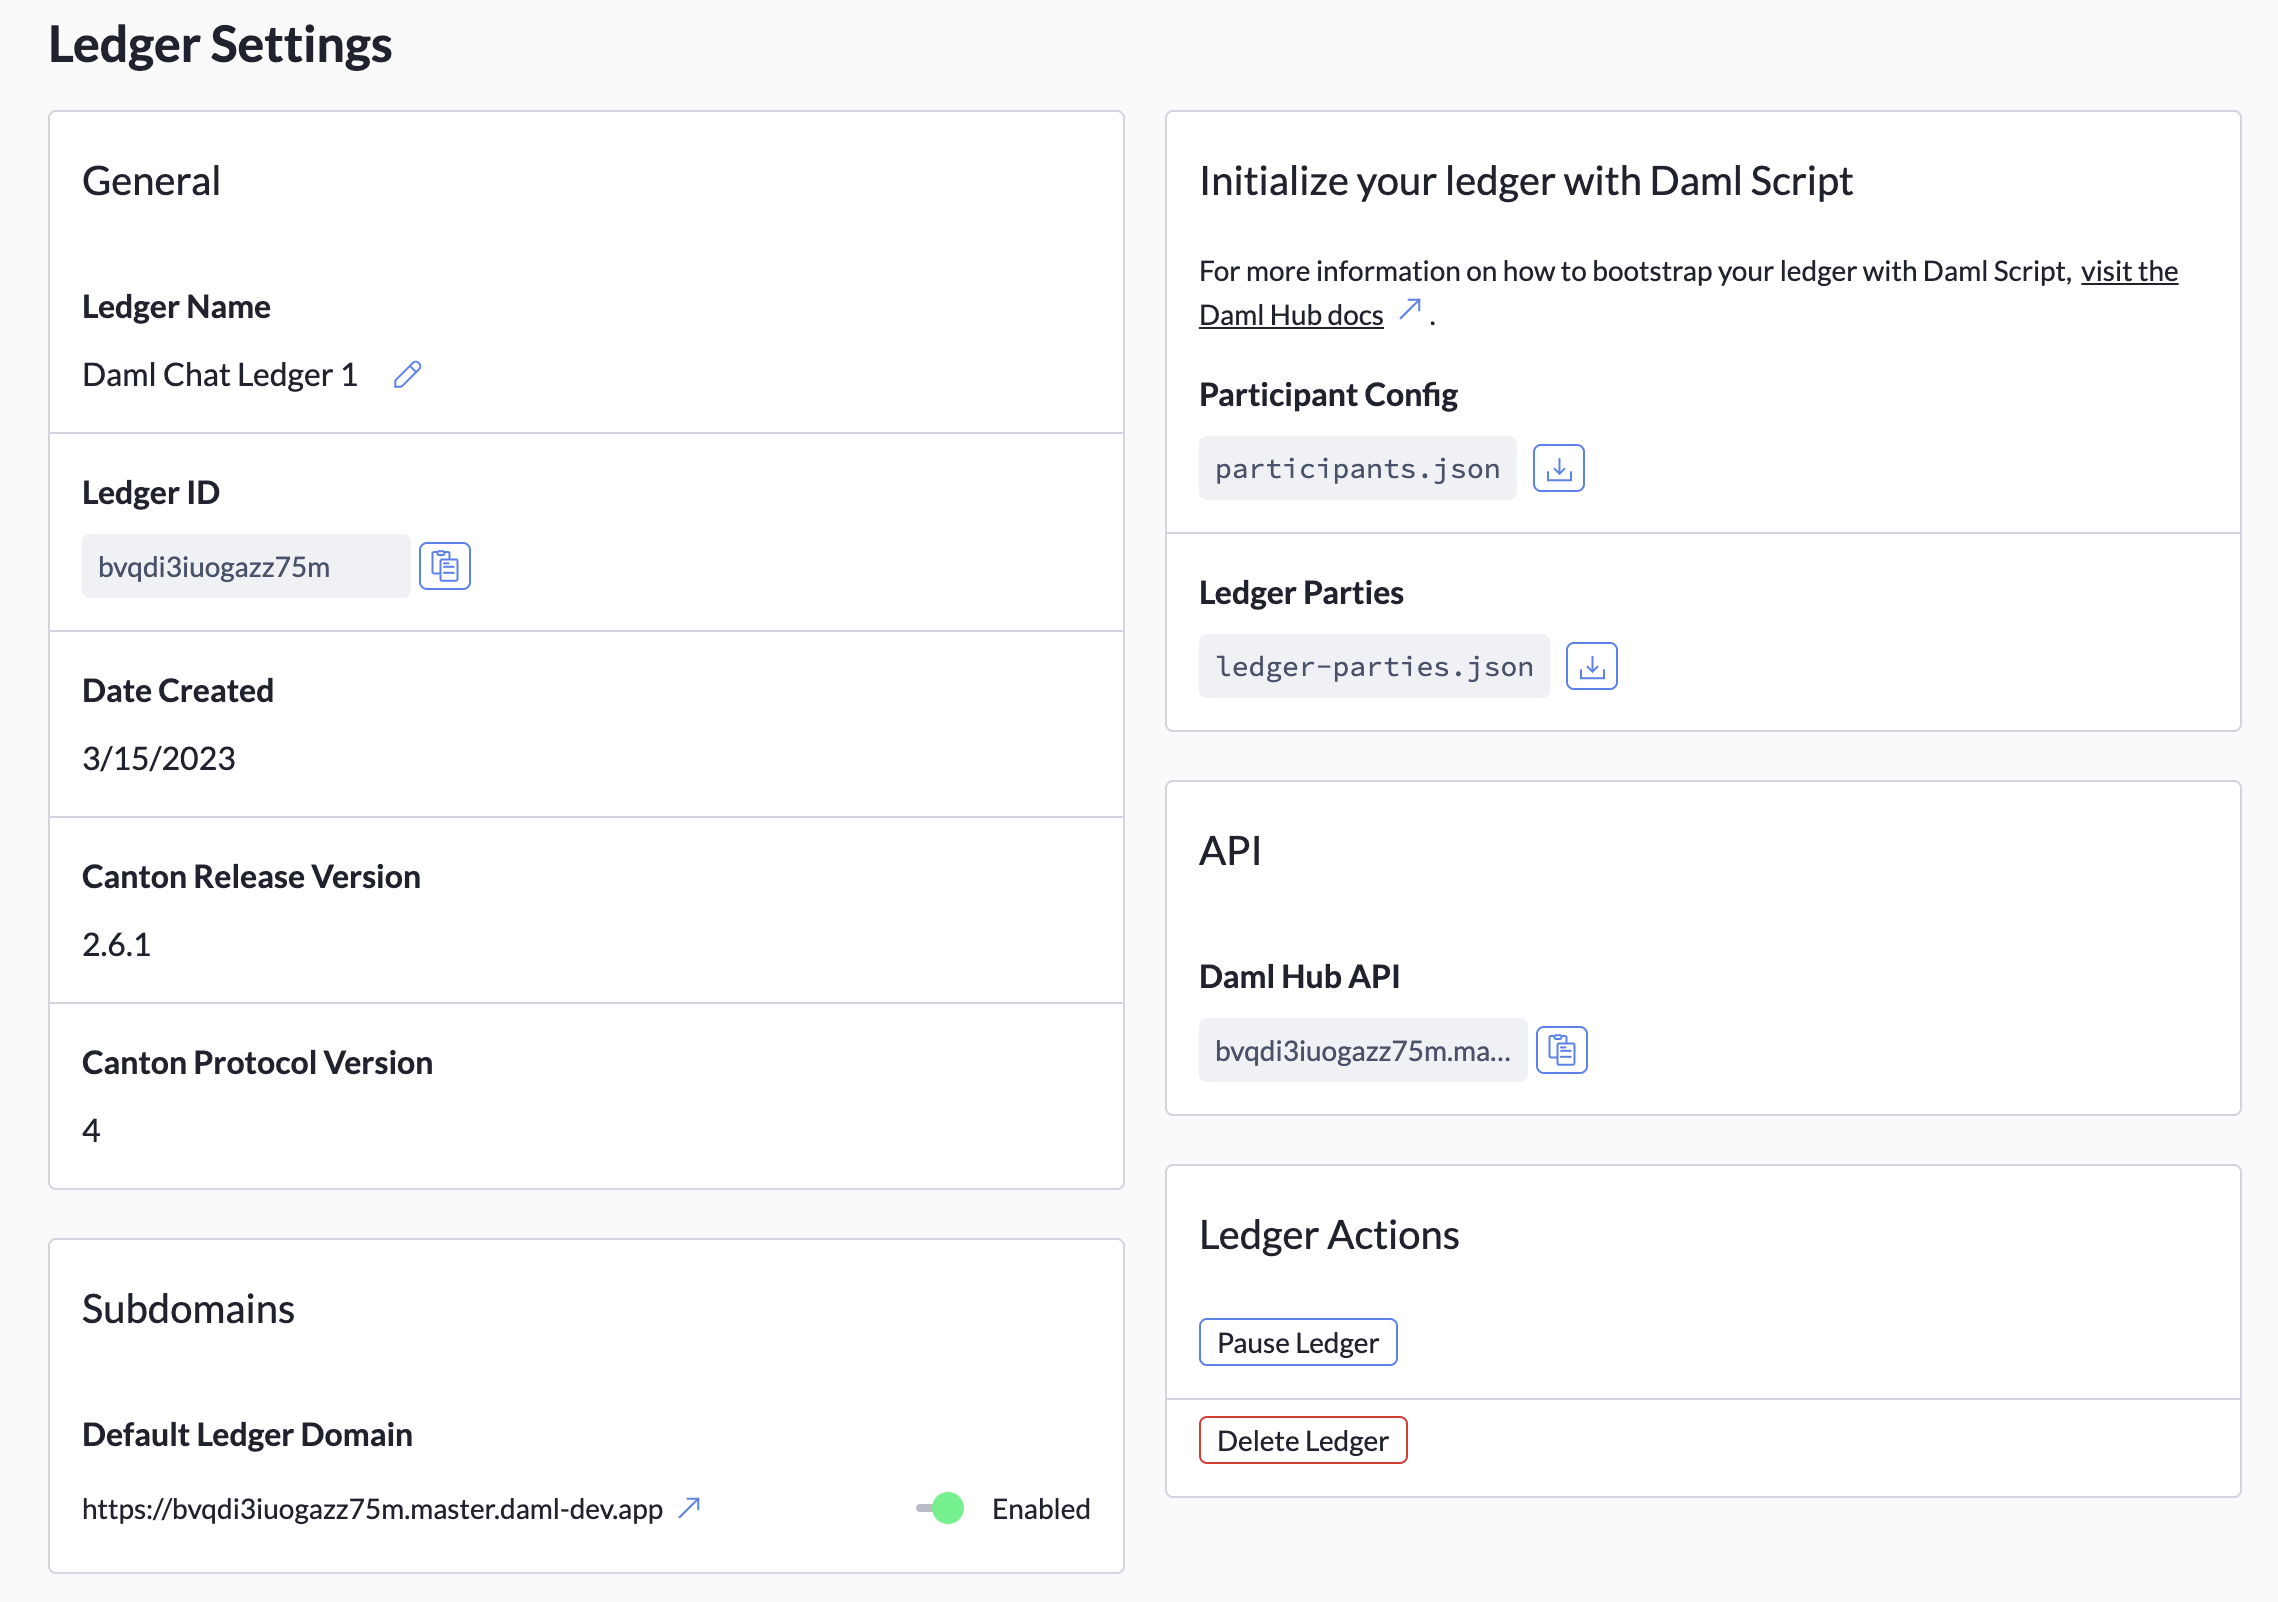
Ledger Settings Tab
The Ledger Settings tab allows you to find basic information about your ledger and interact with it by renaming, pausing, or deleting it. You can also initialize a ledger or manage subdomains.
Integrations Tab
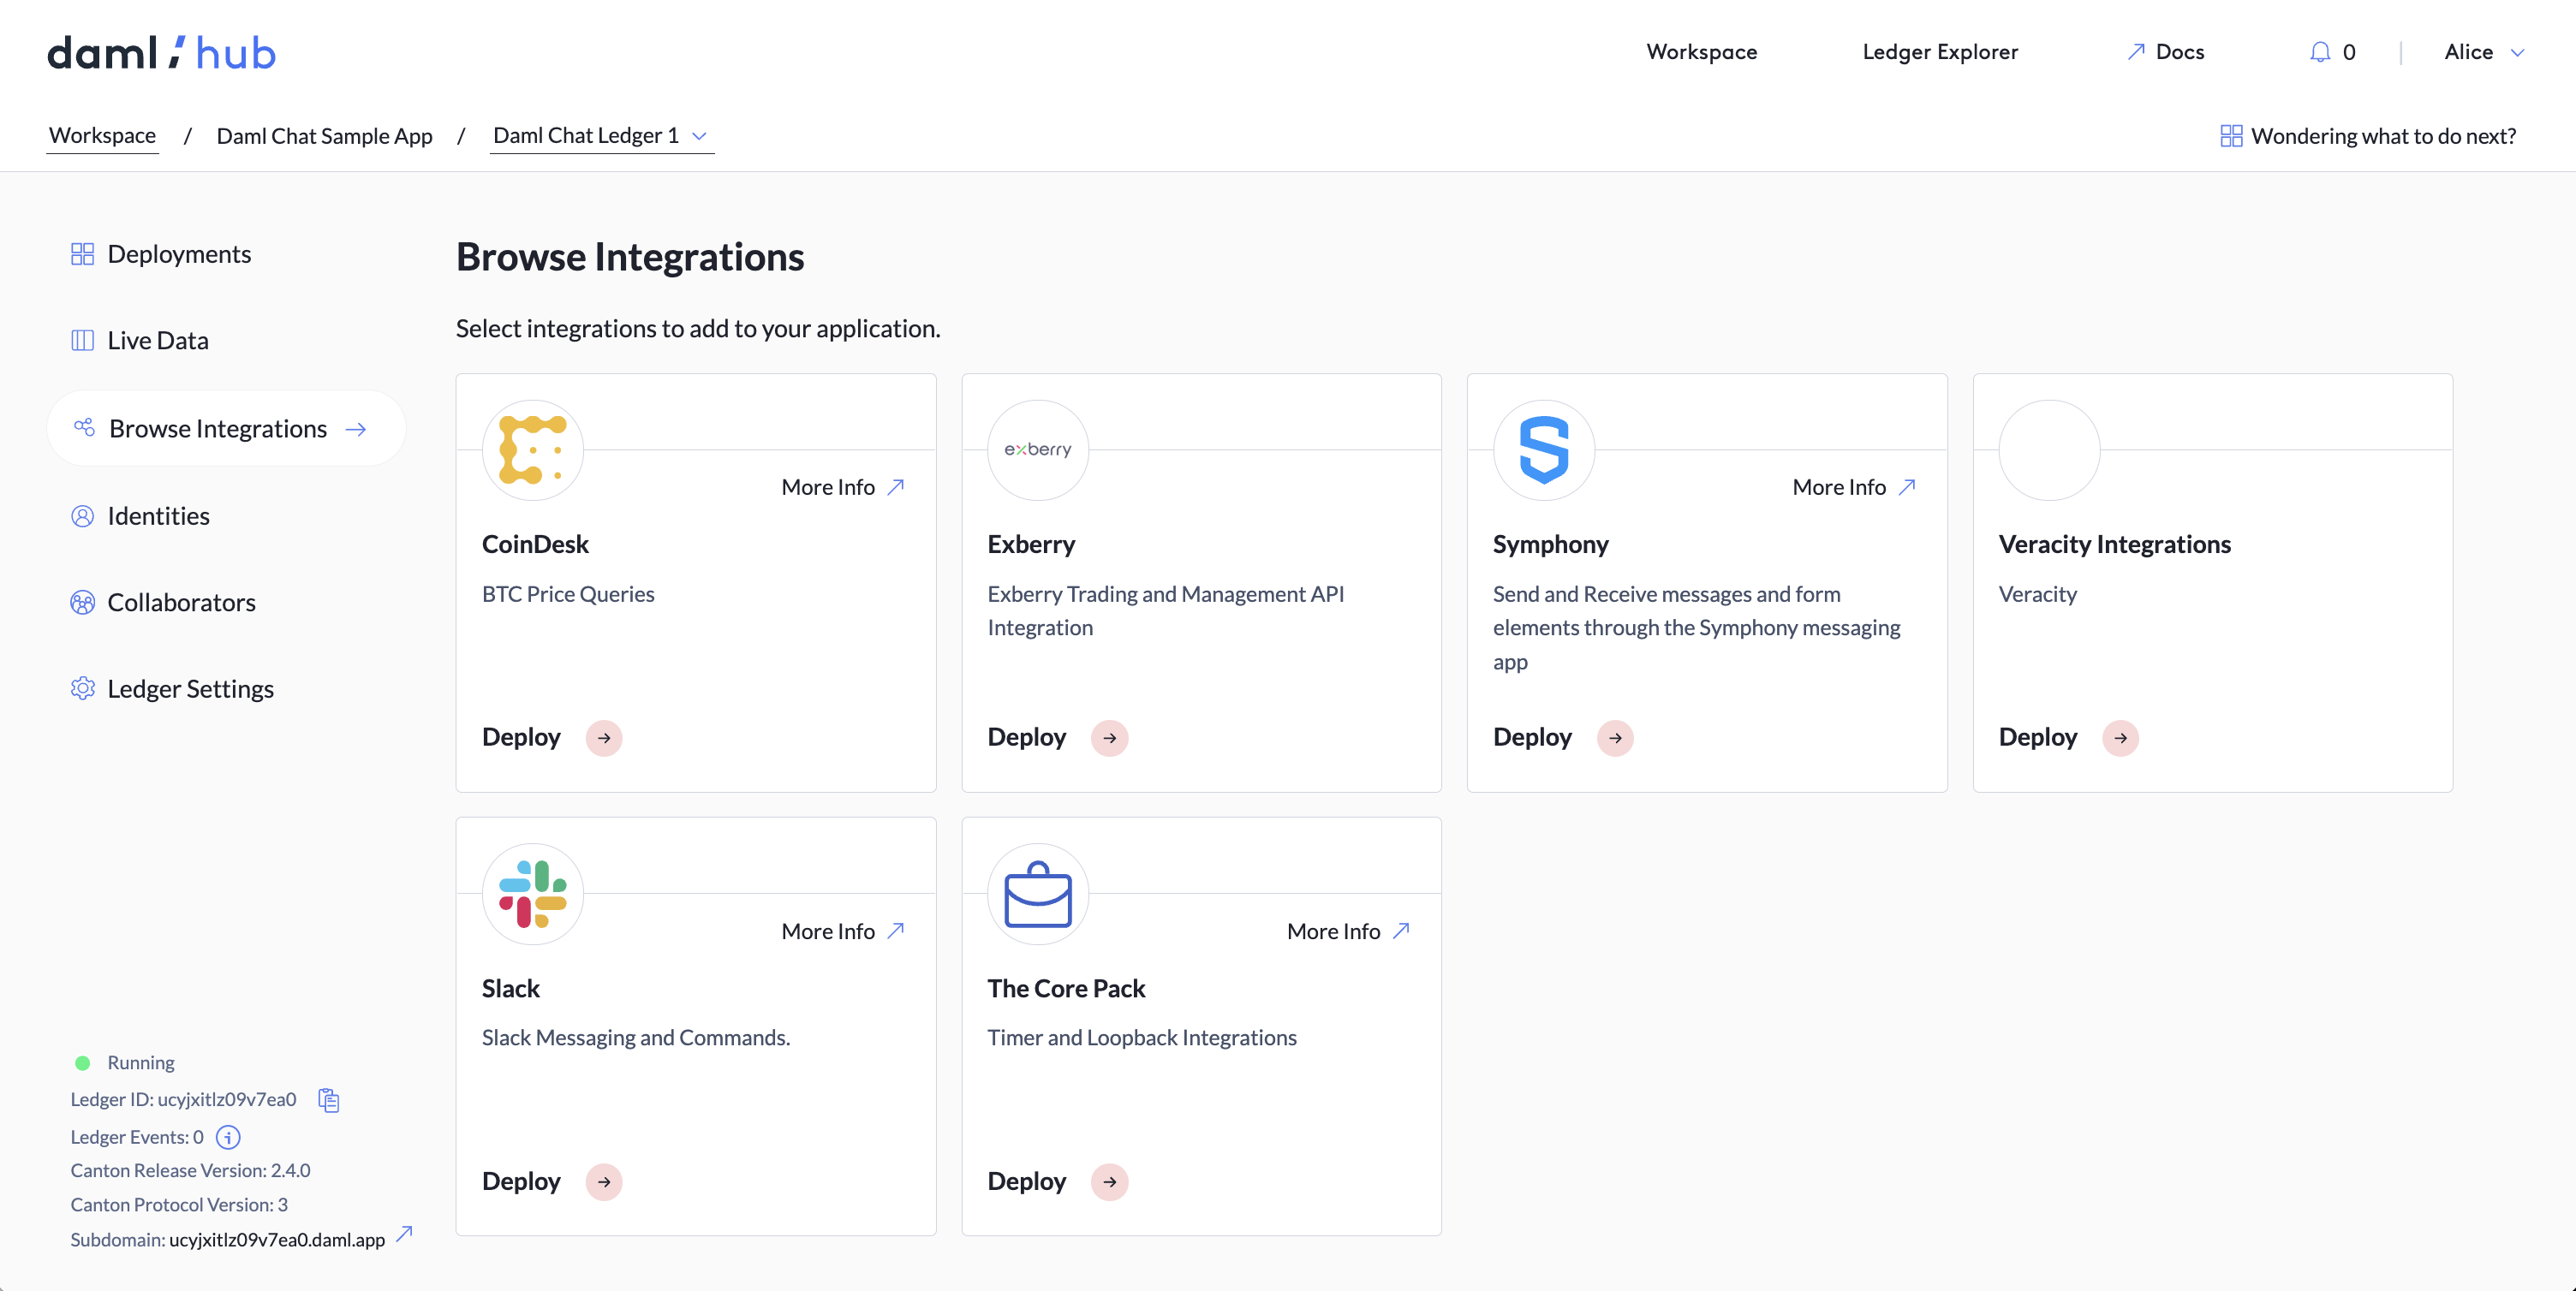
Daml Hub integrations available for installation are shown in the Integrations tab. You can install an integration into a ledger by clicking the Deploy link for the corresponding integration.
Integrations (Legacy)
Note: Daml Hub integrations are a legacy feature in the process of being deprecated.
Integrations are installable modules that allow your app to interact with the outside world by sending and receiving
requests from external systems. Once installed in a Daml Hub app, an integration mediates between the Daml Hub ledger
and an external system, managing connections to the external system, converting data to and from Daml contracts, and
participating fully in the Daml security and permissions model. Integrations are uploaded and deployed as .dit files,
and managed through the Daml Hub console. To get started, a standard package of basic integrations is available in the
Workspace under After you create a project....
Daml Hub integrations available for installation are shown in the Integration tab of the ledger view. Click the Deploy link for a given integration to install it into a ledger.

Once the integration has been installed into the ledger, the tile updates to show a "View deployment" link that takes you to the Deployments tab for the ledger. This allows instances of that integration to be installed and managed within the ledger.
To enable the deployment of previous versions of an integration, toggle the "Enable Pre-Release Sample Apps and Integrations" switch in Account Settings. If multiple versions of an integration are available, they are listed in a drop-down in the upper right corner of the respective tile. Unless you have a specific reason to do otherwise, it is best to install the latest version, which is the default selection of the drop-down. As you set the drop-down, the tile updates to show information relevant to the selected version. This includes the deployment status of the integration. (Note that it is possible to have multiple versions of the same integration installed, which can be useful when migrating from one version to the next.)
Once an integration is installed, the integration becomes available for deployment on the Deployments tab for the ledger:
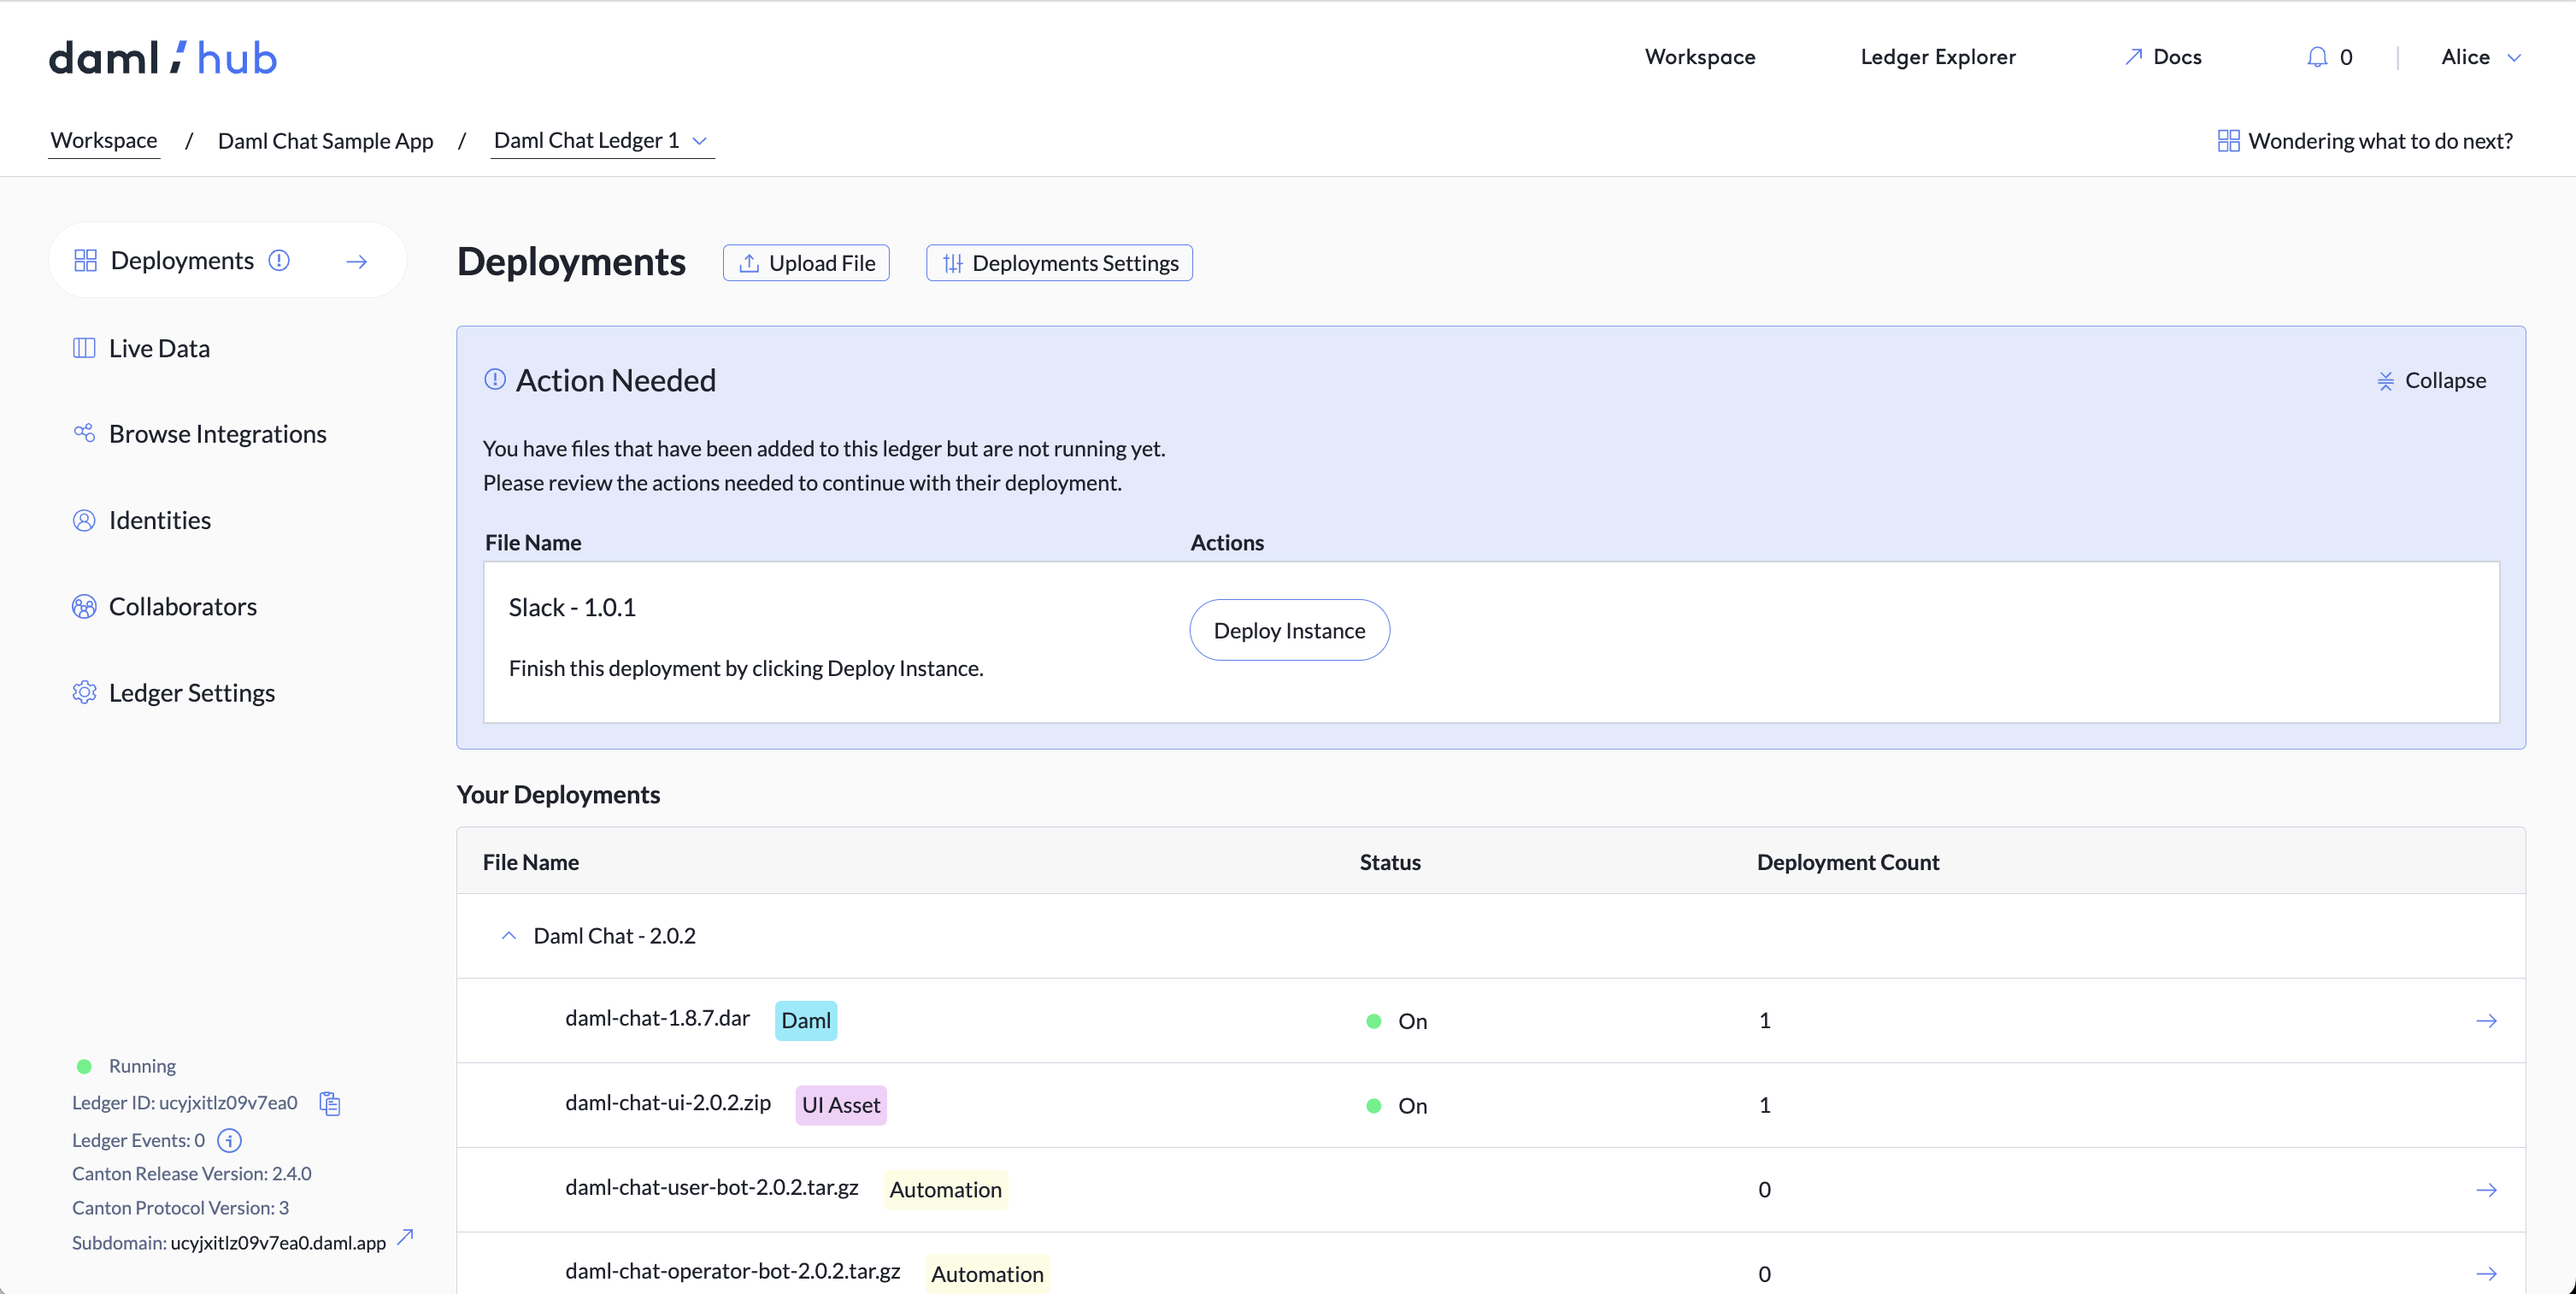
Deploying the integration makes its resources available for use. Integrations generally contain a Daml model that represents their data model and integration types that can be deployed to connect the ledger to the outside world. The Daml model bundled within an integration is like any other Daml model installed into a ledger. It is possible to inspect the Daml code for the integration's Daml model, create and inspect contracts defined within that model, and exercise choices on those contracts. (In fact, ledger actions taken on an integration model's contracts are usually the public API for that integration, such as Creating a contract to send an outbound message).
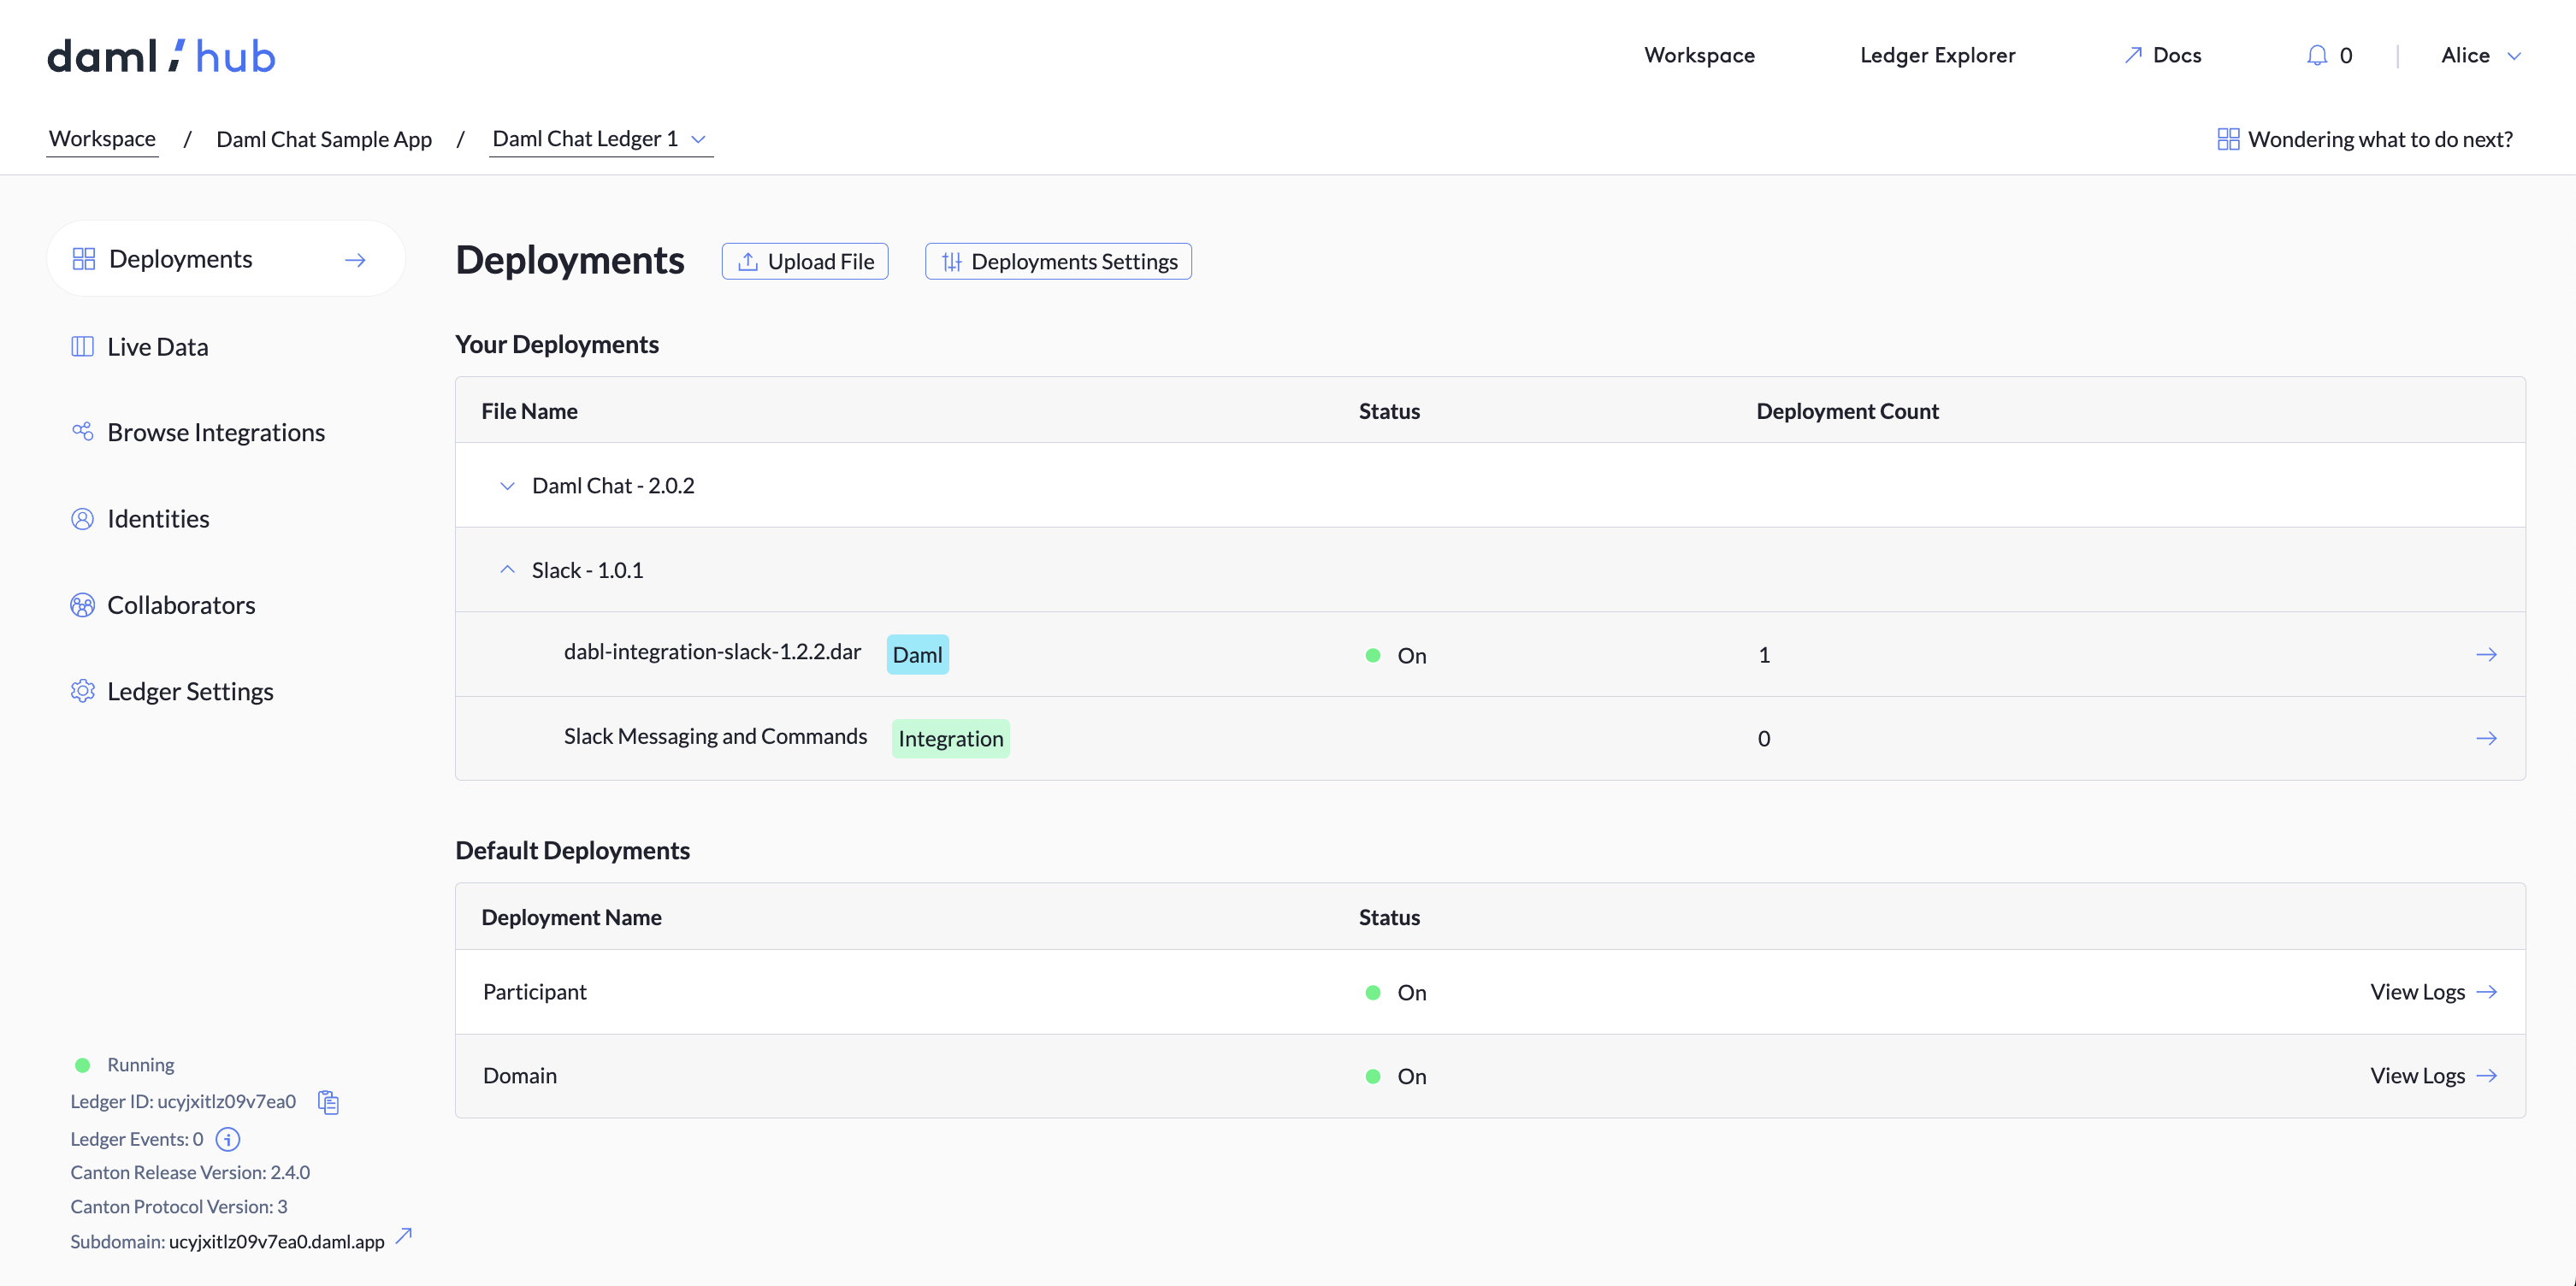
Once an integration has been installed into a ledger, instances of integration types defined within that integration may be deployed. Clicking on an integration type displays a screen showing configuration options for that integration.
Every integration has two standard configuration fields - a field for a label describing the purpose of the specific integration and a field identifying the ledger party the integration runs as. When running, the integration has only the rights of the "Run As" party - it can only see events relating to the contracts visible to that party and can only exercise choices on behalf of that party. If there is a need for an integration to run as more than a single party, a separate deployment of the integration must be created for each party. Some integrations also allow for additional configuration fields beyond just these two.
Once the integration has been launched, it appears on a list of deployments of that type of integration. Additional deployments (running as different parties or with different configuration settings) can be added by clicking on the Configure New Instance tab. Deployments may also be selected to allow them to be disabled or removed entirely.
There are also options available under View Details for inspecting and adjusting the configuration of the integration, viewing the detailed status of the integration, and seeing a technical log of how the integration is operating.
You can view running integrations as listed on the Deployments screen. Clicking on the name of the integration links to the deployment list for that specific integration and the screen for creating new deployments of that type.
For integrations that have inbound webhooks, the URLs of those hooks are visible under the detailed status for that integration deployment.

Core Integrations
Daml Hub ships with two special-purpose core integrations. These are not typical integrations in that they do not strictly integrate with external systems. Instead they are used to solve specific problems without additional code. The first is a periodic timer integration that allows ledger choices to be exercised in response to a periodic timer. The second is a Loopback integration that allows ledger commands to be issued in response to events occurring on the ledger.
Custom Integration Types
If you want to add custom integration types to Daml Hub, either for your own use or for the community, please contact Digital Asset for more details.
Deploy Apps To Daml Hub
Subdomains
Each ledger in the workspace is given a default domain. This is the web address of your application. Users can also set a ledger's custom subdomain. You can view these domains in the Ledger Settings tab.

Custom Subdomains
Daml Hub's Custom Subdomain feature allows you to specify, reserve, and assign custom subdomains to ledgers you own. A custom subdomain is a URL defined by the user with '.daml.app' appended to the URL. Therefore reserving and assigning a subdomain of 'myapp' to your ledger gives your application a URL of 'myapp.daml.app'.
Custom subdomains must consist of lowercase alphanumeric characters, '-', or '.', and must start and end with an alphanumeric character. In the Ledger Settings tab, you can reserve and assign a custom subdomain directly to your ledger. You can also remove or re-assign the custom subdomain at any time.
You can manage all your custom subdomains in the Your Subdomains table on the Subdomains tab of Account Settings.
Here, custom subdomains are listed as either reserved or active. When a custom subdomain has the status reserved,
it means that you've claimed the domain but it has yet to be assigned to a ledger. When a custom subdomain has the
status active, it means that you've claimed the domain and it has been assigned to a ledger.
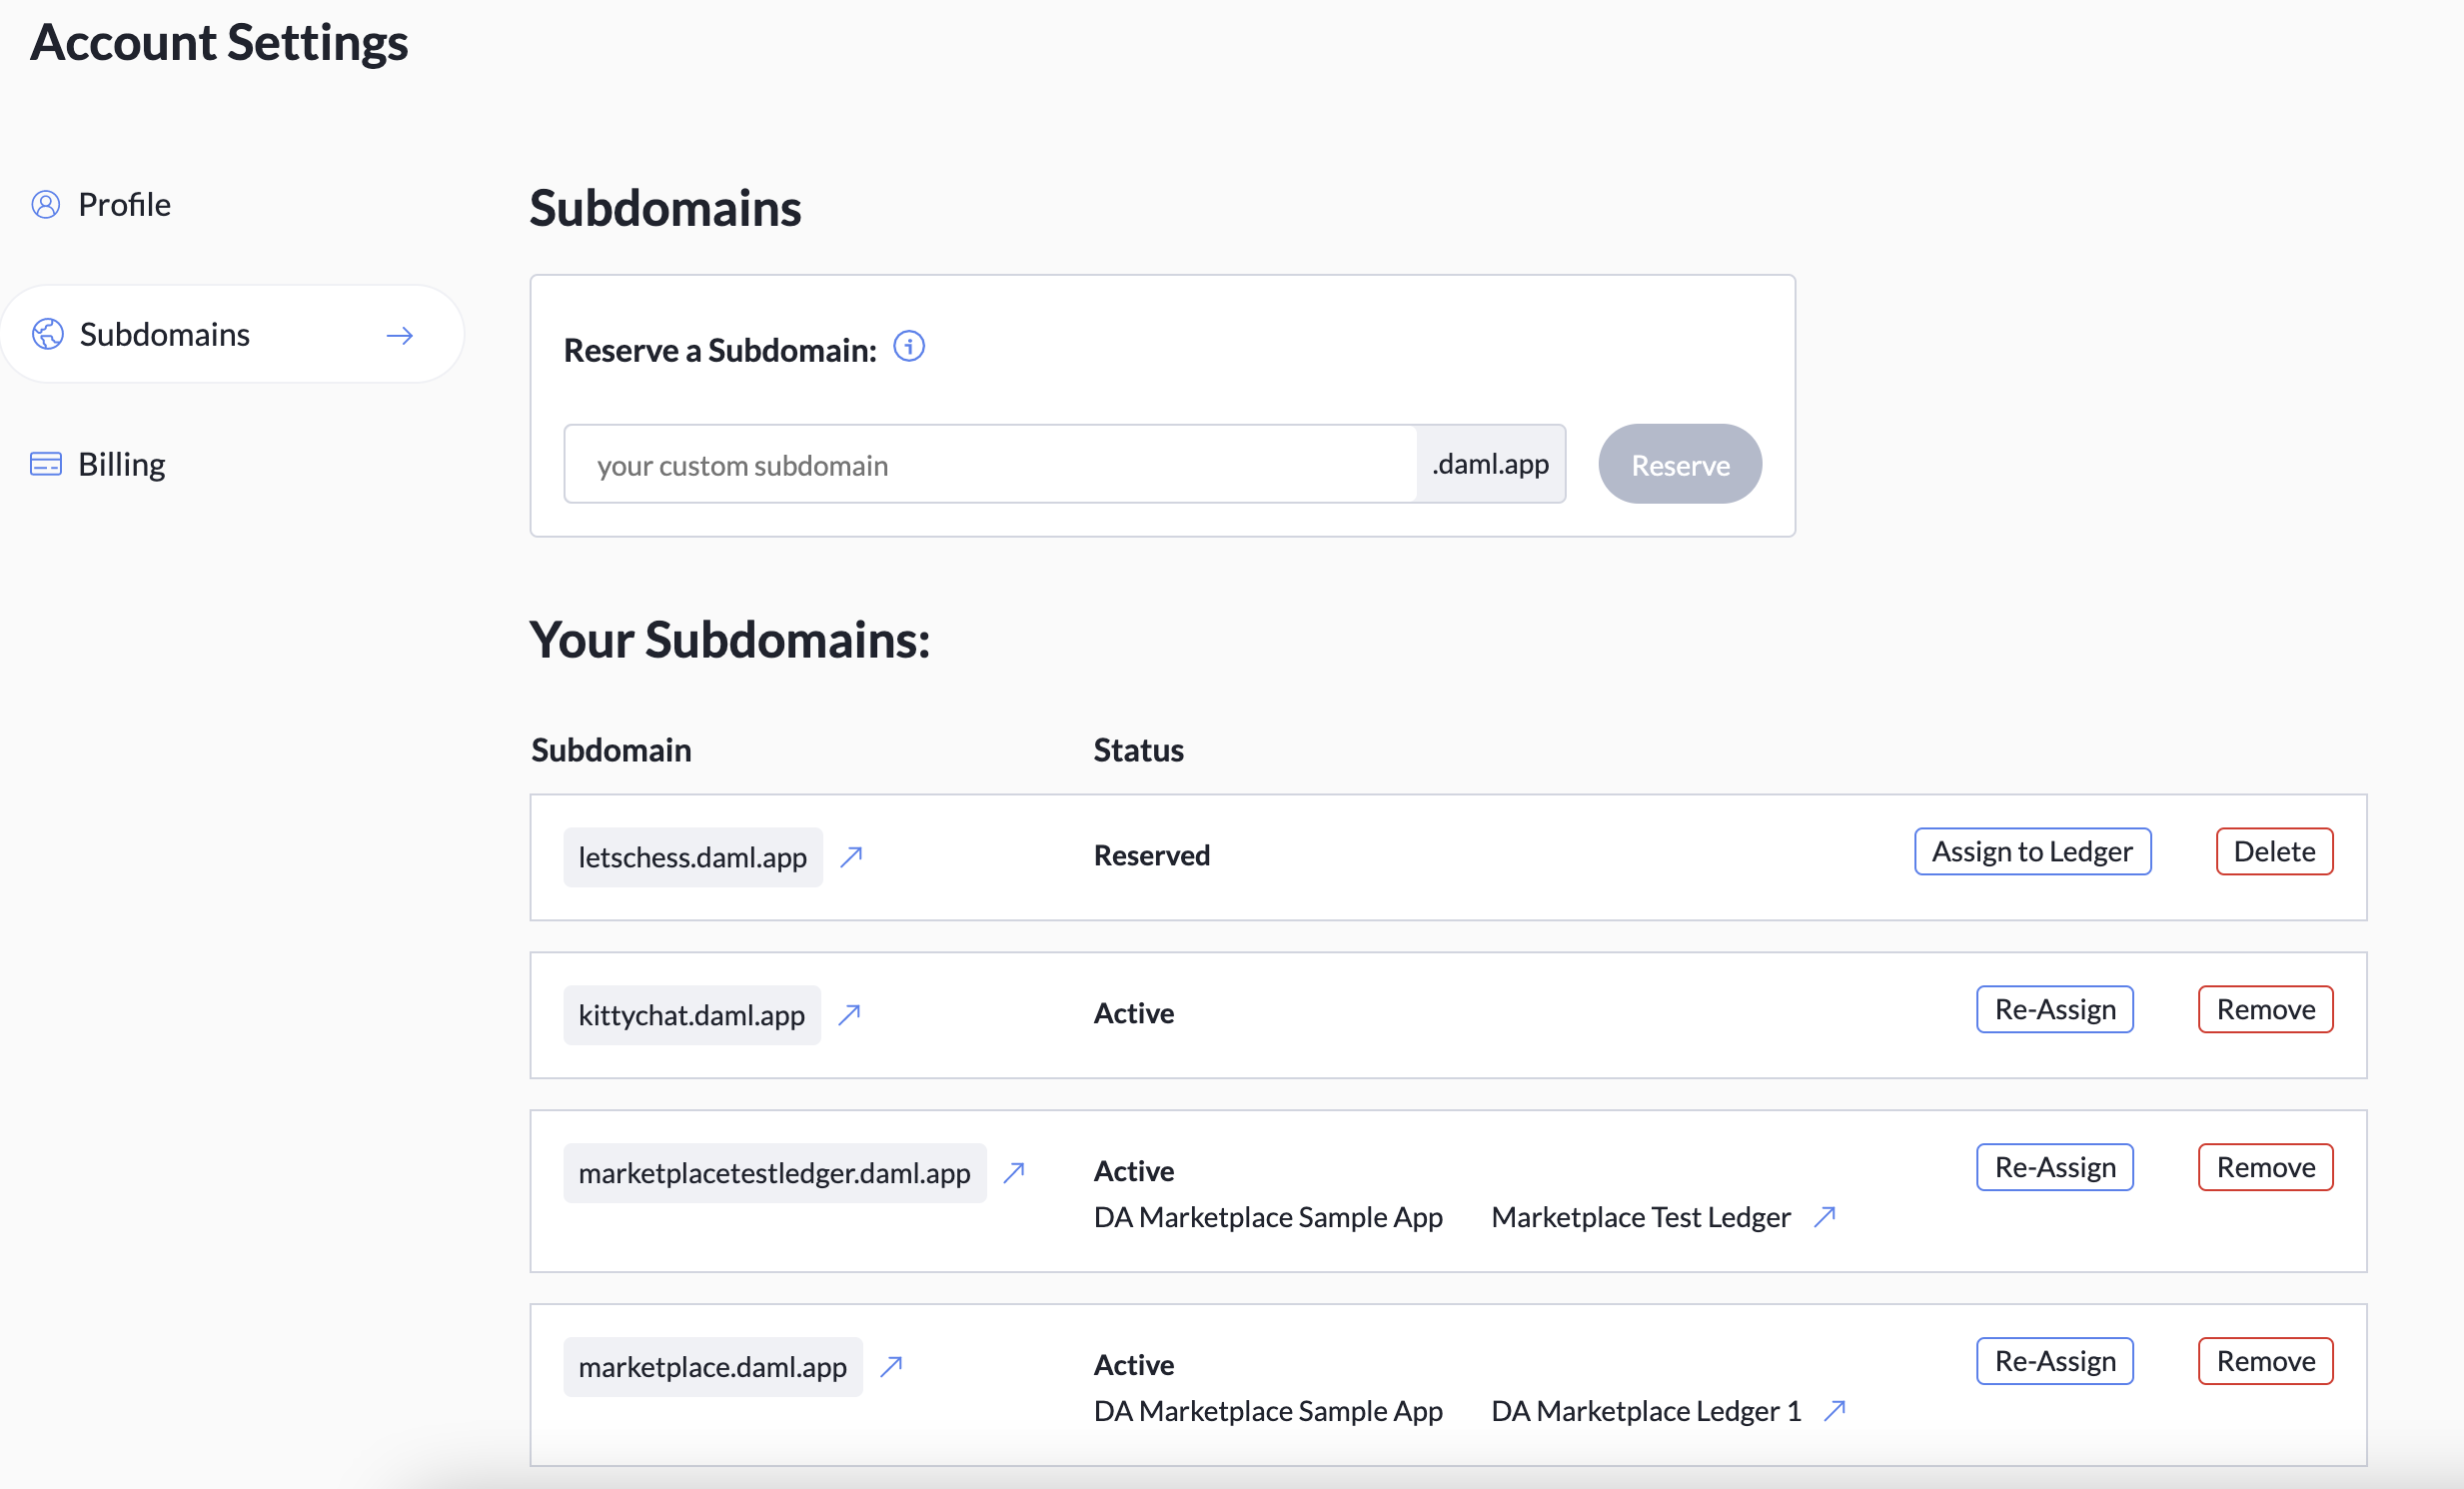
In the Subdomains tab of Account Settings, you can reserve subdomains, assign them to ledgers, remove them from ledgers, re-assign them to different ledgers, and delete them from your account.
Sample Apps
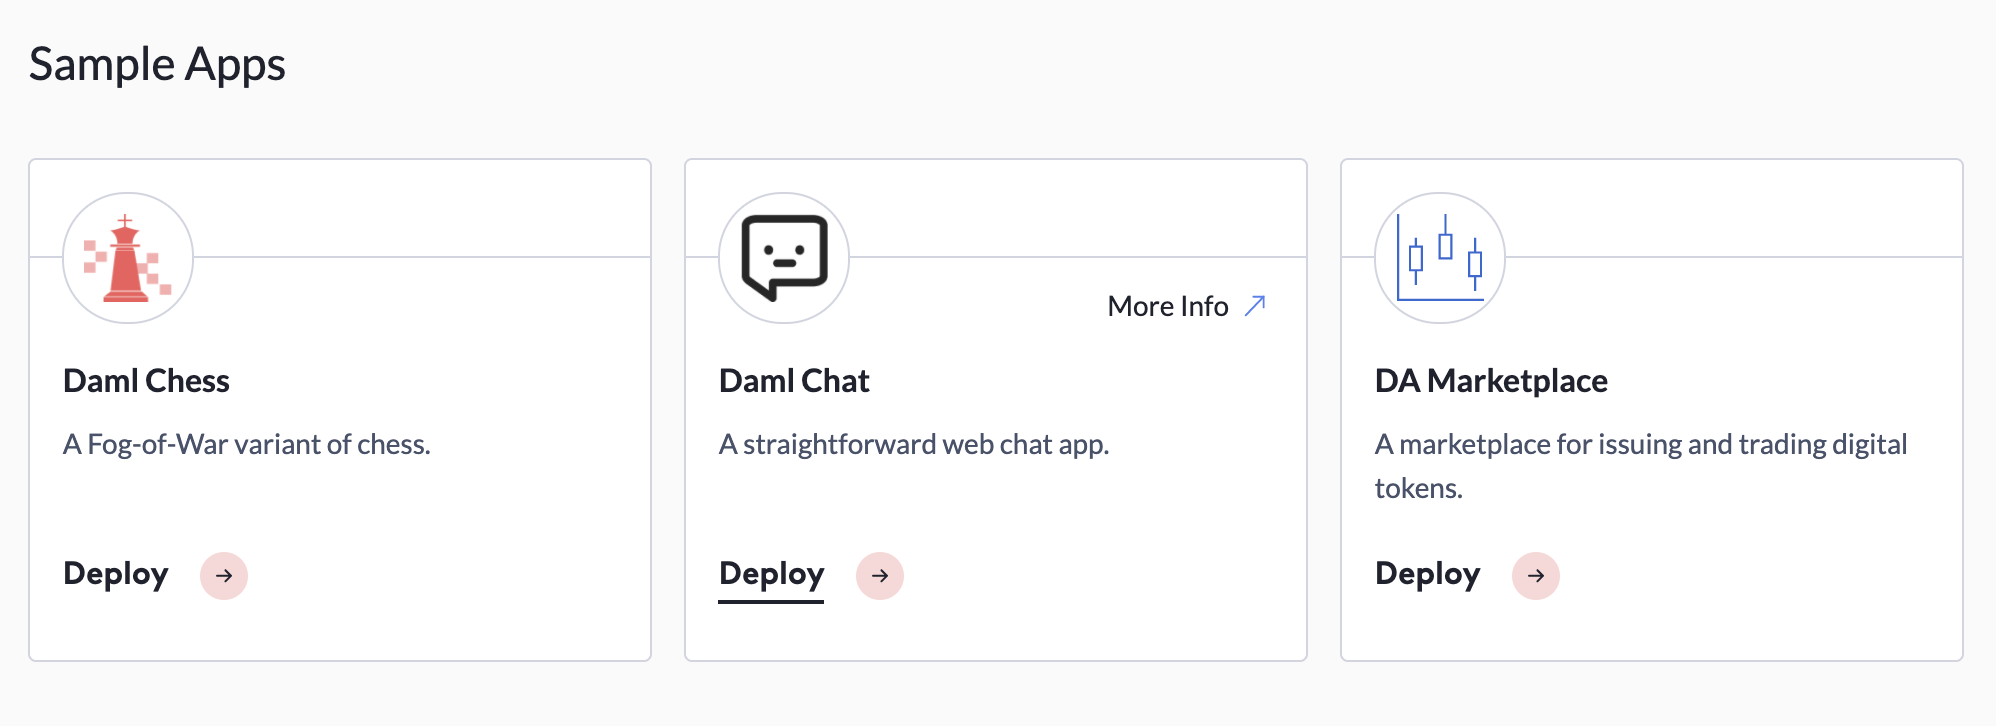
When you first sign in to the Daml Hub console, a selection of sample apps appears at the bottom of the workspace. These are simple Daml Hub applications built by Daml Hub engineers. Deploy them to a ledger to get started with a fully implemented example.
- In the Sample Apps section at the bottom of the workspace, pick an app to deploy, then click Deploy.
- Click the ledger you just deployed to.

- Go to the Deployments tab. The unconfigured deployment appears under Action Needed. Click Deploy Instance. It takes about two minutes to deploy.
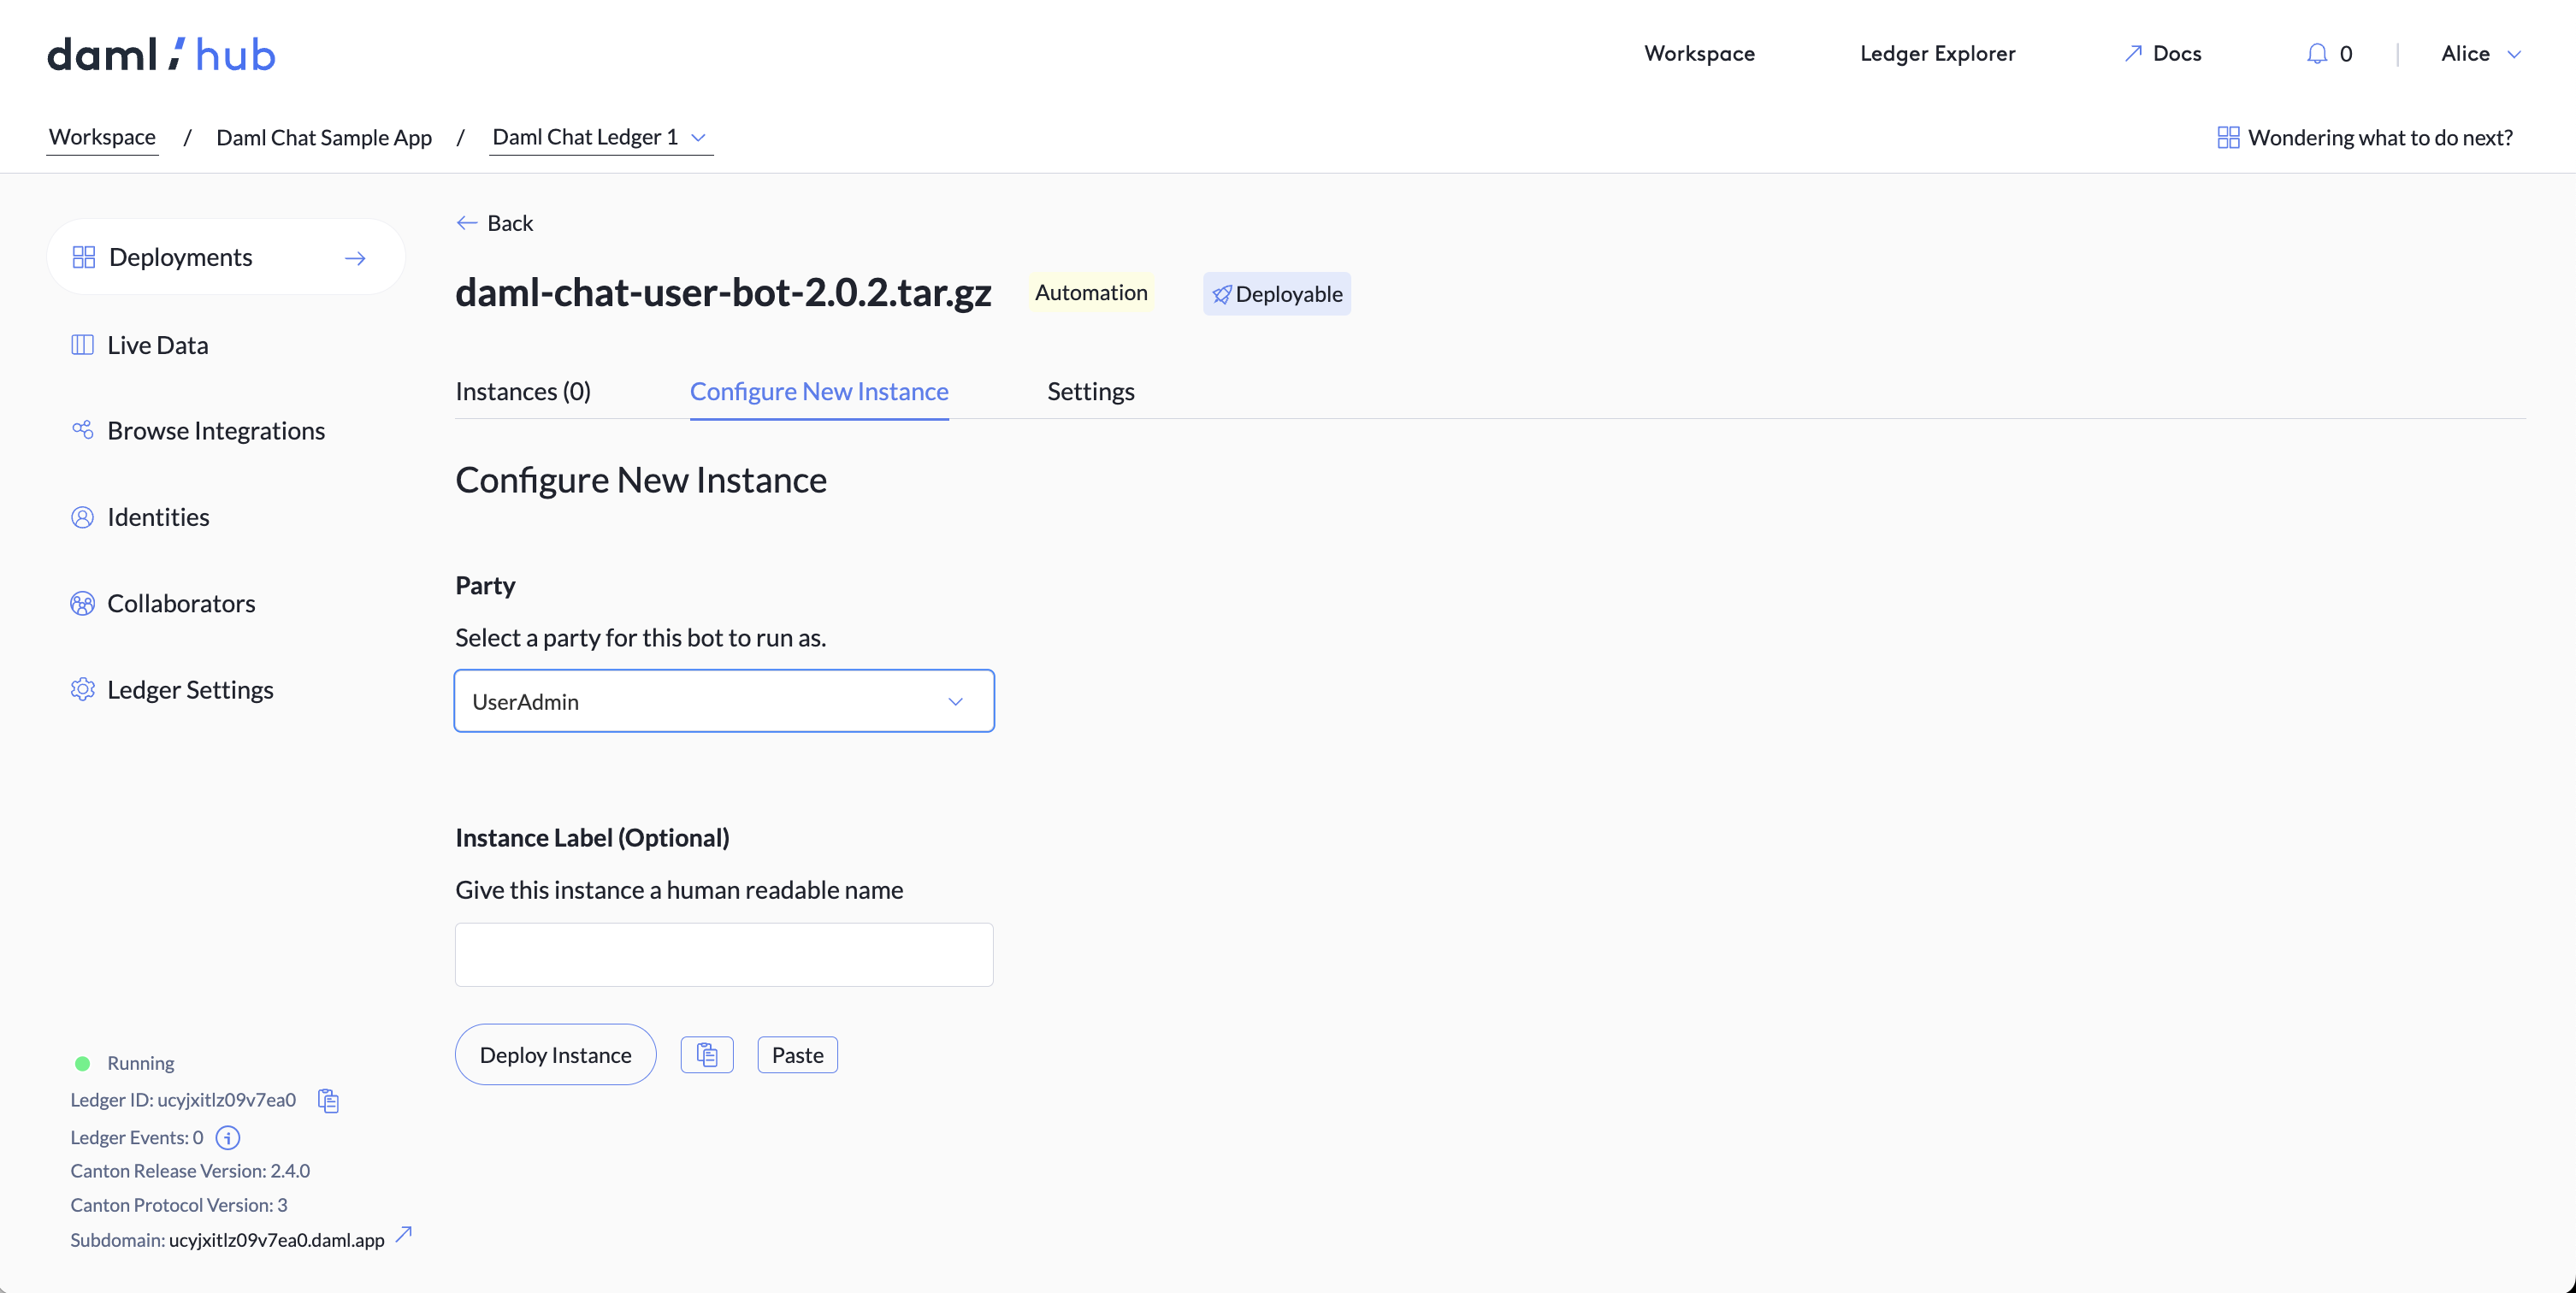
- Click on each automation row and, within it, click "Configure New Instance". Configure an instance of each automation as the UserAdmin party. You may view the status of these instances in that deployment's instance table.
- You're live!
Back on the Deployments tab of your ledger, click "View Site" to navigate to a running instance of your app's UI.
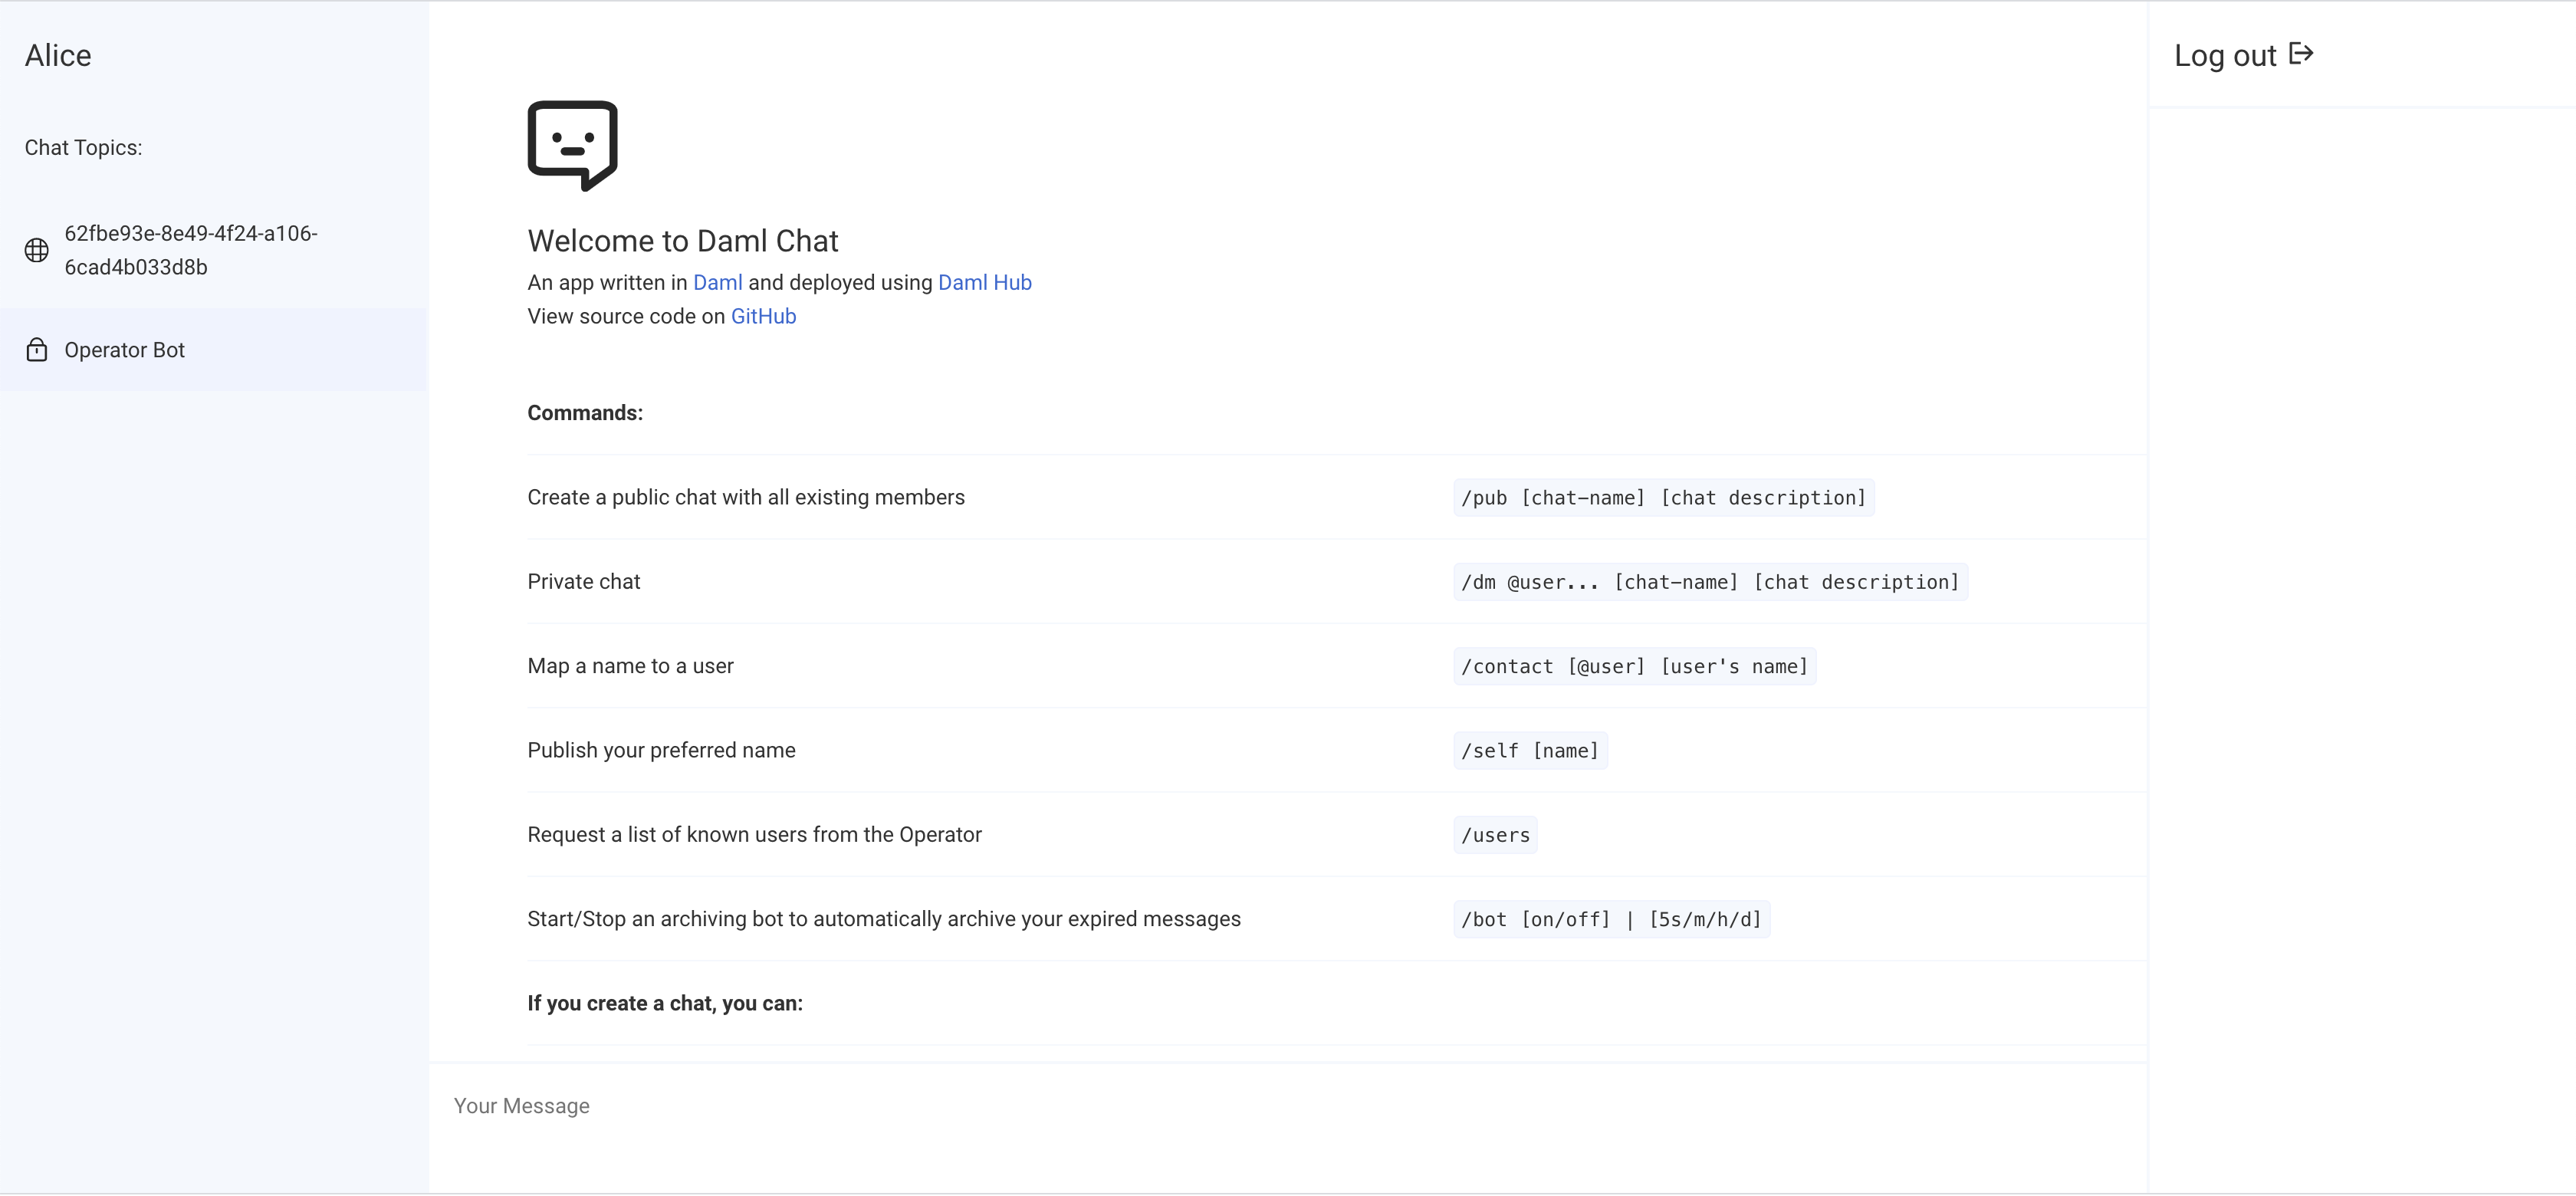
- Explore your app in the Daml Hub console
After deploying your sample app, you can inspect active contracts on the ledger and create new ones from the Live Data tab, upgrade and view your artifacts in the Deployments tab, and learn more about your ledger in Ledger Settings.
If you want to modify a sample app according to your needs, you can find the source code on: