Develop Apps On Daml Hub
Daml Models
Daml templates define the data model and the functional features of your application. For more information on Daml and Daml modeling, see An Introduction to Daml.
Automation
Most applications powered by Daml Hub combine Daml templates and automation. You can write automated services in Python or by using Daml Triggers.
Daml Triggers
Daml Triggers allow you to write your app's automated processes in Daml. To deploy a Daml Trigger to Daml Hub, have all
of the Daml templates compiled into one model .dar. Have the separate trigger project import this model in
the dependencies of daml.yaml.
sdk-version: X.X.X
name: copy-trigger
source: daml
parties:
  - Alice
  - Bob
version: 0.0.1
# trigger-dependencies-begin
dependencies:
  - daml-prim
  - daml-stdlib
  - daml-trigger
  - copy-trigger-model-0.0.1.dar
# trigger-dependencies-end
Execute daml build on the trigger project, then upload both the model .dar and the trigger build separately to your
Daml Hub ledger.
For more information on Daml Triggers see Running a Daml Trigger.
For limits on file size for .dar see file size limit above.
Python and JVM Automations
Automations written in Python must be uploaded and deployed in the form of .tar, .tgz, or .tar.gz files. JVM
automations must be .jar files.
JVM automations are only supported for the Scratchpad service and the Participant service.
You can read more about how to write and test a java automation or python automation.
For limits on file size for .tar, .tgz, and .tar.gz, see file size limit above.
Manage Participant-Synchronizer Connections
Manage Connections as a Participant Owner
Note: once you connect a given participant to a synchronizer, you can disconnect from and reconnect to that synchronizer, but you cannot connect to another synchronizer. To connect to a different synchronizer you must create a new participant.
To connect a participant to a synchronizer you do not own and have not previously connected to (including synchronizers not hosted on Daml Hub):
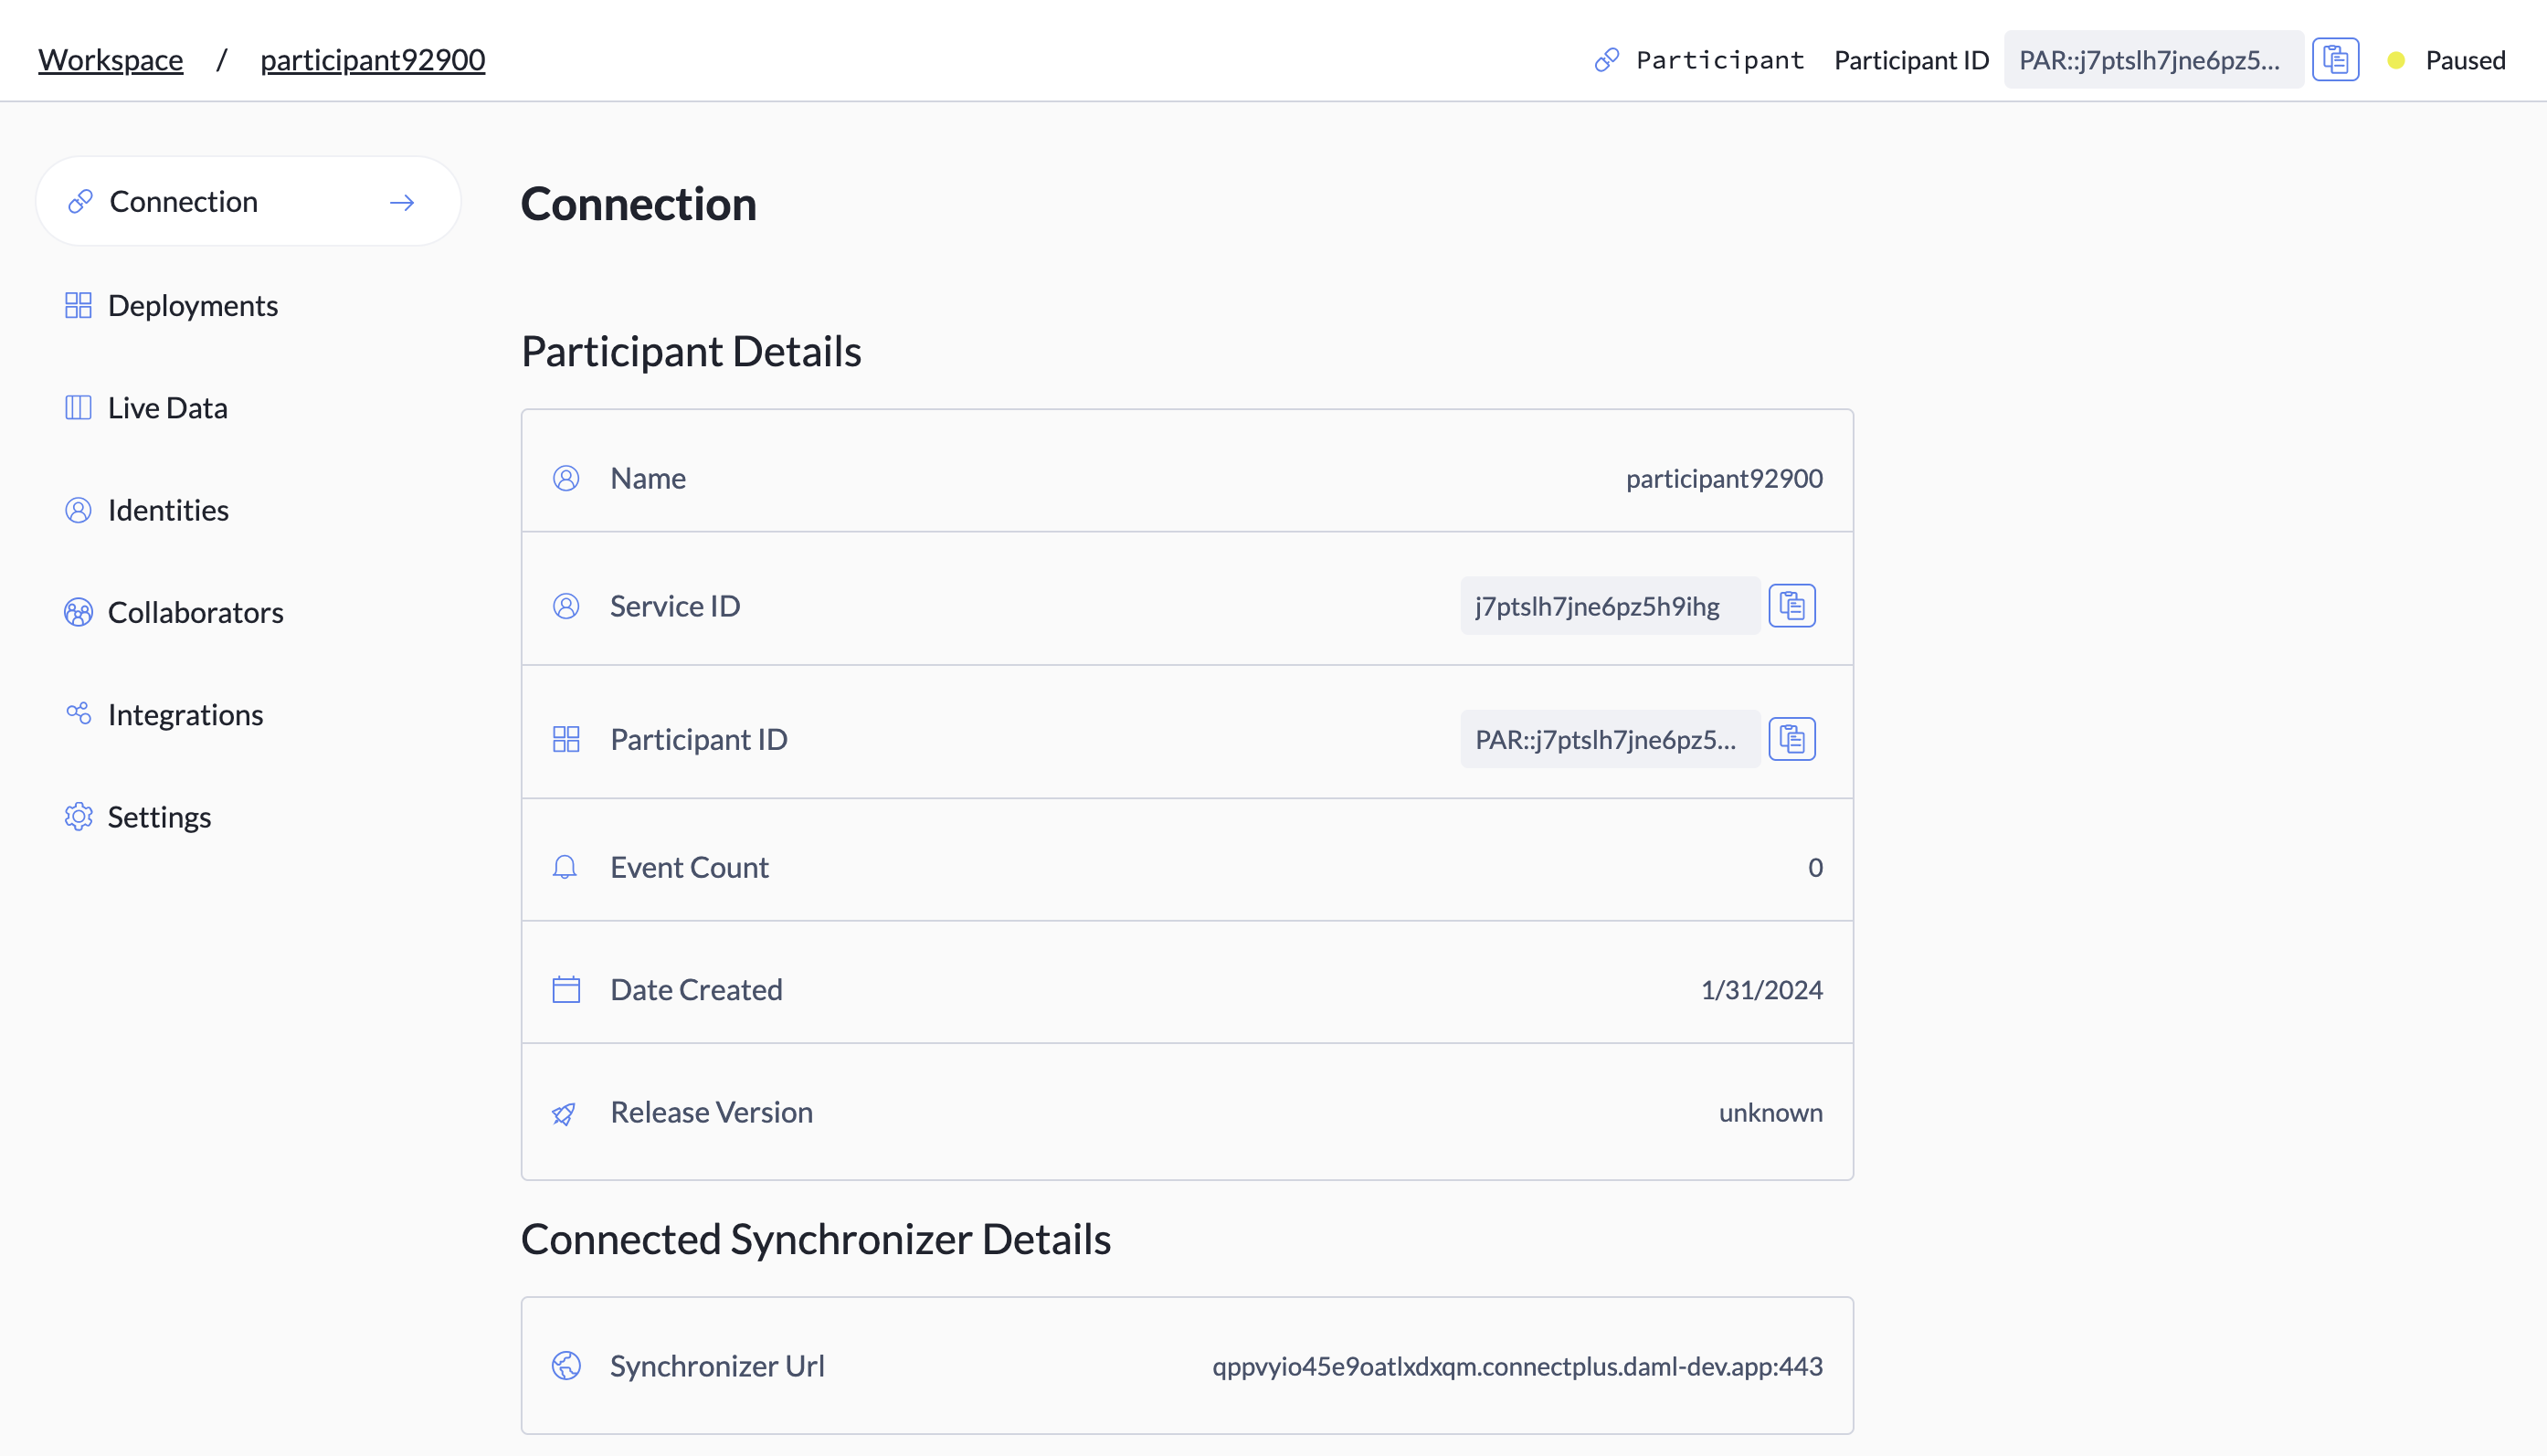
- Copy the participant ID for the participant you want to connect. You can find this at the top right of the Workspace when the participant is selected.
- Send that ID to the owner of the synchronizer, and ask for the synchronizer URL.
- Once the owner has added you to their allow list and sent back confirmation and the synchronizer URL, go to the Connection tab for the participant.
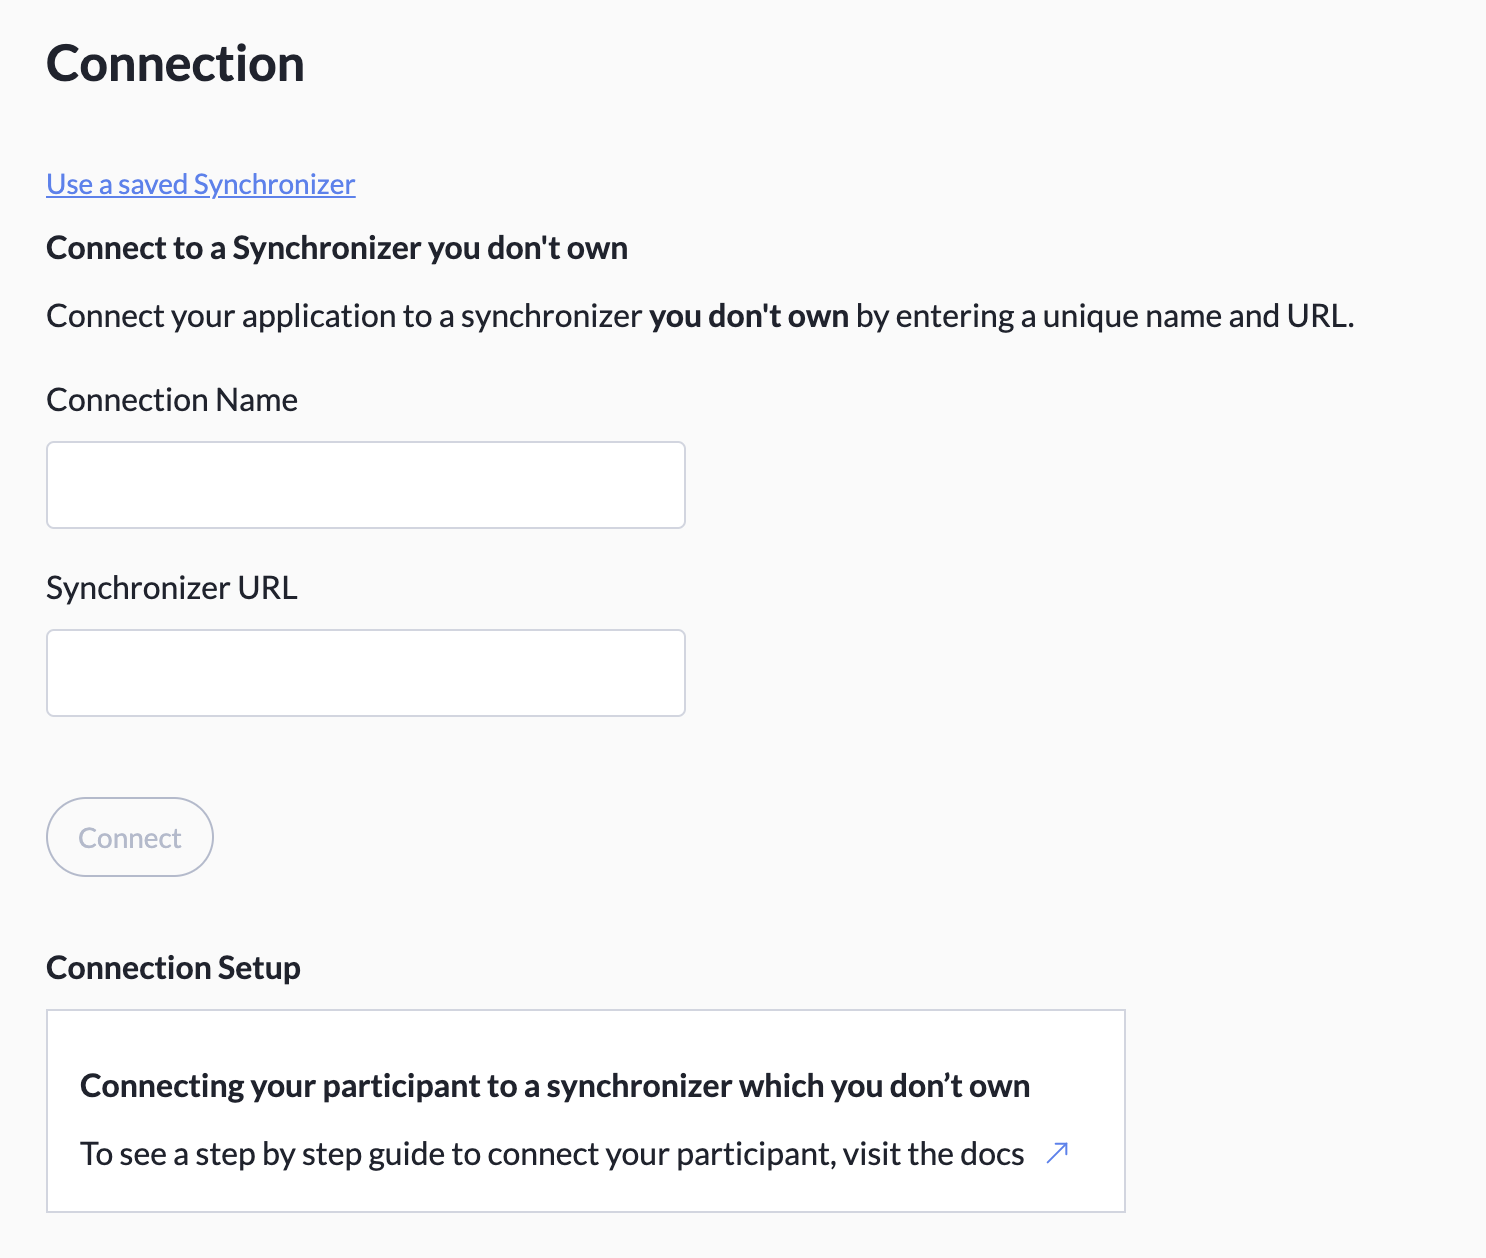
- Enter a unique identifier for the connection in the Connection Name field and the URL of the synchronizer in the Synchronizer URL field
- Click Connect.
Once a connection is established, participant and connected synchronizer details appear in this tab. The synchronizer is added to your saved synchronizer list so you can use it for future connections.
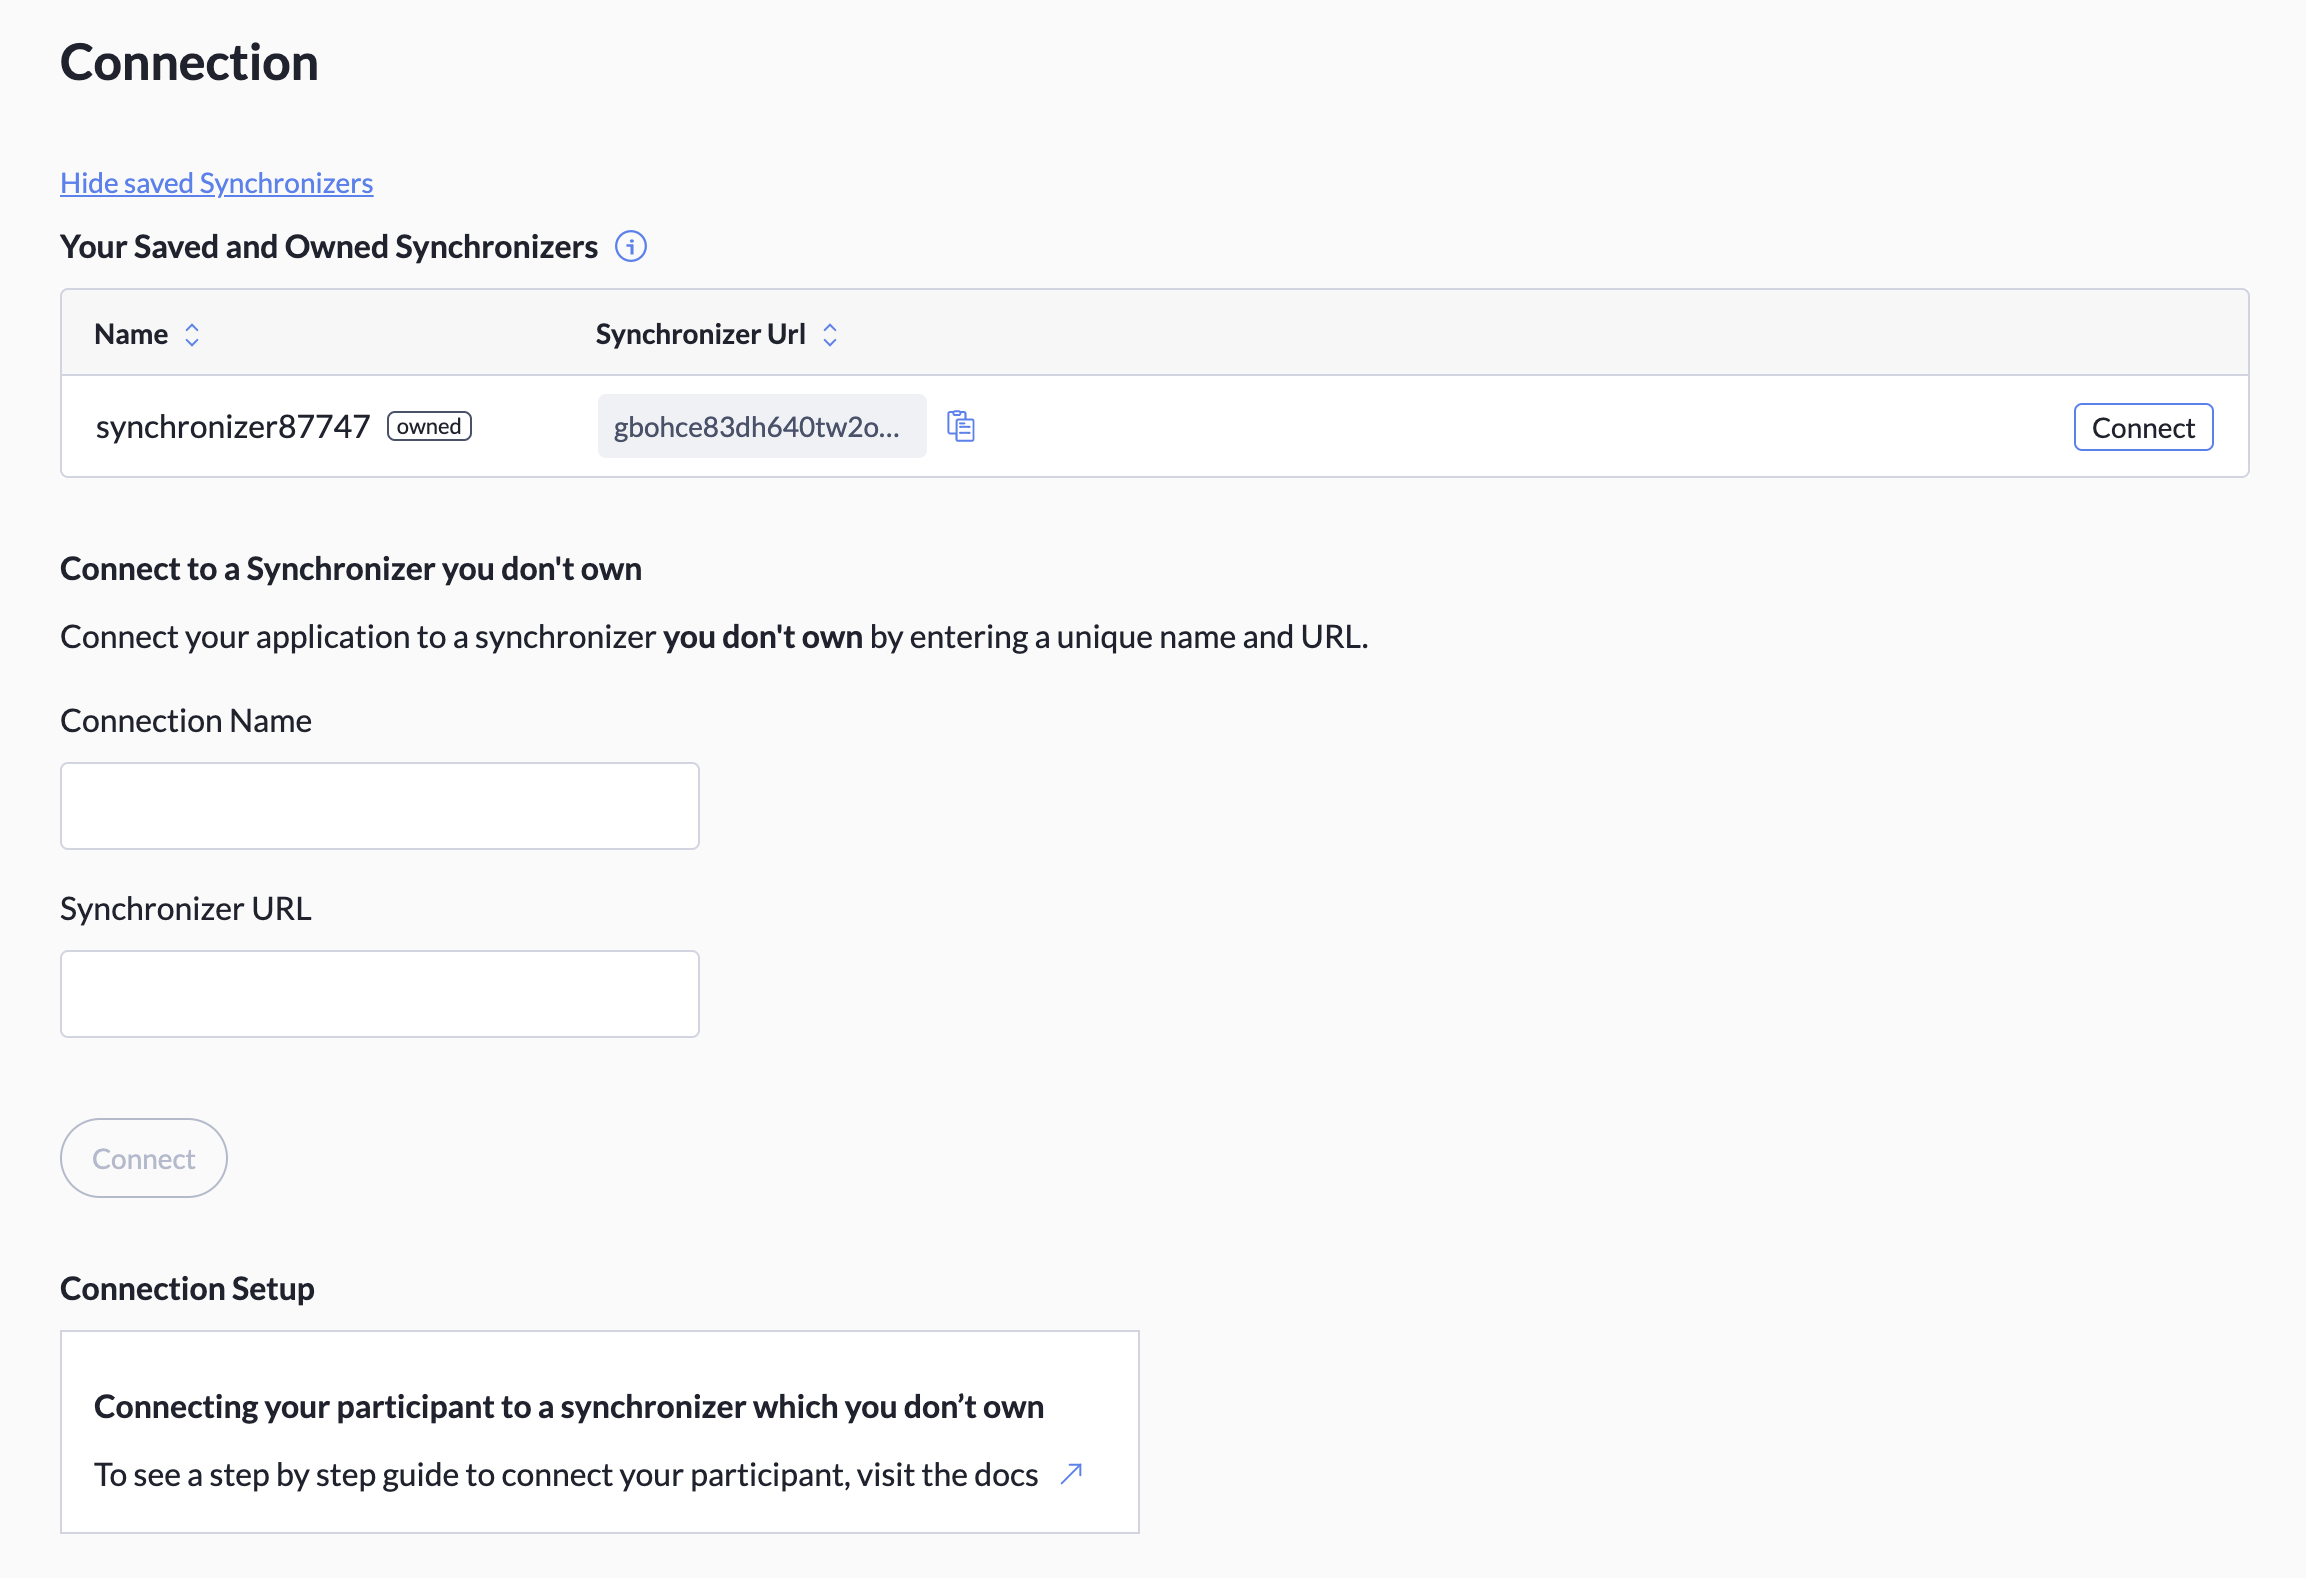
To connect your participant to a synchronizer you own or have previously connected to:
- Select your participant and go to the Connection tab.
- Click Use a saved Synchronizer below the Synchronizer URL field. This reveals a table listing your owned and previously saved synchronizers with their IDs and URLs.
- Select a synchronizer and click Connect in that row of the table.
If you own the synchronizer, your participant's details are automatically added to the synchronizer's allow list and now appear in the same row as the synchronizer in the workspace view. It may take a few minutes for the participant status to change to Connected.
To temporarily disconnect your participant from the synchronizer, navigate to the Settings tab for that participant and click Pause. Pausing may take up to several seconds.
To reconnect a paused participation to the synchronizer, click Resume.
To permanently disconnect and delete your participant, navigate to the Settings tab for that participant and click Delete. **Use caution - this action also deletes all artifacts associated with the participant, and cannot be undone **.
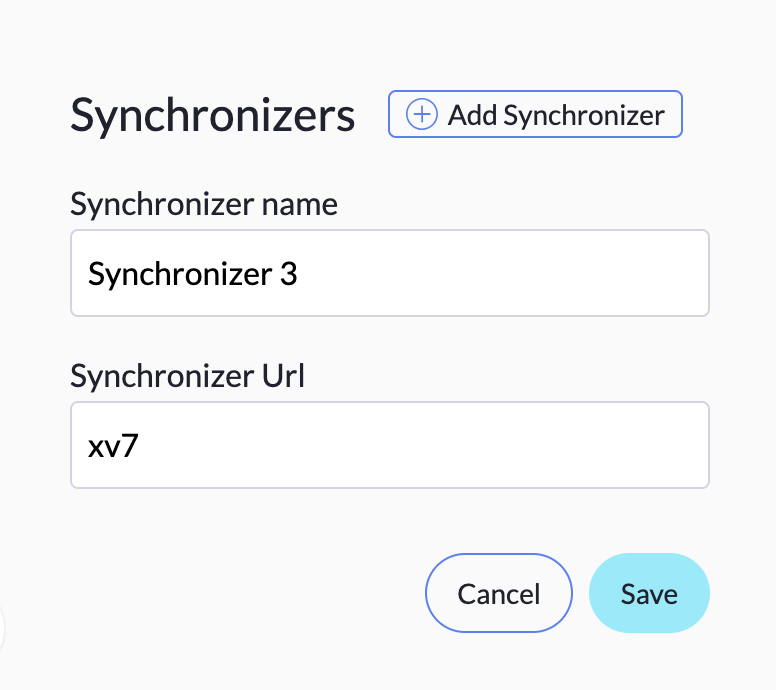
To add to the saved synchronizer list:
- Navigate to your Account Settings and go to the Saved Synchronizers tab in the left nav bar.
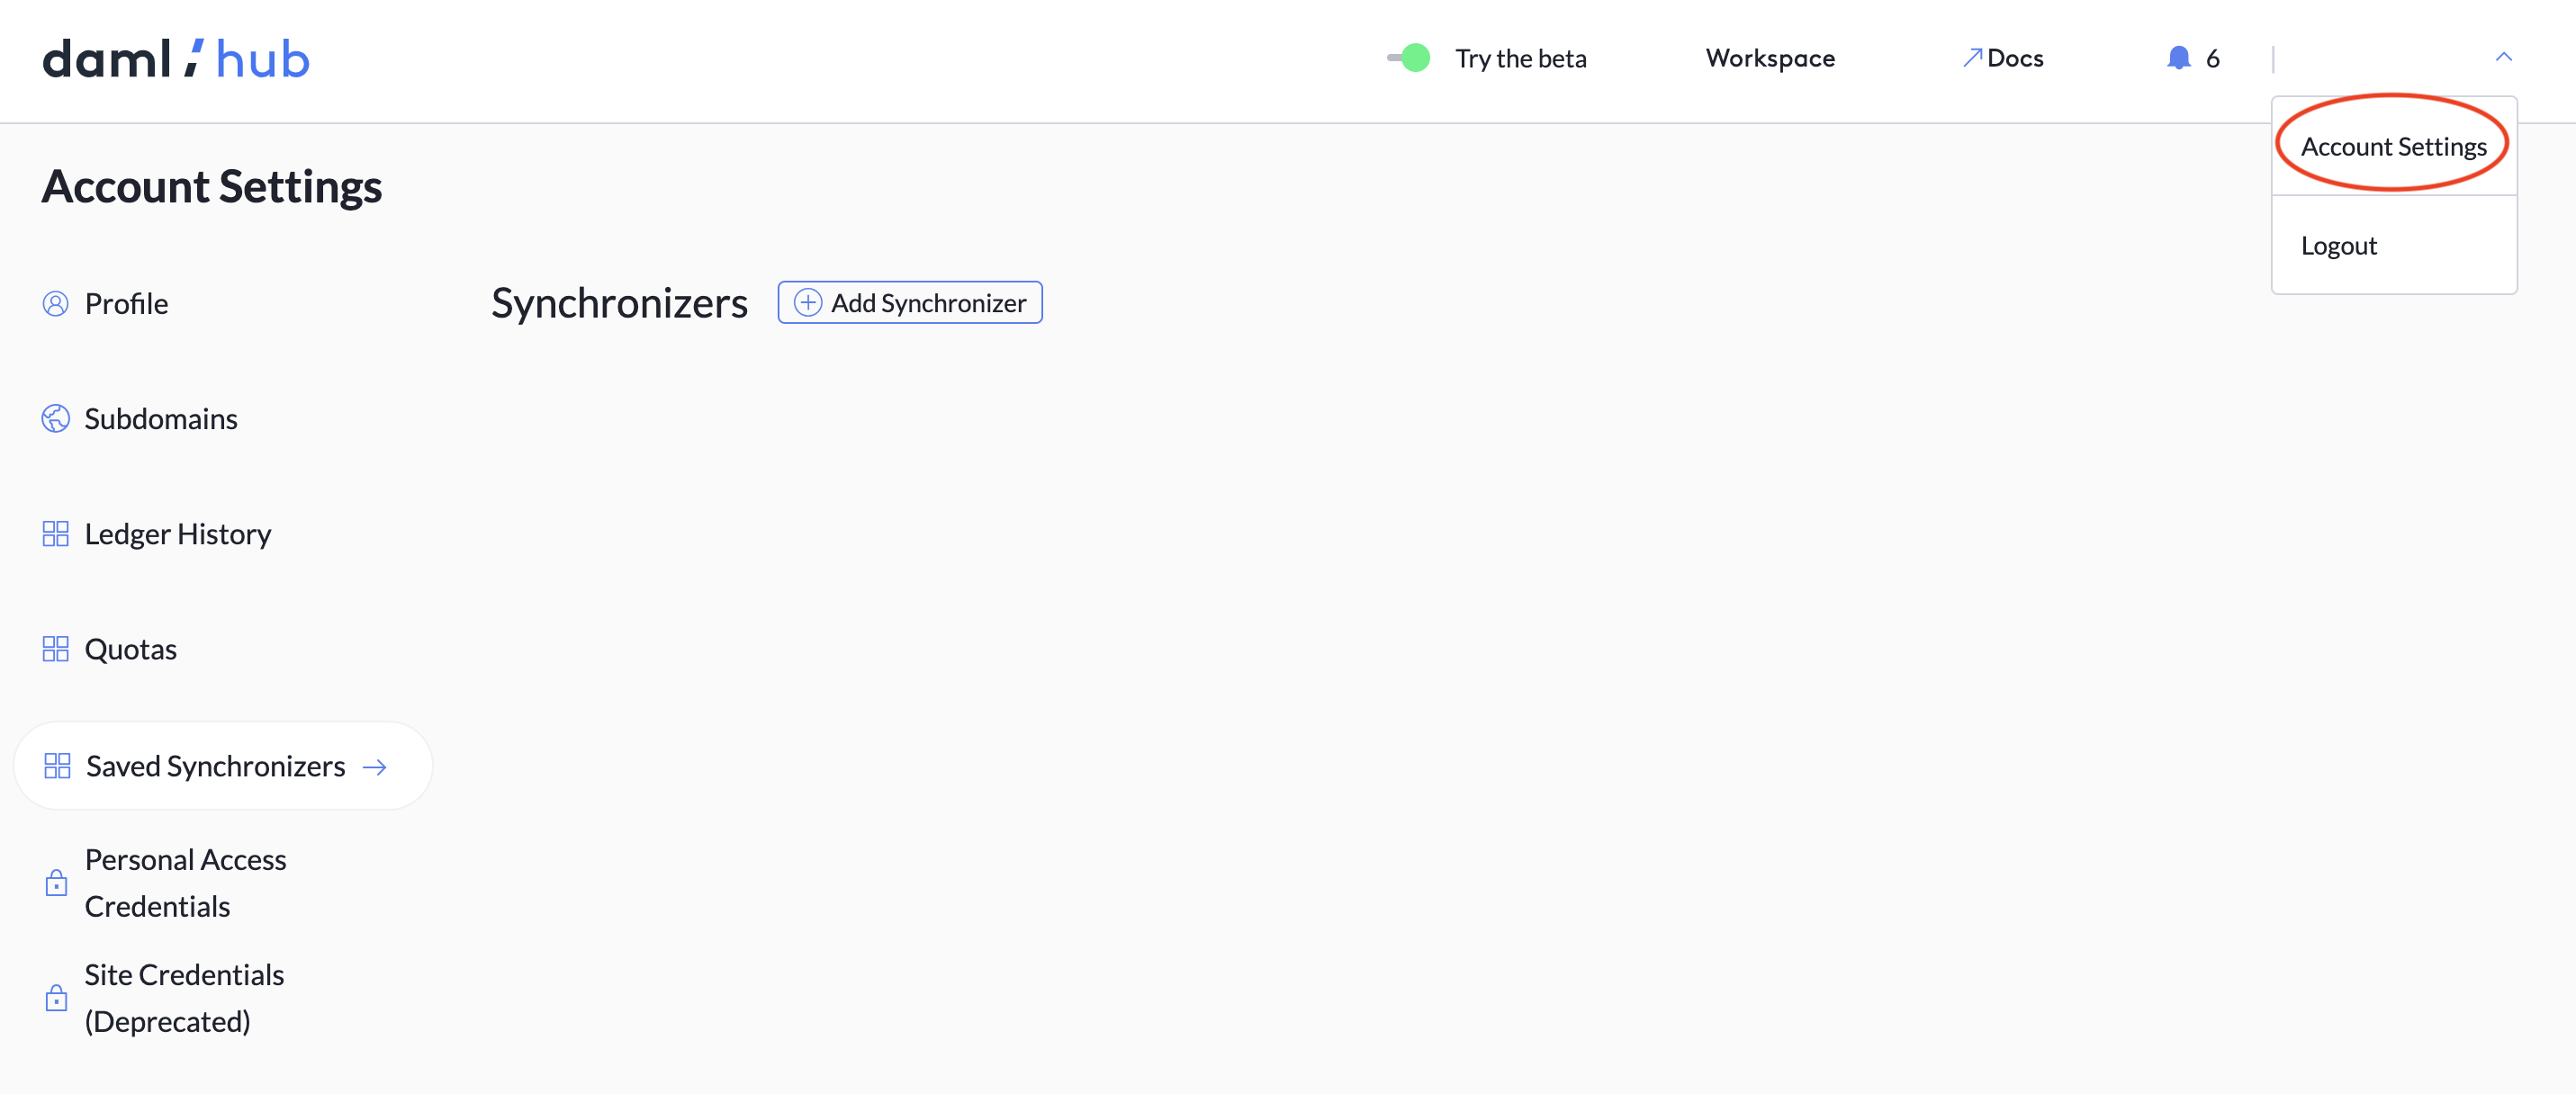
- Click Add Synchronizer.
- Enter the synchronizer name in the Synchronizer Name field and the URL of the synchronizer in the Synchronizer Url field.
- Click Save.
Manage connections as a synchronizer owner
To receive a connection from an individual participant (hosted on or off of Daml Hub):
- Obtain the participant ID from the participant owner.
- Select your synchronizer and go to the Overview tab in the left nav bar.
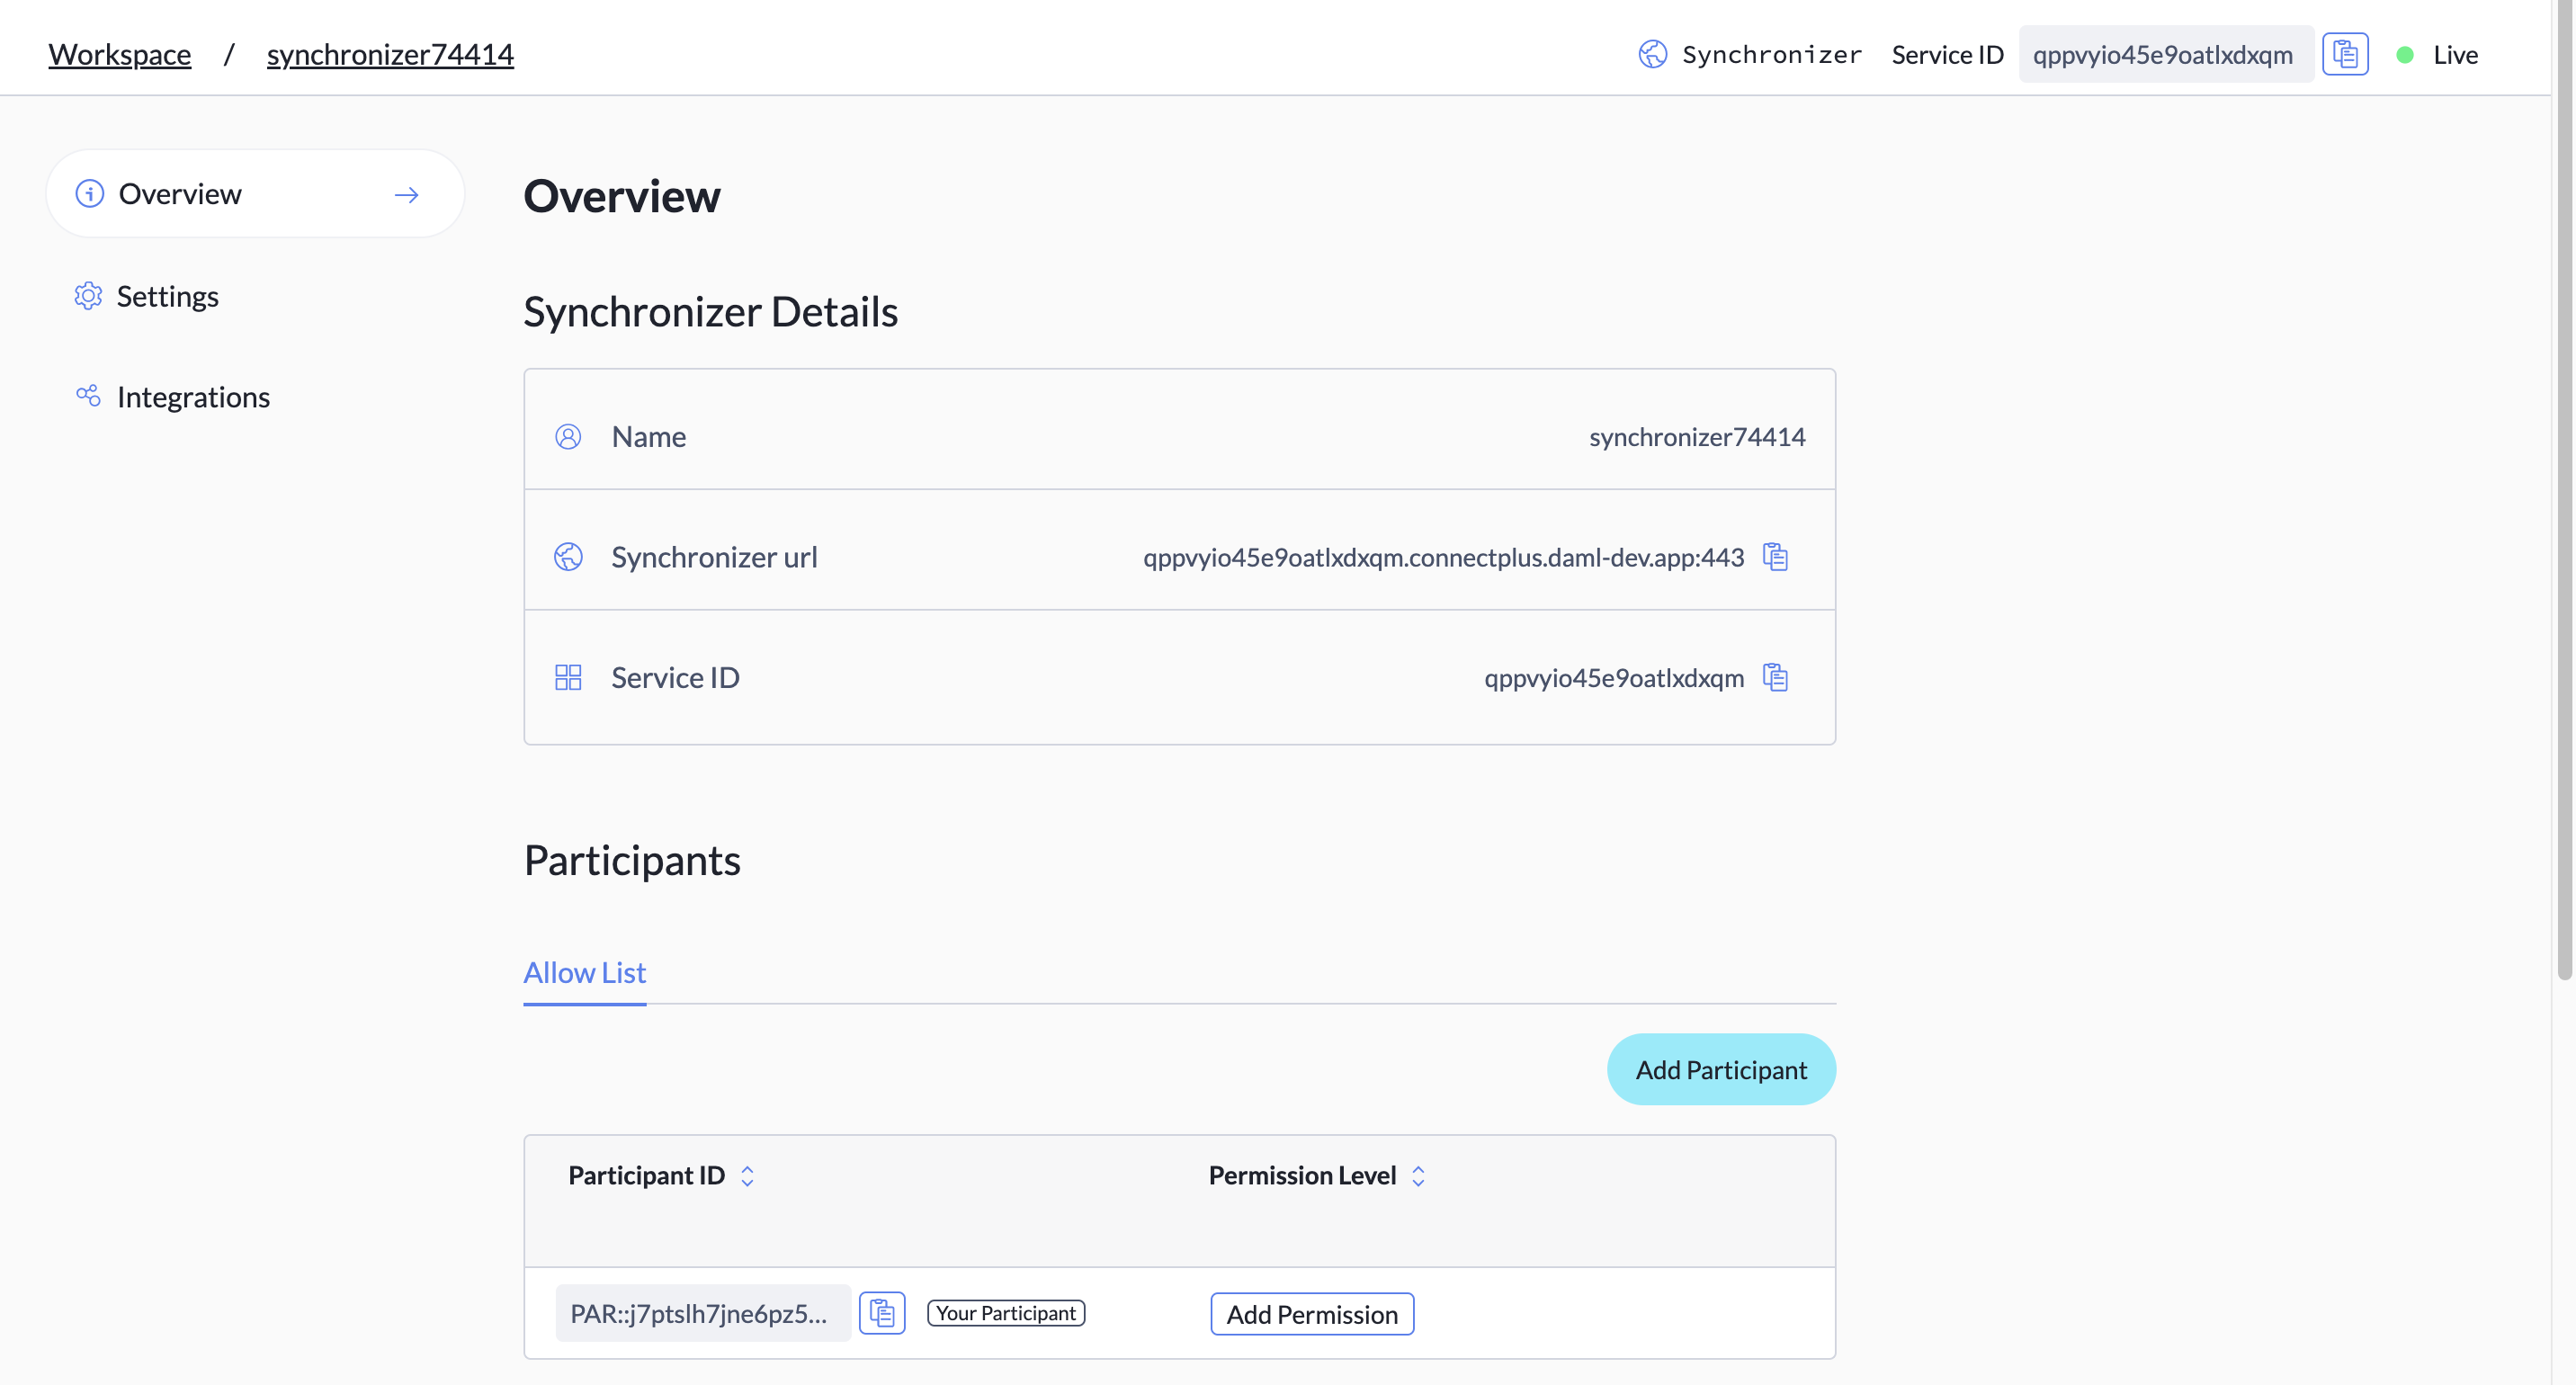
- Click Add Participant in the Participants/Allow List section. This takes you to the Add Participant screen.
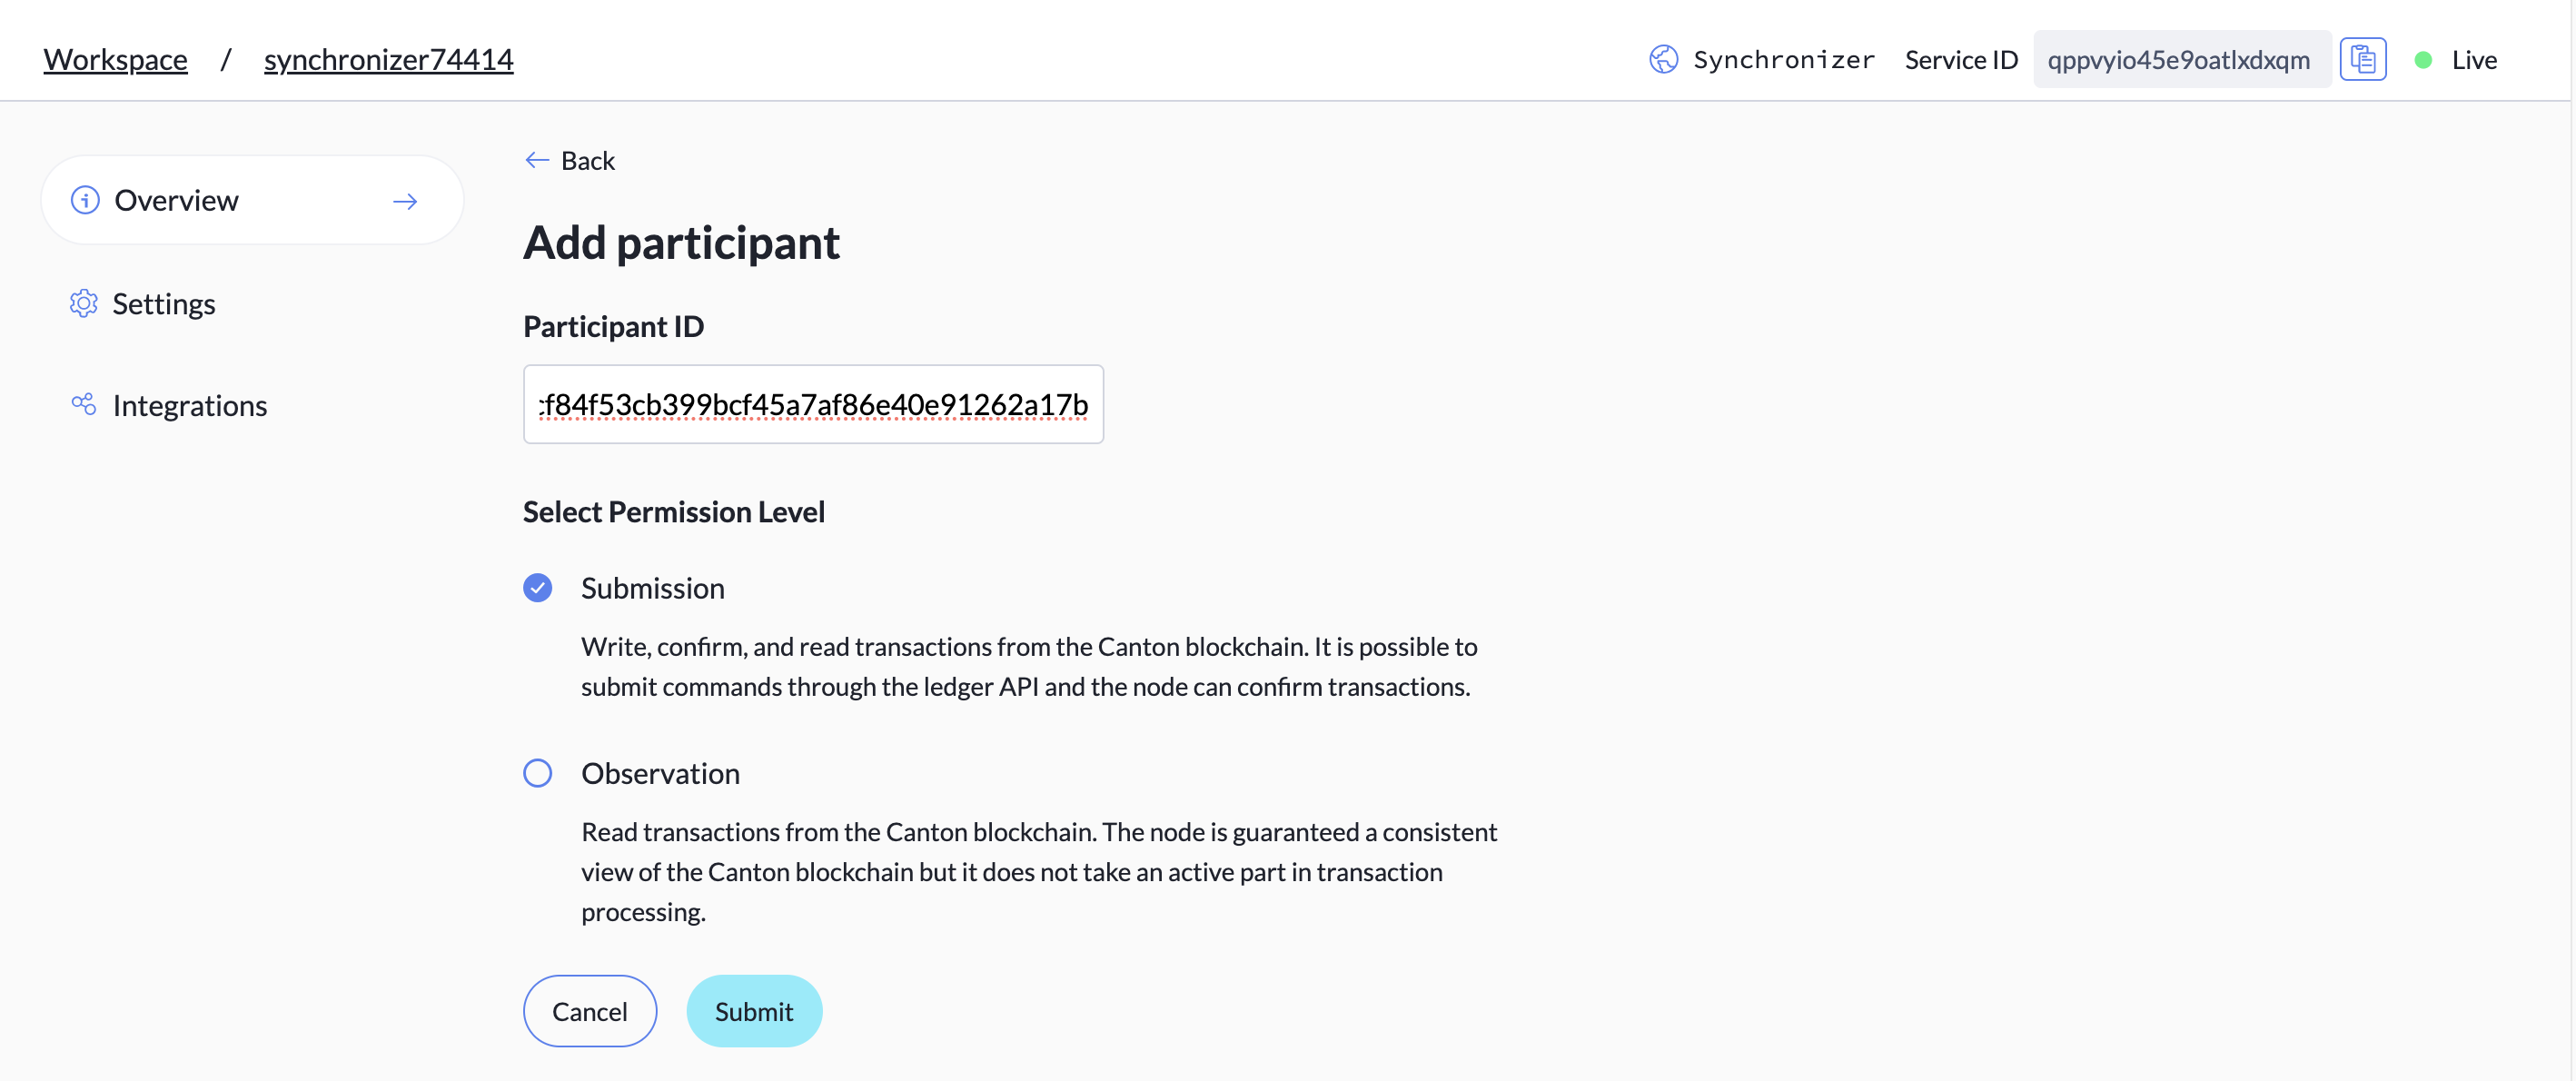
- Enter the participant ID and select a permission level.
- Click Submit.
- Inform the participant owner that they have been added to the allow list and provide them with the synchronizer name and URL so that they can make the connection. You can find the synchronizer name and URL in the Synchronizer Details table on the Overview tab.
You can also make your synchronizer open access, which allows anyone with the synchronizer URL to connect without being added to the allow list individually. An open access synchronizer accepts any new participant and any topology transaction. Use caution - once this option has been enabled, it cannot be turned off.
To make your synchronizer open access:
- Select your synchronizer and go to the Settings tab in the left nav bar.
- Click Enable in the Allow Open Access section.

To change permissions for a connected participant, select your synchronizer and go to the Overview tab in the left nav bar. Use the Permission Level drop-down in the Allow List to select a permission level. Available permission levels are Submission, Observation, or Disabled.
- Submission means that the participant can read, write, and confirm transactions, and submit commands through the ledger API
- Observation means that the participant can read transactions only.
- Disabled means that the participant cannot read transactions or affect transaction processing in any way.
Users vs Parties
Why a User Rather Than a Party?
Acting as a party allows you to only see contracts for that particular party and, depending on rights, to exercise choices on these visible contracts. Creating a user with rights to multiple parties is useful when you want to read or act as multiple parties without repeatedly switching party views.
Party vs. User Examples
The main reason to choose a user rather than a party is for ease and continuity in situations where the rights of individuals may change but a given role remains stable. The general use case is to create users for individuals and add or remove party rights from them as they change roles. To better explain this consider the example below.
User - Alice
User - Bob
User - Charlie
Party - Manager
Alice, Bob and Charlie work for the same company, ACME Corp. They have their own users on the ledger and can act as and read as their own default parties.
Alice and Bob are managers at ACME Corp. and need to be able to see contracts relevant to managers. Go to the Users Zone of the Identities tab and give Alice and Bob’s users the ability to read as the party Manager on the ledger.
Now, suppose that Alice changes roles, so she is no longer a manager and Charlie takes over as the manager. Alice no longer needs to read as the Manager party; Charlie does. From the Users zone of the Identities tab, the read-as right can be removed from Alice’s user and added to Charlie’s user. This ensures that Alice no longer sees the contracts related to managers but Bob and Charlie do.
Another way to employ users is to handle situations where a role incorporates the right to read or act as more than one individual. Here, the individual maps to the party and the user maps to the role. To see this situation in action, consider the following:
Party 1 - Alice
Party 2 - Bob
Party 3 - Bank
Create a number of contracts where Alice, Bob, and the Bank each have their own view on the ledger dependent on rights.
From the Parties zone of the Identities tab, copy the JWT for Alice. Using Alice's token, you can only see or act on contracts where Alice has readAs or actAs permission respectively. Attempting to act as Bob fails.
Now, suppose that Alice and Bob are part of the same household and joint owners of an account. To manage contracts for the entire household, you can create a user called Household which has actAs rights as both Alice and Bob.
Go to the Users zone of the Identities tab and create a new user, Household. Grant actAs Alice and actAs Bob rights to Household. Copy the JWT token for Household and try out CURL command.
You are now able to read and act on contracts for both Alice and Bob.